Introduction
Remote control (RC) cars are fun toys that allow you to drive them around from the comfort of your own home. They come in all shapes and sizes, from miniature to full-sized, so there’s something for everyone. But why buy one when you can make your own? Making your own RC car is an exciting project that allows you to customize it to fit your needs and have fun with it afterwards!
Gather the Supplies
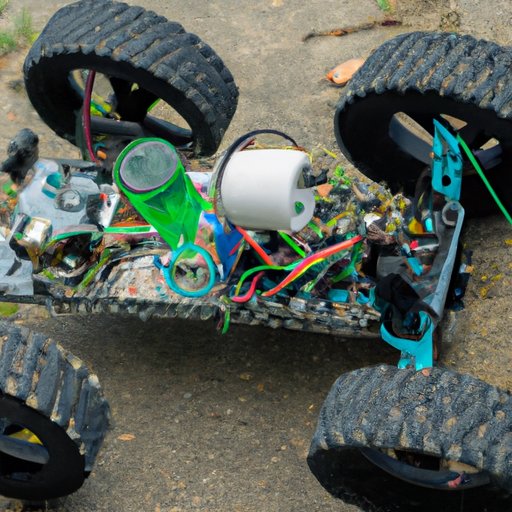
Before you get started, you’ll need to gather the necessary supplies. You’ll need a frame or chassis, two DC motors, two wheels and axles, a battery pack, a receiver, a transmitter, and some wire. You can find these items online or at your local hobby shop. The frame and motors will be the most important components, so make sure to get ones that are strong and sturdy.

Assemble the Frame and Motors
Once you have all the supplies, you can start assembling the frame and motors. Start by attaching the motors to the frame using screws or bolts. Make sure they are securely mounted and double-check the connections. Once the motors are in place, attach the wheels and axles to the frame.
Attach the Wheels and Axles
The next step is to attach the wheels and axles to the frame. For this, you’ll need to use a drill and screws. Start by drilling holes in the frame where the axles will go. Then, insert the axles into the frame and secure them with screws. Finally, attach the wheels to the axles and make sure they are securely fastened.
Install the Electronics
Now that the frame and motors are in place, it’s time to install the electronics. This includes the battery pack, receiver, and transmitter. Start by attaching the battery pack to the frame and connecting it to the motors. Then, attach the receiver to the frame and connect it to the battery pack. Finally, attach the transmitter to the frame and connect it to the receiver.

Test the Car and Make Adjustments
Once the electronics are installed, it’s time to test the car. Turn on the transmitter and test the car’s movements. If everything is working correctly, you can start making adjustments as needed. This includes adjusting the steering, throttle, and brakes. Make sure to take your time and test the car in different conditions before making any major changes.

Have Fun with Your New Remote Control Car
Now that your car is ready to go, it’s time to have some fun with it! There are many different ways to drive your car, such as racing it against other cars or performing stunts. You can even customize your car with different parts and accessories. Have fun and be creative!
Conclusion
Making your own remote control car is a fun and rewarding experience. With the right supplies and instructions, you can have your own homemade RC car in no time. Gather your supplies, assemble the frame and motors, attach the wheels and axles, install the electronics, and make adjustments as needed. Once it’s ready, have fun with your new RC car and explore all the possibilities it offers.
(Note: Is this article not meeting your expectations? Do you have knowledge or insights to share? Unlock new opportunities and expand your reach by joining our authors team. Click Registration to join us and share your expertise with our readers.)