Introduction
RC nitro cars are a great way to get into the world of remote-controlled vehicles. Building your own RC nitro car can be a fun and rewarding experience. Whether you want to race your friends or just have some fun in the backyard, a custom-built RC nitro car is sure to turn heads. In this article, we’ll explore the basics of building a RC nitro car from scratch. We’ll discuss the materials and tools needed, assembling the chassis, installing the electronics, adding the fuel tank and engine, attaching the wheels and tires, tuning and adjusting your nitro car, and finally, testing it out.

Gather the Materials and Tools Needed
Before you can begin building your RC nitro car, you’ll need to gather the necessary materials and tools. The exact list of materials and tools may vary depending on the type of car you’re building, but here’s a basic list to get you started:
- Chassis kit
- Radio control system
- Fuel tank
- Engine
- Wheels and tires
- Screwdrivers
- Hex wrenches
- Pliers
- Soldering iron
- Wire cutters
- Cable ties
- Adhesives
- Paint
When shopping for parts, it’s important to read online reviews and compare prices to make sure you’re getting the best deal. It’s also a good idea to buy extra screws, bolts, and nuts in case you lose any during the assembly process. Finally, don’t forget to pick up a few extra batteries for your radio control system.
Assemble the Chassis
Once you have all the materials and tools, it’s time to start assembling the chassis. Most RC nitro cars come with detailed instructions on how to assemble the chassis, so it’s important to follow these closely. Start by laying out all the parts and making sure you have everything you need. Then, use the screwdrivers and hex wrenches to attach the various components together. Be sure to use the right size screws and bolts for each part, as using the wrong size could cause damage or even injury.
If you encounter any problems while assembling the chassis, such as parts not fitting together properly or screws that won’t stay tight, don’t panic. Take a few deep breaths and try to figure out what went wrong. If you can’t figure it out, you may want to consult an experienced RC enthusiast for help.
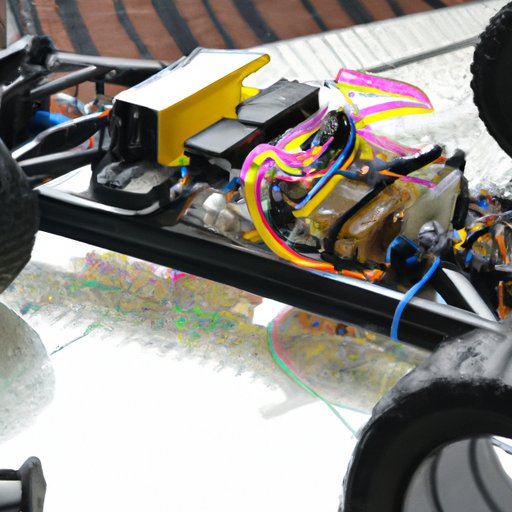
Install the Electronics
Now that the chassis is assembled, it’s time to install the electronics. This includes the radio control system, receiver, servos, and electronic speed controller (ESC). Start by connecting the radio control system to the receiver and servos. Follow the instructions included with your radio control system for specific instructions on how to do this. Once the radio control system is connected to the receiver and servos, it’s time to install the ESC. The ESC connects directly to the battery and allows you to control the speed of the car.
When installing the electronics, it’s important to take your time and double-check all your connections. Incorrectly wiring the electronics can cause serious damage to the car, so it’s better to be safe than sorry. Additionally, it’s a good idea to add a few cable ties to secure the wires and keep them neat and organized.

Add the Fuel Tank and Engine
The next step is to add the fuel tank and engine. Start by attaching the fuel tank to the chassis using the supplied screws and bolts. Make sure the fuel tank is securely mounted and there are no leaks. Then, attach the engine to the chassis using the same method. Again, make sure the engine is securely mounted and all connections are tight.
Once the fuel tank and engine are installed, it’s time to connect the fuel line. Connect one end of the fuel line to the fuel tank and the other end to the engine. Make sure the fuel line is routed correctly and there are no kinks or obstructions. Finally, fill the fuel tank with the recommended fuel mixture and check for leaks.

Attach the Wheels and Tires
Now that the fuel tank and engine are installed, it’s time to attach the wheels and tires. Start by attaching the wheels to the axles using the supplied screws and nuts. Make sure the wheels are securely mounted and there are no wobbles or loose screws. Then, attach the tires to the wheels using the same method. Again, make sure the tires are securely mounted and there are no loose screws.
Once the wheels and tires are installed, it’s time to adjust the ride height. This is done by adjusting the suspension springs. Start by loosening the suspension screws and then adjusting the springs until the desired ride height is achieved. Once the ride height is adjusted, tighten the suspension screws and make sure the wheels are still securely mounted.
Tune and Adjust Your Nitro Car
Now that the wheels and tires are installed, it’s time to tune and adjust your nitro car. Start by adjusting the idle speed and then setting the brake bias. Next, adjust the clutch engagement and throttle response. Finally, set the gear ratios and diff settings. All these adjustments should be done according to the manufacturer’s recommendations.
If you encounter any problems while tuning and adjusting your nitro car, such as the engine stalling or the car not responding correctly to the radio control system, don’t panic. Take a few deep breaths and try to figure out what went wrong. If you can’t figure it out, you may want to consult an experienced RC enthusiast for help.
Test Drive Your RC Nitro Car
Once you’ve finished tuning and adjusting your nitro car, it’s time to take it for a spin. Before you do, however, it’s important to do a quick pre-test check. Check the brakes, steering, and throttle response to make sure they’re working properly. Also, check the fuel lines and fuel tank to ensure there are no leaks. Finally, check the bodywork to make sure it’s secure and there are no loose parts.
Once the pre-test check is complete, it’s time to hit the track. Start by slowly accelerating and then gradually increasing the speed. Make sure to pay attention to how the car responds and take note of any issues. If you notice any problems, make sure to stop driving and fix them before continuing.
Conclusion
Building your own RC nitro car can be a fun and rewarding experience. With the right materials and tools, as well as a bit of patience and perseverance, you can create your very own RC nitro car from the comfort of your own home. Just remember to take your time, follow instructions carefully, and always double-check your work.
(Note: Is this article not meeting your expectations? Do you have knowledge or insights to share? Unlock new opportunities and expand your reach by joining our authors team. Click Registration to join us and share your expertise with our readers.)