Introduction
Are you looking for a fun and easy DIY project to do with your family or entertain yourself? Are you a fan of remote control cars? Look no further as we present to you a step-by-step guide on how to make a paper remote control car right in the comfort of your own home. With just a few materials and easy-to-follow instructions, you can create your own custom-designed car that you can use to play or display. This article will provide you with all the necessary information on how to create your own paper remote control car, including tips for personalizing your car, cost-effective and eco-friendly alternatives, and suggestions for involving your family in the process.
Step-by-Step Guide: How to Make a Paper Remote Control Car in 10 Easy Steps
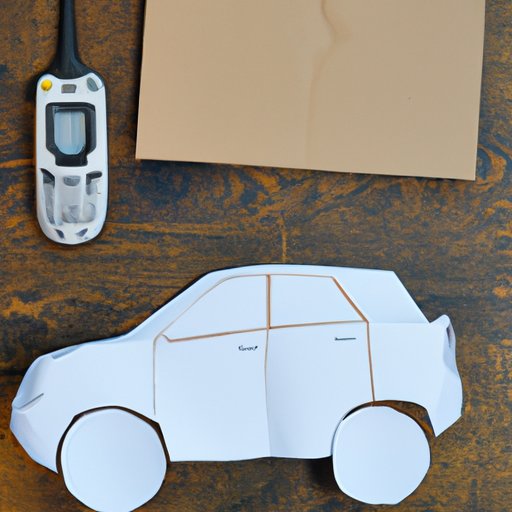
Before starting the process, ensure that you have all the required materials, including cardboard, paper, glue, tape, scissors, a ruler, and a remote control car kit. Once you have all the materials, follow the steps below:
1. Cut Out the Car Parts
Use the template from your remote control car kit or create your design on paper. Cut out all the car parts, including the car’s body, wheels, headlights, and other accessories.
2. Create the Car’s Body
Use the cardboard or paper to create the car’s body. Use the ruler to ensure that the body is the correct size. Glue or tape together the different sections of the body according to the instructions.
3. Assemble the Wheels
Use the templates provided in the kit or draw your wheels on paper. Cut out the wheels and attach them to the car body. Use glue or tape to ensure the wheels stay in place.
4. Add Decorations
Add designs, colors, and other decorations to the car’s body and wheels. You can use sharpies, stickers, or any other materials you want.
5. Create the Remote Control Pad
Construct the remote control pad from cardboard or paper. Use the template in the kit or create your design. Cut out all the remote control buttons.
6. Insert the Remote Control Board
Insert the remote control board into the remote control pad. Make sure the board is firmly attached.
7. Attach the Wires
Attach the wires connecting the remote control pad to the car’s engine. Make sure the wires are secure.
8. Install the Batteries
Install the batteries into the remote control pad and the car engine. Make sure that they are facing the right way.
9. Test the Car
Turn on the remote control pad and test the car. Ensure that the wheels turn when you press the buttons.
10. Enjoy Your New Paper RC Car!
Your paper remote control car is now ready! Take your new car for a spin or display it with pride.
DIY Paper RC Car: A Creative and Fun Family Project
Creating a paper remote control car can be a fun and engaging family project. It allows different family members to work together, bond, and share experiences. Parents can guide younger family members in the construction process while everyone can participate in decorating the car.
Suggestions for Involving Different Family Members
– Design the car body and wheels: Younger children can help in designing the colors and shapes to use in creating the car’s body, while older family members can assist in creating wheels that will fit the car’s body shape.
– Cutting and attaching parts: Children can help in cutting out and attaching parts of the car together, while parents can supervise.
– Decorating the car: This step can involve everyone, as family members can use their creativity to add stickers, draw, or color their designs on the car.
Bonding Moments, Fun Interactions, and Shared Experiences
Making a paper remote control car is a shared experience where family members can interact and bond with each other. As family members work together, they can build new connections and memories that last a lifetime. Furthermore, creating a custom-designed car adds an extra level of fun and creativity to the project.
Unleash Your Creativity: Build a Custom Paper Remote Control Car
Personalizing your paper remote control car with your creativity adds a unique aspect that makes the car one-of-a-kind. Adding decorations, changing shapes, and designs, and using different colors and materials are several ways to make your car stand out.
Examples of Customizing the Car
– Use colorful patterns: Draw or paint different patterns on the car’s body to make it more attractive.
– Add stickers: Use different stickers to create unique designs on the car.
– Change the shape of the wheels: Use different materials such as paper, plastic, or cardboard to create wheels of different shapes.
Benefits of Customizing the Car
Customizing your car promotes creativity, imagination, and self-expression. By personalizing your car, you develop your creative abilities while owning a fun and uniquely-designed toy.
Cheap and Easy: Create Your Own Paper RC Car with Common Household Items
Creating your own paper remote control car is a cost-effective way to have fun. The materials required to create a car can be found in your home or bought at an affordable price. You can use common household items such as cardboard, paper, glue, and tape to construct the car.
Affordable and Easily Accessible Materials and Tools to Use
– Cardboard: Use cardboard boxes from deliveries or packaging to create the car’s body.
– Paper: Use printer paper or any other paper available to create the wheels and remote control pad.
– Glue and tape: Use school glue or tape to hold the car parts together.
– Scissors: Use scissors to cut the car parts and wires.
– Ruler: Use the ruler to measure and ensure that the car’s parts are of the right size.
Ways to Improvise Using Household Items
You don’t have to spend money on specific materials to make a car. You can improvise and use household items such as:
– Bottle caps: Use bottle caps as tires to reduce the cost of making wheels.
– Straws: Use straws as a substitute for wires to connect the car engine to the remote control pad.
Eco-Friendly Fun: Make a Paper Remote Control Car Using Recycled Materials
Making a paper remote control car using recycled materials promotes sustainability and reduces waste. It is an eco-friendly way to have fun while also contributing to the conservation of resources.
Specific Items to Recycle and Use to Build the Car
– Old cardboard boxes: Use old boxes to create the car’s body and replace new cardboard.
– Paper rolls: Use paper rolls to create the car’s wheels, headlights, and other accessories.
– Recycled wires: Use wires from old electronics such as phones and speakers to connect the car’s engine to the remote control pad.
The Message of Sustainability and the Importance of Reducing Waste and Conserving Resources
By recycling old materials, we contribute to reducing waste and saving resources that would have been used to produce new ones. We can teach young ones and remind ourselves of the importance of taking care of our environment while still having fun.
Simple and Fun: Learn the Basics of Building a Paper RC Car in Under an Hour
Building a paper remote control car is a simple and easy process that can be completed in under an hour. In summary, the process involves cutting and sticking parts together, attaching wheels to the car’s body, integrating a remote control pad, connecting wires, and installing batteries.
Encouragement to Try Building the Car on Your Own
The process of building a paper remote control car is fun and straightforward. You can personalize the car using different colors and designs, involve your family in the process, and do it with the materials found in your home. It is a fantastic way to spend time with your family, relax and take on new challenges.
Conclusion
The paper remote control car is a great DIY project to inspire creativity, imagination, and sustainability. Creating a custom-designed car will make your project unique and fun while also reducing waste and saving resources. Involve your family members in the process to create shared experiences and memories that last a lifetime. Get started today by following the easy steps outlined in the article, and feel free to share your experience and feedback in the comments section.
(Note: Is this article not meeting your expectations? Do you have knowledge or insights to share? Unlock new opportunities and expand your reach by joining our authors team. Click Registration to join us and share your expertise with our readers.)