Introduction
Remote control cars are a timeless toy beloved by children and adults alike. However, store-bought remote control cars can be expensive, and they often lack the personal touch of a DIY project. In this article, we’ll show you how to make your very own remote control car at home using cardboard. Whether you’re looking to save money, customize your car, or just have fun crafting, this project is perfect for you.
Why Make Your Own Remote Control Car with Cardboard?
Before diving into the details of this project, let’s talk about why making your own remote control car out of cardboard is a great idea. First and foremost, doing it yourself can save you money. Building your own car from scratch can be much cheaper than buying a pre-made one, especially if you already have some of the necessary materials lying around your house.
Another advantage of building your own remote control car is the ability to customize it. You can choose what color and design you want, and you can even add extra features like a spoiler or headlights. This is a great way to make a toy that truly reflects your personality and interests.
Lastly, using cardboard as a material is an eco-friendly choice. Cardboard is easy to come by and is often overlooked as a valuable crafting material. By reusing cardboard, you’re keeping it out of landfills and giving it new life as a fun toy.
Materials Needed
To get started on this project, you’ll need a few key materials:
- Cardboard
- Scissors
- Glue
- Motors and wheels
- Battery
- Remote control
When it comes to selecting your materials, try to choose high-quality options that will hold up well during the construction process. For example, thicker cardboard is usually better than thin cardboard, and strong glue is essential for keeping everything together. You can also consider purchasing a remote control car kit, which will provide you with all the necessary materials in one package.
Step-by-Step Guide
Now, let’s walk through the process of building your own remote control car using cardboard. Follow these steps, and you’ll be zooming around in no time.
Step 1: Create the Chassis
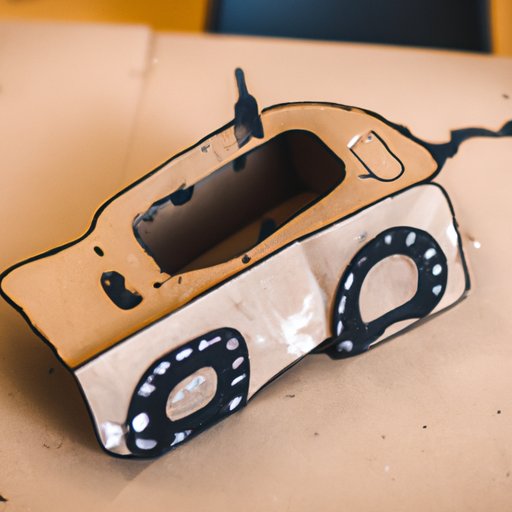
Begin by cutting out a piece of cardboard in the shape of your remote control car’s chassis. This will serve as the foundation for the rest of the car. Be sure to measure the size of your motors and wheels beforehand so you can create a correctly sized chassis.
Next, attach your motors to the bottom of the chassis using glue. Depending on the type of motors you’re using, you may need to attach them with screws as well. Once the motors are in place, attach the wheels to the motors.
Step 2: Make the Control Board
To create the control board for your remote control car, start by drawing a rectangle on a piece of cardboard. Cut out the rectangle and divide it into two sections: one for the battery and one for the remote control receiver.
Cut out a slot for the battery on one end of the control board. Place the battery into the slot and secure it with glue.
Attach the remote control receiver to the other end of the control board with glue. This will allow you to remotely control your car.
Step 3: Connect the Chassis and Control Board
Once the chassis and control board are complete, it’s time to connect them. Use wires to connect the motors to the control board. This will allow the motors to receive power from the battery and respond to your commands from the remote control.
Step 4: Add the Body and Design
Now that the basic structure of your remote control car is complete, it’s time to add some personality. Cut cardboard into the shape of your car’s body, and glue it onto the chassis. Don’t forget to add any additional design elements like headlights, a spoiler, or flames.
Tips for Success
Crafting can be a messy and unpredictable process. Here are some tips to help ensure your remote control car project goes smoothly:
- Take breaks when needed – don’t rush the process
- Make small adjustments as you go – don’t wait until the end to fix a problem
- Double-check measurements and cuts – accuracy is key
- Be patient – the final product will be worth it
The Finished Product
Congratulations! You’ve successfully built your own remote control car using cardboard. Take a moment to appreciate your creation and show it off to your friends and family. Make sure to test it out and adjust anything that’s not working quite right.
Conclusion
Building a remote control car with cardboard is a fun and rewarding project that anyone can enjoy. By making your own toy, you save money, customize your car, and contribute to a more sustainable future. Follow our step-by-step guide, and you’ll have a remote control car that is uniquely yours. Don’t forget to share your creation with us and encourage others to try this project for themselves.
(Note: Is this article not meeting your expectations? Do you have knowledge or insights to share? Unlock new opportunities and expand your reach by joining our authors team. Click Registration to join us and share your expertise with our readers.)
