Introduction
ISO stands for International Organization for Standardization, and it is an important aspect of digital photography. This article will explore what ISO means in photography, how it affects exposure, and the advantages and disadvantages of different ISO settings. Tips on how to choose and use ISO to create better photos will also be discussed.
Exploring the Basics of ISO in Photography
When it comes to understanding ISO in photography, it is important to know the basics. To start, let’s look at what ISO actually is and how it affects exposure.
What is ISO?
ISO is a measure of a camera’s sensitivity to light. The higher the ISO number, the more sensitive the camera is to light, and the brighter the resulting photo will be. In other words, a higher ISO setting will produce brighter images in low-light situations, while a lower ISO setting will produce darker images in bright conditions.
How Does ISO Affect Exposure?
In photography, exposure is the amount of light that reaches the camera’s sensor. Changing the ISO setting affects the exposure by changing the camera’s sensitivity to light. A higher ISO setting will allow more light to reach the sensor, resulting in a brighter image, while a lower ISO setting will allow less light to reach the sensor, resulting in a darker image.
What Are the Advantages and Disadvantages of Different ISO Settings?
One of the main advantages of using a higher ISO setting is that it allows you to take pictures in low-light environments without having to increase the shutter speed or aperture. However, there are some drawbacks to using a higher ISO setting; for example, higher ISO settings can introduce noise into your images, which can reduce the overall image quality. On the other hand, using a lower ISO setting can help reduce noise, but it may also result in underexposed images in certain situations.
An Introduction to ISO for Photographers
Now that we’ve explored the basics of ISO, let’s look at how photographers can use ISO to create better photos. Here are some tips on choosing the right ISO settings for different lighting conditions and types of photography.
What Is the Best ISO Setting for Different Types of Photography?
The best ISO setting for each type of photography depends on the lighting conditions and the desired effect. For example, if you are shooting in bright daylight, it is best to use a lower ISO setting such as 100 or 200. This will help reduce any noise in the image and ensure a crisp, clear shot. On the other hand, if you are shooting in low light, it is best to use a higher ISO setting such as 800 or 1600. This will allow more light to reach the sensor, resulting in a brighter image.
How to Choose the Right ISO Settings for Different Lighting Conditions?
The best way to choose the right ISO setting for different lighting conditions is to experiment with different settings and see what works best for each situation. It is also important to remember that the higher the ISO setting, the more noise will be present in the image. Therefore, it is best to use the lowest ISO setting possible for the given lighting conditions. Additionally, some cameras allow you to set different ISO settings for different shooting modes, so you can customize the ISO depending on the type of photography you are doing.
How to Use ISO to Create Better Photos
Once you understand how ISO works and how to choose the right ISO settings for different lighting conditions, you can start to explore how to use ISO to create better photos. Here are some tips on using ISO to achieve a desired look.
Utilizing Different ISO Settings to Create Different Effects
Different ISO settings can be used to create different effects in your photos. For example, a high ISO setting can be used to create a grainy, “edgy” look, while a low ISO setting can be used to create a smoother, cleaner look. Experimenting with different ISO settings can help you find the right balance between noise and image quality.
Tips on Using ISO to Achieve a Desired Look
It is also important to keep in mind that different ISO settings can affect the color and contrast of an image. A higher ISO setting can result in an image that is too bright or washed out, while a lower ISO setting can result in an image that is too dark or dull. Therefore, it is important to adjust the ISO setting accordingly to achieve the desired look.
A Guide to Understanding ISO Settings in Photography
Once you understand the basics of ISO, you can start to explore the different effects of ISO in photography. Here are some tips on understanding different ISO settings and their effects on image quality.
Different Settings and Their Effects on Image Quality
The higher the ISO setting, the more sensitive the camera is to light, and the brighter the resulting image will be. However, it is important to keep in mind that higher ISO settings can also introduce noise into your images, which can reduce the overall image quality. On the other hand, lower ISO settings can help reduce noise, but they may also result in underexposed images in certain situations.
Best Practices for Choosing the Right ISO Settings
When choosing the right ISO setting for a particular situation, it is important to consider the lighting conditions, the desired effect, and the type of photography you are doing. Additionally, it is best to use the lowest ISO setting possible to reduce noise and ensure a good level of image quality.
The Benefits of Using Higher and Lower ISOs in Photography
Now that we’ve explored the basics of ISO, let’s look at the benefits of using higher and lower ISOs in photography.
Advantages of Using Higher ISO Settings
Using a higher ISO setting can be beneficial in low-light environments, as it allows you to take pictures without having to increase the shutter speed or aperture. Additionally, higher ISO settings can also be useful for capturing fast-moving subjects, as they allow you to use faster shutter speeds without sacrificing image quality.
Advantages of Using Lower ISO Settings
Using a lower ISO setting can be beneficial in bright conditions, as it helps reduce any noise in the image and ensures a crisp, clear shot. Additionally, lower ISO settings can also be useful for capturing slow-moving subjects, as they allow you to use slower shutter speeds without sacrificing image quality.
An Overview of the Different Effects of ISO in Photography
Now that we’ve explored the basics of ISO and the benefits of using higher and lower ISO settings, let’s look at some examples of the different looks that can be achieved with different ISO settings. Here are some common uses of ISO in photography.
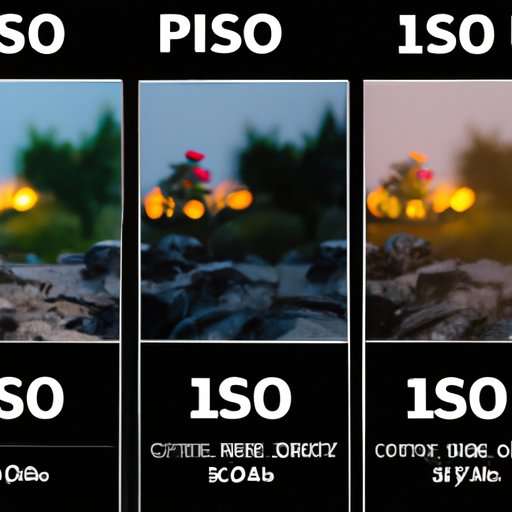
Examples of Different Looks Achieved With Different ISO Settings
Different ISO settings can be used to create different effects in your photos. For example, a higher ISO setting can be used to create a grainy, “edgy” look, while a lower ISO setting can be used to create a smoother, cleaner look. Additionally, different ISO settings can also affect the color and contrast of an image.
Common Uses of ISO in Photography
ISO can be used for a variety of different photography styles and techniques. For example, it can be used to capture fast-moving subjects, create different effects, and even reduce noise in images. Additionally, it can also be used to adjust the exposure in different lighting conditions.
Conclusion
In conclusion, ISO is an important aspect of digital photography and understanding how it works can help you take better photos. We have explored the basics of ISO and how it affects exposure, as well as the advantages and disadvantages of different ISO settings. We have also looked at how to choose and use ISO to create better photos, and the different effects of ISO in photography. By utilizing all the information presented here, you should now have a better understanding of ISO in photography.
(Note: Is this article not meeting your expectations? Do you have knowledge or insights to share? Unlock new opportunities and expand your reach by joining our authors team. Click Registration to join us and share your expertise with our readers.)