
Introduction
A starter motor is an electric component that is used to start an engine. It converts electrical energy into mechanical energy and then uses it to turn the crankshaft of the engine, thus starting it. Wiring a starter motor is a complex process that requires knowledge of electrical systems and safety protocols. This article will provide an overview of the basic steps and components involved in wiring a starter motor.
Step-by-Step Guide to Wiring a Starter
Wiring a starter motor can be a daunting task, but with the right tools and knowledge, it can be done safely and effectively. Here are the steps to follow when wiring a starter motor:
Basic Tools Needed
Before beginning any wiring project, it’s important to have the right tools at your disposal. You’ll need a few basic tools to complete the job, including wire cutters, wire strippers, electrical tape, and a soldering iron. Additionally, you should have a voltage meter on hand to test the connections once they are made.
Preparing the Area
Once you have all the necessary tools, the next step is to prepare the area for wiring. Make sure all power sources are turned off and that the area is well ventilated. Also, ensure that all wires are properly labeled so that you know where each one connects.
Connecting the Wires
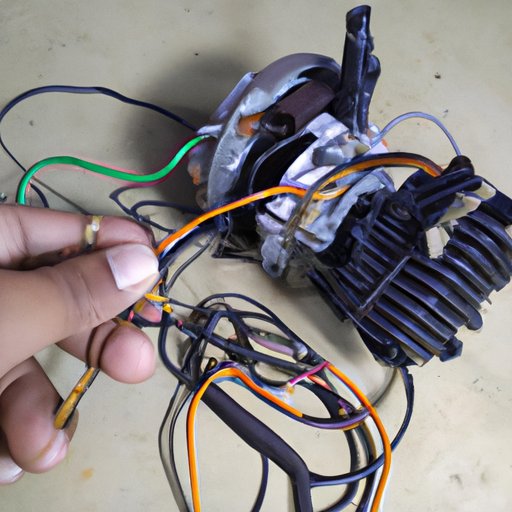
The last step in wiring a starter motor is to connect the wires. Start by attaching the black wire to the negative terminal on the starter, then attach the red wire to the positive terminal. Finally, connect the remaining wires according to the wiring diagram provided by the manufacturer. Once all the wires are connected, use electrical tape to secure them in place.
How to Connect a Starter Motor: A Beginner’s Guide
For those new to the world of wiring, connecting a starter motor can seem like a daunting task. However, with the right supplies and a bit of patience, it is possible to successfully wire a starter motor. Here are some tips for beginners on how to connect a starter motor:
Identifying the Parts
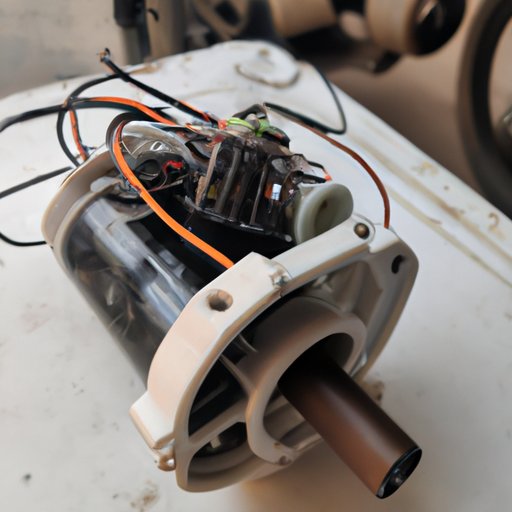
The first step in wiring a starter motor is to identify the different parts and their functions. The most important parts are the starter motor itself, the battery, the wiring harness, and the starter switch. It’s important to familiarize yourself with these components before attempting to wire them together.
Securely Attaching the Starter Motor
Once you’ve identified the components, the next step is to securely attach the starter motor to the engine block. To do this, you’ll need to use bolts, washers, and nuts. Make sure the starter motor is firmly in place before moving on to the next step.
Connecting the Wires
The final step in wiring a starter motor is to connect the wires. Start by attaching the red wire to the positive terminal on the starter, then attach the black wire to the negative terminal. After that, connect the remaining wires according to the wiring diagram provided by the manufacturer. Once all the wires are connected, use electrical tape to secure them in place.
The Basics of Wiring a Starter Motor
Before attempting to wire a starter motor, it’s important to understand the basics of how it works. A starter motor consists of several components, including a solenoid, a starter switch, and a wiring harness. The solenoid is responsible for providing the electricity needed to start the engine, while the starter switch is used to activate the solenoid. The wiring harness connects all the components together.
Understanding the Wiring Diagram
In order to correctly wire a starter motor, it’s essential to understand the wiring diagram provided by the manufacturer. This diagram will show you where each wire is connected and what type of wire is needed. Take some time to study the diagram before attempting to wire the starter motor.
Locating the Components
Once you have a good understanding of the wiring diagram, the next step is to locate the components. The starter motor should be located near the engine block, and the starter switch should be mounted nearby. Make sure all the components are in their proper locations before continuing.
Understanding the Wiring Process of a Starter Motor
When wiring a starter motor, there are a few key points to keep in mind. First, it’s important to use the correct type of wiring harness for the application. Different types of wiring harnesses are designed for different applications, so make sure you get the right one. Second, it’s important to make sure all the connections are secure. Use electrical tape or solder to ensure a strong connection.
Types of Wiring Harnesses
There are two main types of wiring harnesses used for starter motors: insulated and uninsulated. Insulated wiring harnesses are designed to protect the wires from extreme temperatures, while uninsulated wiring harnesses are more flexible and less expensive. It’s important to choose the right type of wiring harness for your application.
Different Ways to Wire a Starter Motor
There are a few different ways to wire a starter motor, depending on the type of vehicle you’re working on. For example, some vehicles require the starter motor to be wired directly to the battery, while others require the starter motor to be wired through the ignition switch. Make sure you understand the specific wiring requirements of your vehicle before beginning.
Testing for Proper Connection
Once the wiring is complete, it’s important to test the connections to make sure everything is working properly. If there are any loose connections, use electrical tape or solder to secure them. Additionally, use a voltage meter to test the connections to make sure they are in the correct range.

Troubleshooting Common Starter Motor Wiring Issues
Even with the best preparation, wiring a starter motor can still present some challenges. If you encounter any issues during the process, here are a few tips for troubleshooting:
Reading Fault Codes
If your vehicle’s computer system detects an error in the wiring, it may display a fault code. Refer to the owner’s manual to interpret the code and determine the cause of the issue. This can help you pinpoint the source of the problem and take the necessary steps to fix it.
Checking for Loose Connections
If the starter motor isn’t working properly, check for any loose connections. Make sure all the wires are securely attached to the terminals and that none of them are frayed or damaged. If any of the wires appear to be damaged, replace them with new ones.
Replacing Damaged Wires
If any of the wires are damaged, it’s important to replace them as soon as possible. Damaged wires can cause electrical shorts and reduce the efficiency of the starter motor. Use only high-quality replacement wires to ensure a safe and reliable connection.
Tips for Successfully Wiring a Starter Motor
Wiring a starter motor can be a complex process, but with the right tools and knowledge, it can be done safely and effectively. Here are some tips for successful installation:
Take Your Time
It’s important to take your time when wiring a starter motor. Don’t rush the process, as this could result in mistakes or poor connections. Instead, take your time and double check everything before turning the power on.
Double Check Everything
Before testing the connections, make sure to double check everything. Look for any loose connections or frayed wires, and make sure all the wires are connected to the correct terminals. Taking the time to double check your work can help prevent electrical problems down the line.
Follow Manufacturer Instructions
Finally, make sure to follow the manufacturer’s instructions when wiring a starter motor. Different vehicles require different wiring methods, so it’s important to read the instructions carefully before beginning the process.
Conclusion
Wiring a starter motor can seem intimidating, but it doesn’t have to be. With the right tools and knowledge, you can successfully wire a starter motor in no time. Remember to take your time, double check everything, and follow the manufacturer’s instructions for best results.
(Note: Is this article not meeting your expectations? Do you have knowledge or insights to share? Unlock new opportunities and expand your reach by joining our authors team. Click Registration to join us and share your expertise with our readers.)