Introduction
Well pumps are an important part of any home plumbing system, providing water to your home from a deep underground source. Regular maintenance and testing of your well pump is essential to ensure that it is functioning properly and that you have access to clean and safe drinking water. This article will provide a comprehensive guide on how to test a well pump.
Research the Type of Well Pump
Before beginning the process of testing a well pump, it is important to identify the type of well pump that is being used. There are several different types of well pumps, each with its own unique components and characteristics. Once the type of well pump is identified, research should be done to understand the specific components of the well pump and their function.

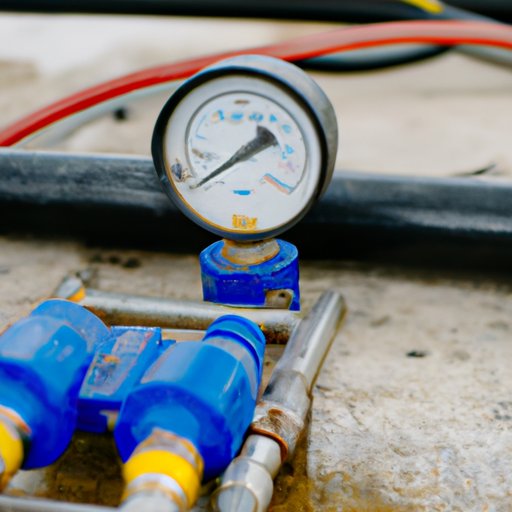
Gather Materials Needed for Testing
The first step in testing a well pump is to gather all the necessary materials. The most important tool for testing a well pump is a pressure gauge. This device measures the amount of pressure within the system, which can help identify any issues with the well pump. Additionally, other tools such as wrenches, screwdrivers, and pliers may be needed depending on the type of well pump being tested.
Inspect the Well Pump
Once all the necessary materials have been gathered, it is time to inspect the well pump for any visible signs of damage or wear. Check for any loose connections, corrosion, or other signs of damage. Additionally, check the accuracy of the pressure gauge by comparing it to a known reference point, such as another pressure gauge or a known pressure reading.
Turn Off Power Supply
Before beginning the test, it is important to make sure that the power supply to the well pump is turned off. This is to ensure that no electricity is flowing through the system while the test is being conducted. If the power is not shut off, there is a risk of electric shock.
Perform Visual Inspection
After turning off the power supply, it is important to perform a thorough visual inspection of the well pump and its components. Carefully inspect all the parts of the well pump and look for any signs of damage or wear. Make sure that all the connections are secure and that there is no debris or dirt blocking any of the pipes.
Run Tests
Once the visual inspection is complete, it is time to start running tests on the well pump. Depending on the type of well pump, different tests may be required. For example, a jet pump may require a pressure test, while a submersible pump may require a flow rate test. It is important to determine which tests are necessary and then execute them to determine the functionality of the well pump.
Conclusion
Testing a well pump is an important part of maintaining your home’s plumbing system. By following the steps outlined in this article, you can ensure that your well pump is functioning properly and giving you access to clean and safe drinking water. Researching the type of well pump, gathering the necessary materials, performing a visual inspection, and running tests are all essential steps in testing a well pump.
(Note: Is this article not meeting your expectations? Do you have knowledge or insights to share? Unlock new opportunities and expand your reach by joining our authors team. Click Registration to join us and share your expertise with our readers.)