Introduction
A starting capacitor is an electrical component that helps start motors in air conditioners, refrigerators, and other household appliances. It stores energy and releases it quickly when the motor needs additional torque to start. Testing a starting capacitor is important to ensure it’s working properly and can help diagnose any problems with the appliance.
Why Test a Starting Capacitor?
Testing a starting capacitor helps determine whether it’s functioning correctly and can help diagnose any issues with the appliance. A faulty starting capacitor can cause the motor to run slowly or not at all. If the motor is running slowly, it could be due to a weak starting capacitor that needs to be replaced. If the motor isn’t running at all, it could be due to a faulty starting capacitor or another issue with the appliance.
Step-by-Step Guide to Testing a Starting Capacitor
Testing a starting capacitor requires some knowledge of electricity and the ability to handle electrical components safely. Follow these steps to test a starting capacitor:
Safety Considerations
Before beginning any work on an electrical component, make sure the power is disconnected from the appliance. Wear protective gloves and eyewear to protect yourself from electric shock.
Gather the Necessary Tools
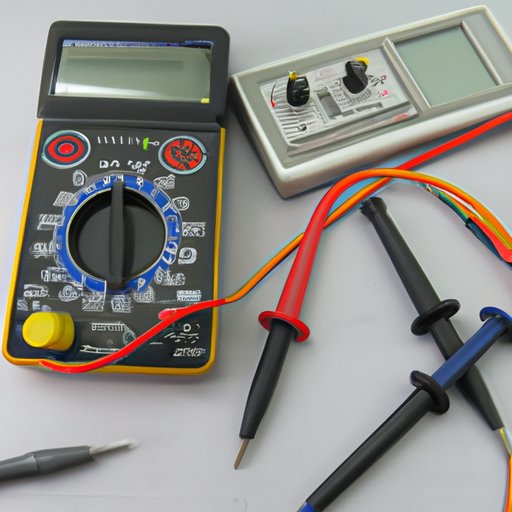
To test a starting capacitor, you will need a digital multimeter, insulated screwdriver, and needle-nose pliers. Make sure the multimeter is set to measure AC voltage.
Prepare the Capacitor for Testing
Remove the starting capacitor from the appliance and inspect it for any signs of physical damage. If the capacitor appears to be damaged, do not attempt to test it; replace it with a new one.
Connect the Testing Equipment
Using the insulated screwdriver, remove the leads from the capacitor. Connect the multimeter to the capacitor by attaching the red lead to the positive terminal and the black lead to the negative terminal.
Record the Results
Once the multimeter is connected, turn it on and note the reading. This should give you an indication of whether the capacitor is working properly or needs to be replaced.
How to Diagnose & Test a Starting Capacitor
In order to accurately diagnose and test a starting capacitor, you will need to use an ohmmeter. An ohmmeter measures resistance, which can give you an indication of whether the capacitor is functioning correctly. Here are the steps for using an ohmmeter to diagnose and test a starting capacitor:
Inspect Visually
Start by inspecting the capacitor visually for any signs of physical damage. If the capacitor appears to be damaged, do not attempt to test it; replace it with a new one.
Test with an Ohmmeter
Set the ohmmeter to measure resistance. Connect the red lead to the positive terminal and the black lead to the negative terminal of the capacitor. Note the reading on the ohmmeter. It should be within the range specified on the capacitor label.
Check the Voltage
Next, check the voltage of the capacitor by connecting the multimeter to the terminals. The voltage should be within the range specified on the capacitor label.
Troubleshooting Starting Capacitors with Multimeters
Multimeters are often used to troubleshoot starting capacitors. Here are the steps for using a multimeter to troubleshoot a starting capacitor:
Set the Meter to Measure Resistance
Start by setting the multimeter to measure resistance. Connect the red lead to the positive terminal and the black lead to the negative terminal of the capacitor.
Read the Resistance of the Capacitor
Note the reading on the multimeter. It should be within the range specified on the capacitor label.
Set the Meter to Measure Voltage
Next, set the multimeter to measure voltage. Connect the red lead to the positive terminal and the black lead to the negative terminal of the capacitor.
Read the Voltage on the Capacitor
Note the reading on the multimeter. It should be within the range specified on the capacitor label.
A Beginner’s Guide to Testing a Starting Capacitor
If you’re a beginner and want to learn how to test a starting capacitor, here are the steps to follow:
Identify the Type of Capacitor
The first step is to identify the type of capacitor you have. Depending on the type of capacitor, the testing procedure may vary.
Read the Label
Once you’ve identified the type of capacitor, read the label for specifications such as voltage and resistance range.
Test the Capacitor
Using a multimeter, connect the leads to the capacitor and note the readings. Compare the readings to the specifications on the label.

Testing a Starting Capacitor: The Basics
To test a starting capacitor, you will need a digital multimeter, insulated screwdriver, and needle-nose pliers. Follow these steps to test a starting capacitor:
Prepare the Capacitor
Remove the starting capacitor from the appliance and inspect it for any signs of physical damage. If the capacitor appears to be damaged, do not attempt to test it; replace it with a new one.
Connect the Capacitor to the Multimeter
Using the insulated screwdriver, remove the leads from the capacitor. Connect the multimeter to the capacitor by attaching the red lead to the positive terminal and the black lead to the negative terminal.
Read the Resistance of the Capacitor
Turn on the multimeter and note the resistance reading. This should give you an indication of whether the capacitor is working properly or needs to be replaced.
Read the Voltage of the Capacitor
Set the multimeter to measure AC voltage and note the reading. This should give you an indication of whether the capacitor is functioning correctly or needs to be replaced.
Conclusion
Testing a starting capacitor is an important step in diagnosing any issues with an appliance. Following the steps outlined above, you can safely and accurately test a starting capacitor. To recap, the steps are: safety considerations, gathering the necessary tools, preparing the capacitor for testing, connecting the testing equipment, recording the results, and diagnosing and testing with an ohmmeter or multimeter. When testing a starting capacitor, it’s important to remember to wear protective gear and to double-check the readings against the specifications on the label. Following these tips and tricks will help ensure your testing process is safe and accurate.
(Note: Is this article not meeting your expectations? Do you have knowledge or insights to share? Unlock new opportunities and expand your reach by joining our authors team. Click Registration to join us and share your expertise with our readers.)