I. Introduction
Tripping breakers can be a frustrating and inconvenient problem that many homeowners and electricians face. Whether it’s constantly tripping a breaker or sporadic incidents, it’s important to address this issue promptly. Testing and troubleshooting breakers not only ensures the safety of your electrical system but also saves you time and money in the long run.
II. Troubleshooting 101: A Step-by-Step Guide to Testing Tripping Breakers
Understanding the basics of breaker function and how to test them is the first step in troubleshooting the tripping issue. By following this step-by-step guide, you can identify the root cause and resolve the problem.
A. Understanding the breaker’s purpose and how it works
Before diving into testing the breaker, it’s helpful to have a basic understanding of its purpose and how it functions. Breakers are designed to protect electrical circuits from overloads and short circuits by automatically interrupting the flow of electricity.
B. Conducting a visual inspection of the breaker and surrounding connections
A visual inspection can often reveal underlying issues that may cause the breaker to trip. Check for any loose connections, frayed wires, or signs of damage on the breaker itself or in the vicinity.
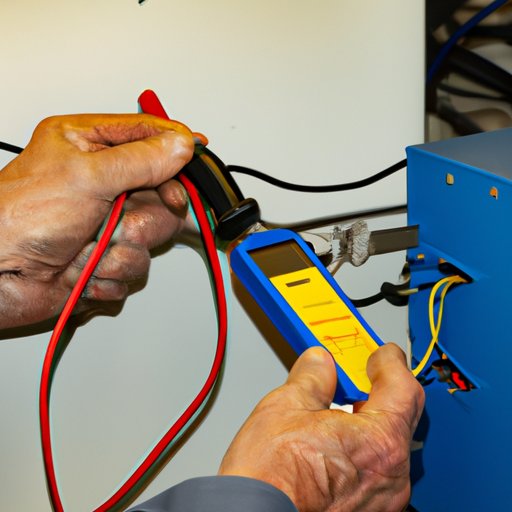
C. Testing the breaker using a multimeter
A multimeter is a versatile tool that can be used to test the functionality of a breaker. Set the multimeter to measure voltage, and ensure it is calibrated correctly. Test the breaker by placing the probes on the appropriate terminals while the breaker is in the reset position.
D. Identifying abnormal readings that indicate a faulty breaker
If the multimeter readings are significantly different from the expected values, it may indicate a faulty breaker. Abnormal readings could include low or no voltage, voltage fluctuations, or no continuity. These results suggest that the breaker is not functioning correctly and may need to be replaced.
III. Proactive Electrical Maintenance: 6 Effective Methods to Test and Diagnose Tripping Breakers
Prevention is always better than cure when it comes to electrical issues. By implementing these proactive maintenance methods, you can minimize the occurrences of tripping breakers and identify potential problems before they become severe.
A. Regularly checking for loose connections and frayed wires
Loose connections and frayed wires can cause resistance and heat, potentially leading to tripping breakers. Regularly inspecting and tightening connections, as well as replacing damaged wires, can prevent these issues.
B. Performing load calculations to ensure the breaker is not overloaded
An overloaded breaker is a common cause of trips. Calculate the total electrical load on the circuit and compare it to the breaker’s amperage rating. If it exceeds the rating, consider redistributing the load across multiple breakers or upgrading to a higher amperage breaker.
C. Testing for ground faults and short circuits
Ground faults and short circuits can cause breakers to trip. Test for these issues using a ground fault circuit interrupter (GFCI) tester or a multi-function tester. These tools can quickly identify the presence of these electrical faults.
D. Monitoring voltage fluctuations that may cause breakers to trip
Voltage fluctuations, such as surges or sags, can trip breakers. Install a voltage monitor or power quality analyzer to track any abnormal voltage variations. Address any consistent fluctuations by consulting with an electrician.
E. Examining the condition of appliances and electrical devices
If a specific appliance consistently causes a breaker trip, it may be faulty or drawing too much power. Inspect the condition of the device and monitor its power usage. Consider repairing or replacing the appliance if necessary.
F. Seeking professional assistance if necessary
If you are unsure about any aspect of testing and troubleshooting breakers, or if the problem persists despite your efforts, it is advisable to consult a qualified electrician. They have the expertise and tools to diagnose and solve complex electrical issues.
IV. Is Your Breaker Acting Up? Try These 6 DIY Tests to Identify and Solve the Problem
Before reaching out to a professional, there are several DIY tests you can perform to identify and potentially resolve the issue with a tripping breaker.
A. Resetting the breaker and observing its behavior
Start by resetting the tripped breaker. If it immediately trips again, it indicates something beyond a minor issue. However, if it doesn’t trip immediately, it may have been a temporary power surge or a minor overload.
B. Isolating the circuit to determine if the problem is specific to one area
If the breaker continues to trip, try isolating the circuit by turning off all the lights, unplugging appliances, and switching off devices. Gradually turn them back on one by one until the breaker trips again. This way, you can identify the specific area or device causing the issue.
C. Testing individual appliances and devices on the circuit
Conduct a test by plugging in each appliance or device one at a time and observing if it triggers the breaker. A faulty or malfunctioning appliance could be the culprit, and repairing or replacing it should solve the problem.
D. Temporarily replacing the breaker with a known working one
If you have a spare breaker of the same size and rating, swap it temporarily with the tripping breaker. If the replacement breaker doesn’t trip, it suggests that the original breaker is faulty and needs to be replaced.
E. Checking for moisture or water damage near the breaker
Moisture or water damage near the breaker can cause issues. Inspect the area around the breaker for any signs of water intrusion, leaks, or condensation. Address any moisture-related problems promptly.
F. Inspecting the condition of wiring and outlets
Wires or outlets in poor condition can cause trips. Inspect the wiring for any signs of damage, such as fraying or exposed wires. Additionally, check the outlets for loose connections or signs of arcing. Address any necessary repairs or replacements.
V. Unlocking the Mystery: How to Test a Troublesome Tripping Breaker
Troubleshooting tripping breakers can be a complex process. To make it easier, here’s a concise summary of the steps in the testing process:
- Understand the purpose and function of breakers.
- Perform visual inspections of the breaker and connections.
- Test the breaker using a multimeter.
- Identify abnormal readings that indicate a faulty breaker.
- Regularly check for loose connections and frayed wires.
- Perform load calculations to ensure the breaker is not overloaded.
- Test for ground faults and short circuits.
- Monitor voltage fluctuations that may cause trips.
- Examine the condition of appliances and devices.
- Seek professional assistance if necessary.
By following these steps, you can effectively diagnose and solve the problem.
VI. Keeping Electrical Systems in Check: 6 Essential Tips for Testing and Troubleshooting Tripping Breakers
Preventing and resolving tripping breakers requires a systematic and proactive approach. Here are six essential tips to keep your electrical systems in check:
A. Regular maintenance schedule for breaker testing
Set up a routine maintenance schedule to test and inspect breakers. Regular testing helps identify potential issues before they escalate.
B. Establishing a baseline for normal breaker behavior
By documenting the normal behavior of breakers, you can quickly identify deviations that may indicate problems. Record normal voltage readings, testing results, and any other relevant information.
C. Documenting and tracking tripping incidents
Keep a log of all tripping incidents, noting the date, time, circuit, affected devices, and any patterns you observe. This information can help identify recurring issues and pinpoint the causes.
D. Educating oneself on electrical safety precautions
Electrical safety is crucial when testing and troubleshooting breakers. Familiarize yourself with safety precautions, such as wearing appropriate protective gear and avoiding contact with live wires.
E. Utilizing appropriate tools and equipment for testing purposes
Invest in quality tools and equipment specifically designed for testing electrical systems. Using the right tools ensures accurate results and minimizes the risk of accidents.
F. Seeking professional help when necessary or unsure
When in doubt or if you encounter complex issues, it’s always best to seek the help of a qualified electrician. They have the knowledge and experience to diagnose and resolve electrical problems safely and effectively.
VII. Don’t Let a Tripping Breaker Keep You in the Dark: Learn How to Test and Fix it Today!
Resolving tripping breaker issues is essential for a safe and efficient electrical system. By following the steps outlined in this article and implementing the tips for proactive maintenance, you can minimize disruptions and ensure the uninterrupted flow of electricity in your home or business.
Remember, understanding how to test and troubleshoot breakers empowers you to find and fix the problem, saving time and money.
(Note: Is this article not meeting your expectations? Do you have knowledge or insights to share? Unlock new opportunities and expand your reach by joining our authors team. Click Registration to join us and share your expertise with our readers.)