Introduction
The Husqvarna weed eater is one of the most popular models on the market today. But like any other piece of outdoor power equipment, it requires regular maintenance to keep it running smoothly. To ensure that your trimmer is in top condition, you need to know how to string a Husqvarna weed eater.
In this article, we’ll cover everything you need to know about stringing a Husqvarna weed eater. We’ll provide a step-by-step guide for both beginners and experienced users, as well as tips on selecting the right line and adjusting the tension. By the end of this article, you’ll be able to restring your trimmer with ease.
Step-by-Step Guide: How to String a Husqvarna Weed Eater
Stringing a Husqvarna weed eater isn’t difficult, but it does require some basic knowledge of the process. Follow these steps to get your trimmer up and running in no time:
Gather Supplies
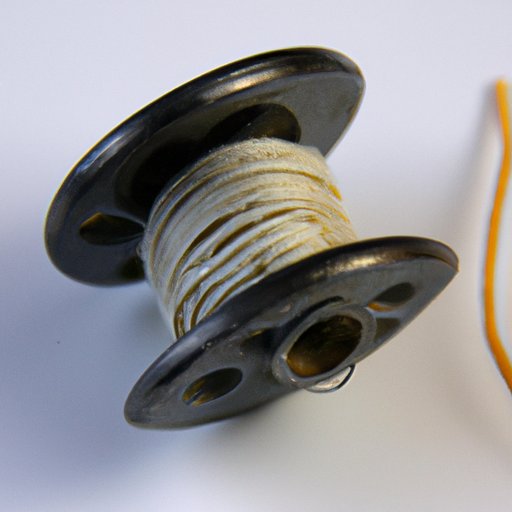
Before you begin, make sure you have all the necessary supplies on hand. You’ll need a new spool of string, a screwdriver, and a pair of scissors. Make sure the spool of string is the correct size for your model of trimmer.
Remove the Spool
Once you have all the supplies ready, you can start the stringing process. Begin by removing the spool from the trimmer. This is usually done by unscrewing the spool cap with a screwdriver.
Replace the String
Next, cut off a length of string that’s slightly longer than the circumference of the spool. Then, wind the string around the spool in a clockwise direction, making sure to leave enough slack at the end for the string to feed through the eyelets. Once you’ve wound the string, secure it in place with a knot.
Replace the Spool
Finally, reattach the spool to the trimmer and tighten the cap with a screwdriver. Be sure to check the tension of the string after replacing the spool.
A Beginner’s Guide to Stringing a Husqvarna Weed Eater
If you’re new to stringing a Husqvarna weed eater, don’t worry. Here’s a quick and easy guide to help you get started:
What You Need
Before you begin, make sure you have all the necessary supplies on hand. You’ll need a new spool of string, a screwdriver, and a pair of scissors. Make sure the spool of string is the correct size for your model of trimmer.
Preparing the Trimmer
To begin the stringing process, remove the spool from the trimmer. This is usually done by unscrewing the spool cap with a screwdriver.
Installing the Line
Cut off a length of string that’s slightly longer than the circumference of the spool. Then, wind the string around the spool in a clockwise direction, making sure to leave enough slack at the end for the string to feed through the eyelets. Once you’ve wound the string, secure it in place with a knot.

How to Replace the String on a Husqvarna Weed Eater
Replacing the string on a Husqvarna weed eater is a simple task that doesn’t require any special tools or skills. Here’s what you need to do:
Removing the Old Line
Start by removing the old line from the spool. This is usually done by simply pulling it out with your fingers. If the line is stuck, use a pair of pliers or needle-nose pliers to gently pull it out.
Installing the New Line
Once you’ve removed the old line, install the new line by winding it around the spool in a clockwise direction. Make sure to leave enough slack at the end for the string to feed through the eyelets. Secure the line in place with a knot.

The Basics of Restringing a Husqvarna Weed Eater
When restringing a Husqvarna weed eater, there are a few important things to keep in mind. Here are the basics:
Select the Right Line
It’s important to select the right type of line for your trimmer. Most Husqvarna weed eaters require a .095″ diameter line, but be sure to check your owner’s manual for exact specifications.
Install the Line
Once you’ve selected the right line, install it by winding it around the spool in a clockwise direction. Make sure to leave enough slack at the end for the string to feed through the eyelets. Secure the line in place with a knot.
Adjust the Tension
After installing the line, it’s important to adjust the tension. Too much tension can cause the line to break, while too little tension can cause the trimmer to vibrate excessively. The ideal tension should be just tight enough to keep the line from slipping.
How to Easily Change the String on a Husqvarna Weed Eater
Changing the string on a Husqvarna weed eater doesn’t have to be complicated. Here’s a simple guide to help you get the job done quickly and easily:
Unwind the Old Line
Start by unwinding the old line from the spool. This is usually done by simply pulling it out with your fingers. If the line is stuck, use a pair of pliers or needle-nose pliers to gently pull it out.
Install the New Line
Once you’ve removed the old line, install the new line by winding it around the spool in a clockwise direction. Make sure to leave enough slack at the end for the string to feed through the eyelets. Secure the line in place with a knot.
Check the Tension
After installing the line, it’s important to check the tension. Too much tension can cause the line to break, while too little tension can cause the trimmer to vibrate excessively. The ideal tension should be just tight enough to keep the line from slipping.

Everything You Need to Know About Replacing the String on a Husqvarna Weed Eater
Replacing the string on a Husqvarna weed eater is something every homeowner should know how to do. Here’s a comprehensive guide to help you get the job done right:
Gather All Necessary Tools
Before you begin, make sure you have all the necessary supplies on hand. You’ll need a new spool of string, a screwdriver, and a pair of scissors. Make sure the spool of string is the correct size for your model of trimmer.
Remove the Spool
Once you have all the supplies ready, you can start the stringing process. Begin by removing the spool from the trimmer. This is usually done by unscrewing the spool cap with a screwdriver.
Replace the String
Next, cut off a length of string that’s slightly longer than the circumference of the spool. Then, wind the string around the spool in a clockwise direction, making sure to leave enough slack at the end for the string to feed through the eyelets. Once you’ve wound the string, secure it in place with a knot.
Replace the Spool
Finally, reattach the spool to the trimmer and tighten the cap with a screwdriver. Be sure to check the tension of the string after replacing the spool.
Adjust the Tension
After replacing the spool, it’s important to adjust the tension of the string. Too much tension can cause the line to break, while too little tension can cause the trimmer to vibrate excessively. The ideal tension should be just tight enough to keep the line from slipping.
Test the Trimmer
Once you’ve adjusted the tension, test the trimmer to make sure it’s working properly. Start the engine and let it run for a few minutes to make sure the line is feeding properly.
Conclusion
Stringing a Husqvarna weed eater doesn’t have to be complicated. With the right supplies and a bit of patience, you can easily restring your trimmer in no time. Just remember to select the right line, install it correctly, and adjust the tension accordingly. With these simple steps, you’ll be able to enjoy a perfectly trimmed lawn in no time.
(Note: Is this article not meeting your expectations? Do you have knowledge or insights to share? Unlock new opportunities and expand your reach by joining our authors team. Click Registration to join us and share your expertise with our readers.)