Introduction
Shingling a roof is a major home improvement project that can be intimidating for many people. It requires the right tools, knowledge, and skills to do the job properly. But with the right preparation and guidance, shingling a roof can be accomplished safely and efficiently.
This article will provide an overview of the steps involved in shingling a roof, from preparing the roof to finishing up. We’ll also discuss the essential tools needed for the job, how to calculate the number of shingles needed for a roof, and tips for ensuring proper nailing and sealing when shingling a roof. Finally, we’ll cover the benefits of shingling a roof.
Step-by-Step Guide to Shingling a Roof
Shingling a roof is a multi-step process that should be done in the correct order. The following is a step-by-step guide to shingling a roof:
Preparing the Roof
Before shingling a roof, you need to prepare it by removing any existing shingles and inspecting the roof deck for any damage. Make sure to repair any damaged areas before proceeding with the installation. Additionally, you’ll want to make sure the roof is clean and free of debris.
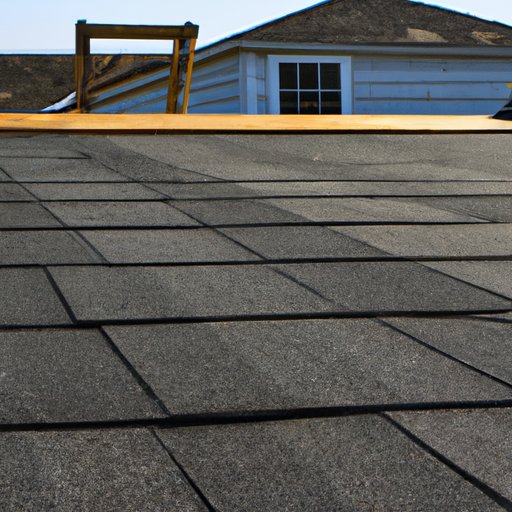
Installing the Starter Course of Shingles
Once the roof is prepared, you can begin installing the starter course of shingles. This is the first row of shingles that will be installed along the eaves of the roof. Make sure to use roofing nails that are long enough to penetrate the roof sheathing and secure the shingles in place.
Installing the Main Courses of Shingles
The next step is to install the main courses of shingles. You’ll want to start at the bottom of the roof and work your way up. Make sure to use roofing nails that are long enough to penetrate the roof sheathing and secure the shingles in place. Additionally, you’ll want to make sure the shingles overlap each other as you work your way up the roof.
Adding Ridge Cap Shingles
After all of the main courses of shingles have been installed, you can add the ridge cap shingles. These are the shingles that are used to cover the peak of the roof. As with the other shingles, you’ll want to make sure they overlap each other and are secured in place with roofing nails.
Finishing Up
Once all of the shingles have been installed, you can finish up by trimming any excess material and cleaning up the area. Additionally, you’ll want to inspect the roof for any signs of water or air leaks. If any are found, they should be repaired immediately.
The Essential Tools for Shingling a Roof
In order to install shingles on a roof, you’ll need the following tools and materials:
Hammer
A hammer is necessary for driving roofing nails into the roof sheathing.
Nail Gun
A nail gun can be used in place of a hammer for driving roofing nails into the roof sheathing. This can save time and make the job easier.
Ladder
You’ll need a ladder to access the roof. Make sure it’s tall enough to reach the highest point of the roof.
Roofing Felt
Roofing felt is a waterproof membrane that is used to protect the roof from water damage. It should be installed before the shingles are applied.
Roofing Nails
Roofing nails are specially designed nails that are galvanized to prevent corrosion. They should be long enough to penetrate the roof sheathing and secure the shingles in place.
Asphalt Shingles
Asphalt shingles are the most common type of shingle used for residential roofs. They come in a variety of colors and styles to suit any aesthetic.
Chalk Line
A chalk line is used to mark straight lines on the roof. This helps ensure that the shingles are installed in a neat and orderly fashion.
How to Calculate the Number of Shingles Needed for a Roof
Calculating the number of shingles needed for a roof can be tricky. Here are the steps you should take to make sure you get the right amount:
Measure the Roof Area
The first step is to measure the area of the roof. This will determine the total square footage of the roof and help you calculate how many shingles you’ll need to purchase.
Calculate the Number of Bundles Needed
Once you know the area of the roof, you can then calculate how many bundles of shingles you’ll need. Most bundles of shingles cover an area of 33 square feet, so divide the total area of the roof by 33 to get the number of bundles needed.
Consider Waste
When calculating the number of shingles needed for a roof, it’s important to remember that some shingles will be wasted due to cuts and other factors. According to Remodeling Magazine, “allow for a 10 percent waste factor when ordering shingles.”

Tips for Installing Shingles on a Roof
Installing shingles on a roof requires skill and precision. Here are some tips to keep in mind to ensure a successful installation:
Work from the Bottom Up
Always start at the bottom of the roof and work your way up. This will ensure that the shingles are installed in the correct order.
Nail in Proper Locations
Make sure to nail the shingles in the correct locations. According to Today’s Homeowner, “each shingle should be nailed about 1 inch above its center and 4 inches from the top and bottom edges.”
Use an Adhesive Underlayment
An adhesive underlayment can be used to improve the durability and wind resistance of the shingles. This should be installed before the shingles are applied.
Trim the Shingles
Once all of the shingles are installed, you’ll need to trim any excess material. This will ensure that the shingles fit snugly against the roof.

How to Ensure Proper Nailing and Sealing When Shingling a Roof
In order to ensure a successful shingling job, it’s important to pay close attention to the details. Here are some tips for ensuring proper nailing and sealing when shingling a roof:
Seal Around Holes and Penetrations
Make sure to seal around any holes or penetrations in the roof. This will help prevent water from leaking into the house.
Use Nails that are Long Enough
When installing the shingles, make sure to use nails that are long enough to penetrate the roof sheathing and secure the shingles in place. According to Family Handyman, “use 11/4-in. roofing nails driven through the shingle and into the roof sheathing.”
Place Nails at the Right Intervals
Finally, make sure to place the roofing nails at the correct intervals. According to This Old House, “for most asphalt shingles, drive nails 6 inches above the offset and 12 inches above the butt edge of each shingle.”

The Benefits of Shingling a Roof
Shingling a roof has many benefits, including increased durability, improved curb appeal, and added protection from the elements. Here are some of the advantages of shingling a roof:
Increased Durability
Shingling a roof will increase its durability and help it withstand extreme weather conditions. Asphalt shingles are designed to be resistant to wind, rain, snow, and other elements.
Improved Curb Appeal
Shingling a roof can also improve the curb appeal of a home. Asphalt shingles come in a variety of colors and styles, so you can choose the one that best suits your home’s aesthetic.
Added Protection from the Elements
Finally, shingling a roof can provide added protection from the elements. Asphalt shingles are designed to be water-resistant, so they can help keep your home dry and free from water damage.
Conclusion
Shingling a roof is a major home improvement project that requires the right tools, knowledge, and skills. This article provided an overview of the steps involved in shingling a roof, from preparing the roof to finishing up. We also discussed the essential tools needed for the job, how to calculate the number of shingles needed for a roof, and tips for ensuring proper nailing and sealing when shingling a roof. Finally, we covered the benefits of shingling a roof.
With the right preparation and guidance, shingling a roof can be accomplished safely and efficiently. By following the steps outlined in this article, you’ll be well on your way to shingling a roof like a pro.
Final Thoughts
Shingling a roof is a big job, but with the right preparation and guidance, it can be done safely and efficiently. Remember to follow the steps outlined in this article, use the right tools, and consider the benefits of shingling a roof.
(Note: Is this article not meeting your expectations? Do you have knowledge or insights to share? Unlock new opportunities and expand your reach by joining our authors team. Click Registration to join us and share your expertise with our readers.)