Introduction
Needlepoint is an enjoyable and rewarding craft that dates back centuries. It’s easy to learn and can be done anywhere with just a few simple tools and supplies. Whether you’re looking for a hobby or want to create something special for your home, learning how to needlepoint can be both fun and satisfying.
Overview of Needlepoint
Needlepoint is a form of embroidery that uses a canvas fabric and yarn or thread to create intricate designs. The designs can be geometric, floral, abstract, or any other pattern imaginable. Needlepoint is a great way to relax and express yourself creatively. Plus, it’s portable so you can take it with you wherever you go.
Benefits of Needlepoint
There are many benefits to learning how to needlepoint. It’s a great way to de-stress after a long day and can help boost confidence as you hone your skills. Plus, you can use needlepoint to make beautiful pieces of art for your home or as gifts for friends and family. Learning how to needlepoint can also be a great way to connect with others who share your passion for this craft.
Gather the Tools and Supplies Needed for Needlepoint
The first step in learning how to needlepoint is to gather all the tools and supplies you will need. This includes needles, threads, fabrics, and stitching accessories.
Types of Needles
Needles come in a variety of sizes and styles, so choose one that is best suited for the type of project you are working on. For example, if you are making a large piece with thick fabric, you may need a longer needle with a larger eye. For more delicate projects, opt for a smaller needle.
Threads, Fabric, and Stitching Accessories
When it comes to threads and fabrics, there are endless options to choose from. You can find thread in a variety of colors, weights, and textures. When selecting fabric, look for a canvas that is sturdy enough to hold up to the weight of the thread. In addition to thread and fabric, you may also need additional items such as scissors, measuring tape, and a hoop or frame to help keep your work secure while stitching.

Learn the Basics of Needlepoint Stitches
Once you have gathered the tools and supplies needed for needlepoint, it’s time to learn the basics of needlepoint stitches. Although there are many different stitches used in needlepoint, the three most common are the cross-stitch, the backstitch, and the satin stitch.
Cross-Stitch
The cross-stitch is one of the most popular stitches used in needlepoint. To create a cross-stitch, you will make an “X” shape by looping the thread around two adjacent holes in the canvas fabric. This stitch can be used to create lines, shapes, and patterns.
Backstitch
The backstitch is another common needlepoint stitch. To create a backstitch, you will make a small line of stitches by looping the thread around each hole in the canvas fabric. This stitch is often used to add details to a design or to outline shapes.
Satin Stitch
The satin stitch is a decorative stitch used to create bolder edges and outlines. To create a satin stitch, you will make several small stitches in a row to fill in a space. This stitch is often used to add texture and color to a design.

Choose an Appropriate Needlepoint Pattern
Once you have mastered the basic stitches, it’s time to choose an appropriate needlepoint pattern. Patterns can be found online, in books, or even in magazines.
Selecting a Pattern
When selecting a pattern, consider the size, complexity, and colors of the pattern. If you are new to needlepoint, start with a simpler pattern with fewer colors. As you become more experienced, you can try more complex patterns and colors.
Where to Find Patterns
Patterns can be found in a variety of places. Many craft stores offer a selection of needlepoint patterns, as do online retailers such as Etsy and Amazon. You can also find free patterns online or create your own custom pattern.

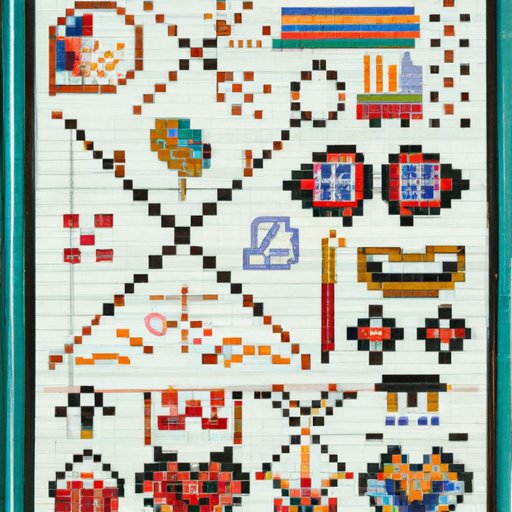
Understand How to Read a Needlepoint Chart
Once you have chosen a pattern, you will need to understand how to read a needlepoint chart. Charts provide instructions on what stitches to use and where to place them in order to create the desired design.
Symbols Used in the Chart
Charts use symbols to represent the different stitches. These symbols vary depending on the style of chart, but usually include the cross-stitch, backstitch, and satin stitch. Other symbols may also be used to indicate specific colors or types of thread.
Reading the Chart
To read a chart, start at the bottom left corner and work your way up and to the right. Each symbol indicates a specific stitch, and the number next to it indicates how many times to repeat that stitch. For example, a chart may have a symbol for a cross-stitch followed by the number 5, which means you should make five cross-stitches in the same spot.
Practice Needlepoint Techniques on a Sampler
Now that you understand the basics of needlepoint, it’s time to practice your skills. The best way to do this is to create a sampler. A sampler is a piece of fabric with a variety of different stitches and patterns that you can use to practice your skills.
Creating a Sampler
Creating a sampler is easy. All you need is a piece of canvas fabric, some thread, and a few basic stitches. Start by creating a grid of squares on the canvas. Then, practice the various stitches by filling in each square with a different stitch.
Basic Stitches Used in a Sampler
Common stitches used in a sampler include the cross-stitch, backstitch, and satin stitch. You can also practice more advanced stitches such as the French knot, lazy daisy, and bullion knot. As you practice, make sure to take notes so you can remember which stitches you used and how they were created.
Conclusion
Learning how to needlepoint can be a fun and rewarding experience. With the right tools, supplies, and knowledge, you can create beautiful works of art.
(Note: Is this article not meeting your expectations? Do you have knowledge or insights to share? Unlock new opportunities and expand your reach by joining our authors team. Click Registration to join us and share your expertise with our readers.)