Introduction
Growing your own herbs is a great way to add flavor and nutrition to your meals. It is also an enjoyable and rewarding hobby that can help bring you closer to nature. In this article, we’ll provide you with a step-by-step guide on how to start an herb garden in your backyard or balcony.

Research the Best Herbs to Grow in Your Area
The first step in starting an herb garden is to do some research. The best herbs for you to grow depend on the climate and soil type of your area. For example, Mediterranean herbs such as oregano, thyme, and rosemary are well-suited to warm, sunny climates while cooler climates may be better suited to herbs such as mint and parsley.
When selecting herbs to grow, consider your personal preferences. Are there any particular herbs that you use frequently in your cooking? Do you want to grow herbs for medicinal purposes? Think about how much space you have available for your garden and how much time you can devote to it.

Choose a Location for Your Garden
The next step is to find the right spot for your garden. Most herbs prefer full sun, so choose a spot that gets at least 6 hours of direct sunlight per day. If you don’t have an outdoor space, many herbs can be grown indoors in pots or window boxes.
When selecting a location, consider the amount of space you have available and how much maintenance you’re willing to do. For example, if you live in a windy area, you may want to avoid exposed locations to protect your plants.

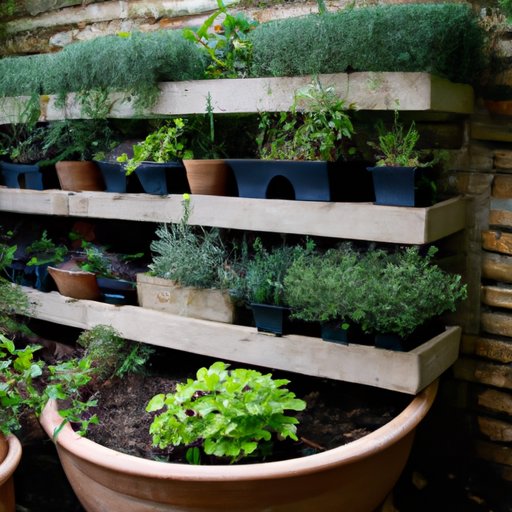
Select the Right Containers for Growing Herbs
Once you’ve chosen a location, it’s time to select the right containers for growing your herbs. There are many options available, including traditional clay pots, wooden planters, and even hanging baskets. When choosing containers, consider their size, drainage capabilities, and material.
Make sure your containers are large enough to accommodate the root systems of your herbs. They should also have drainage holes to prevent water from pooling around the roots. Avoid using plastic containers as they tend to retain too much moisture.
Prepare the Soil for Planting
The next step is to prepare the soil for planting. Start by removing any weeds and rocks from the soil. Then add organic matter such as compost or aged manure to improve the soil’s structure and increase its nutrient content. Finally, mix in a slow-release fertilizer to ensure your herbs receive all the nutrients they need.
A study published in the journal Horticulture Research found that adding organic matter to soil can significantly improve the growth and yield of herbs. The researchers concluded that “the addition of organic matter is an effective way to improve the growth and yield of herbs.”
Plant Your Herbs with Care
Now it’s time to start planting your herbs! Make sure to read the instructions on the seed packets or plant tags carefully. For most herbs, you should plant them at the same depth as they were in their original containers. Water the soil thoroughly before planting and water again after planting to ensure the soil is moist.
Be careful not to overcrowd your herbs. Planting them too close together can lead to problems such as disease and pests. If you’re planting multiple herbs in one container, make sure to leave enough space between them.
Water and Fertilize Your Herbs Regularly
Once your herbs are planted, it’s important to water and fertilize them regularly. How often you need to water and fertilize depends on the type of herb and the weather conditions. Generally speaking, herbs should be watered once or twice a week and fertilized every two weeks.
Look for signs that your herbs need more or less water or fertilizer. Wilting leaves or yellowing leaves can indicate that your herbs need more water, while yellowing or curling leaves can indicate that they need more fertilizer.

Harvest and Use Your Herbs
When your herbs are ready for harvesting, it’s time to start enjoying the fruits of your labor! The best time to harvest herbs is in the morning when the essential oils are at their peak. Cut the stems just above a pair of leaves and store the herbs in a cool, dry place.
Fresh herbs can be used in a variety of dishes, from salads to sauces. If you have a surplus of herbs, you can dry them for later use. To do this, hang the herbs upside down in a dark, airy place until the leaves are completely dry. Once dry, store the herbs in an airtight container for up to one year.
Conclusion
Starting your own herb garden is a fun and rewarding experience. With some research, the right location and containers, and proper care, you can enjoy fresh herbs all year round. Not only will your garden look beautiful, but you’ll also be able to add flavor and nutrition to your favorite dishes.
(Note: Is this article not meeting your expectations? Do you have knowledge or insights to share? Unlock new opportunities and expand your reach by joining our authors team. Click Registration to join us and share your expertise with our readers.)