Introduction
Starting a water heater can be an intimidating task for those who are unfamiliar with the process. There are several steps that must be taken in order to ensure that the water heater is installed safely and correctly. This article will provide a comprehensive guide on how to start a water heater and the precautions that must be taken in order to ensure that it is done properly.
Gather the Necessary Tools and Supplies
The first step in starting a water heater is to gather the necessary tools and supplies. Depending on the type of water heater being installed, the tools and supplies required may vary. Generally speaking, however, the following items are required: a wrench set, screwdriver set, plumber’s tape, pipe joint compound, and a level. These items can typically be found at any home improvement store.
Read the Manufacturer’s Instructions
Once the necessary tools and supplies have been gathered, the next step is to read the manufacturer’s instructions. It is important to read the instructions carefully and thoroughly in order to understand the specific steps that must be taken. Additionally, it is important to pay close attention to any safety warnings or cautions that may be included in the instructions.
Check for Gas Leaks
Before proceeding with the installation of the water heater, it is important to check for any possible gas leaks. To do this, turn off the main gas valve and then use a soap and water solution to check all of the connections for bubbles. If any bubbles are detected, it is important to take appropriate action to repair the leak before proceeding further.
Ensure Proper Ventilation
It is also important to ensure that there is adequate ventilation for the water heater. Without proper ventilation, the water heater may not function properly and could even become a fire hazard if not vented properly. The manufacturer’s instructions should include information on the type of ventilation required and where it should be installed.
Turn Off Electrical Power
To prevent any potential electrical shock, it is important to turn off the electrical power to the water heater before beginning the installation. The main switch can typically be located near the water heater. Once the power has been disconnected, it is safe to proceed with the installation.
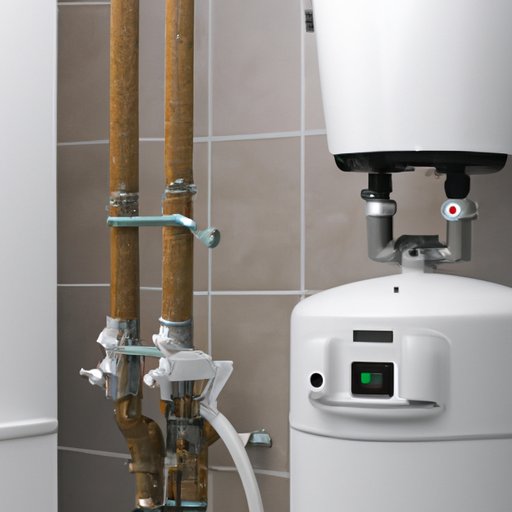
Connect the Water Supply
The next step is to connect the water supply to the water heater. This typically involves assembling various parts and securing the connections with plumber’s tape and pipe joint compound. Once the connections have been made, it is important to test them for leaks.
Ignite the Pilot Light
The final step in starting a water heater is to ignite the pilot light. Typically, the pilot light can be located at the bottom of the water heater. Once the pilot light is lit, the water heater should be ready for use.
Conclusion
Starting a water heater can seem like a daunting task, but by following the steps outlined in this article, the process can be completed safely and successfully. It is important to make sure that all of the necessary tools and supplies are gathered, the manufacturer’s instructions are read and followed, and all safety precautions are taken into account. Additionally, it is important to check for gas leaks, ensure proper ventilation, turn off the electrical power, connect the water supply, and ignite the pilot light. By following these steps, the water heater should be ready for use.
(Note: Is this article not meeting your expectations? Do you have knowledge or insights to share? Unlock new opportunities and expand your reach by joining our authors team. Click Registration to join us and share your expertise with our readers.)