Introduction
Setting up photography lights can seem intimidating, but with a bit of practice and knowledge, it can be a straightforward process. This article will provide an overview of the basics of lighting for photography, discuss different light sources and their benefits, explain how to set up your lights for the best results, demonstrate how to position your lights for the most flattering look, show how to diffuse light for a softer appearance, discuss how to use reflectors to control natural light, and share tips on how to troubleshoot common lighting problems.
Explain the Basics of Lighting for Photography
In order to understand how to set up photography lights, it’s important to have a basic understanding of the fundamentals of lighting. There are three main types of lighting: natural, continuous, and flash/strobe. Natural light is sunlight or moonlight, while continuous light is any type of light that stays constant, such as fluorescent or LED. Flash/strobe lights are used to create dramatic effects, like freezing motion or creating shadows.
Light also has certain qualities, such as intensity, direction, and color temperature. Intensity refers to the brightness of the light, while direction is the angle at which the light is hitting the subject. Color temperature is measured in Kelvin (K) and determines how “warm” or “cool” the light appears. Warmer tones appear more yellow or orange, while cooler tones appear more blue or green.

Discuss Different Light Sources and Their Benefits
Now that you understand the basics of lighting for photography, let’s discuss the different types of light sources and their benefits. Natural light is often the easiest to work with, as it is readily available and usually free. However, it can be difficult to control and may not be available at all times of day. Continuous lights are great for beginners, as they are relatively inexpensive and easy to use. They also offer more control over the direction and quality of light.
Flash/strobe lights are more expensive than continuous lights, but they offer more power and flexibility. These lights can be used to freeze motion, create dramatic shadows, and add atmosphere to a shot. Additionally, some flash/strobe lights can be triggered remotely, allowing the photographer to take photos from a distance.
Describe How to Set Up Your Lights for the Best Results
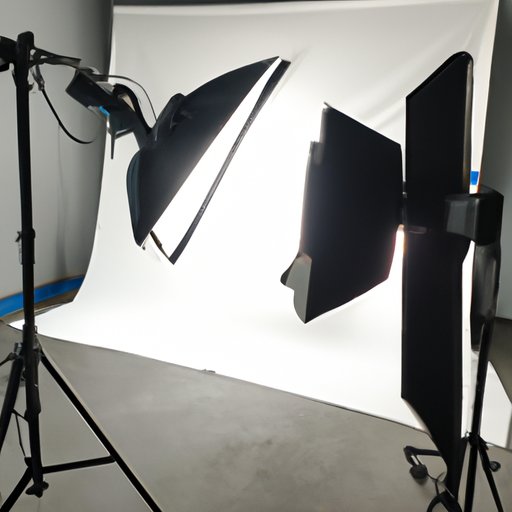
Once you’ve chosen the right light source, it’s time to set up your lights for the best results. To achieve the desired effect, you’ll need to choose the right light modifiers, such as softboxes, umbrellas, and reflectors. Softboxes are great for creating a soft, even light, while umbrellas can be used to bounce light off of the ceiling or walls. Reflectors are great for controlling and directing natural light.
When setting up your lights, it’s important to consider the direction, intensity, and color temperature of the light. You can use a light meter to measure the intensity of the light, and use gels to alter the color temperature if needed. Additionally, it’s helpful to create a lighting diagram that shows where each light is positioned and what type of modifier is being used.

Demonstrate How to Position Your Lights for the Most Flattering Look
Once you’ve set up your lights, it’s time to position them for the most flattering look. The most common technique is to use three lights: a key light, a fill light, and a background light. The key light is the main light and should be positioned at a 45-degree angle to the subject. The fill light should be placed opposite the key light to fill in shadows and soften the overall look. The background light should be placed behind the subject to create a sense of depth.
Show How to Diffuse Light for a Softer Appearance
Diffusing light is a great way to create a softer, more flattering look. Softboxes are great for diffusing light, as they help to evenly spread the light across the subject. Umbrellas are another option, as they can be used to bounce the light off of the ceiling or walls. Reflectors can also be used to bounce light onto the subject, creating a softer, more even light.

Discuss How to Use Reflectors to Control Natural Light
Reflectors are a great tool for controlling natural light. They can be used to fill in shadows and balance the light, creating a more even exposure. White reflectors are best for filling in shadows, while silver reflectors are best for balancing light. Additionally, black reflectors can be used to reduce glare and add contrast to a shot.

Share Tips on How to Troubleshoot Common Lighting Problems
Despite your best efforts, there may be times when you encounter lighting problems. If you find that your images are too dark or too bright, it could be an issue with exposure. In this case, try adjusting the power levels of your lights. If you’re having trouble with the color of your images, it could be due to an incorrect white balance setting or an issue with the color temperature of your lights. If you’re having trouble with your light modifiers, make sure they are securely mounted and properly positioned.
Conclusion
Setting up photography lights can be a daunting task, but with a bit of practice and knowledge, it can be a straightforward process. In this article, we discussed the basics of lighting for photography, different light sources and their benefits, how to set up your lights for the best results, how to position your lights for the most flattering look, how to diffuse light for a softer appearance, how to use reflectors to control natural light, and tips on how to troubleshoot common lighting problems.
If you’d like to learn more about lighting for photography, we recommend checking out online resources such as B&H Photo and Video, Fstoppers, and CreativeLive. With the help of these resources and the information in this article, you’ll be able to confidently set up your lights and create beautiful images.
(Note: Is this article not meeting your expectations? Do you have knowledge or insights to share? Unlock new opportunities and expand your reach by joining our authors team. Click Registration to join us and share your expertise with our readers.)