I. Introduction
Replacing a car starter is a task that many car owners may find intimidating and opt to have a professional handle. However, with the right knowledge and tools, replacing a car starter can be a manageable DIY project. This article aims to guide car owners through the process of replacing a car starter, providing step-by-step instructions, troubleshooting tips, and highlighting the benefits of doing it themselves. Whether you are a car enthusiast or simply looking to save some money, this article is for you.
II. Common Signs of a Failing Starter
Before diving into the replacement process, it’s essential to identify whether your car starter is indeed the problem. There are a few common signs that indicate a failing starter:
- Grinding noises: If you hear a grinding noise when starting your car, it may be due to worn-out gears in the starter. This is a clear indication that the starter needs to be replaced.
- Slow engine cranking: If your engine cranks slowly or takes longer than usual to start, it could be a sign of a weak starter motor. This can be caused by a variety of factors, including a failing starter.
- Engine not starting at all: If your car doesn’t start at all, even after multiple attempts, it is likely a problem with the starter. Of course, it’s essential to rule out other potential issues such as a dead battery or faulty ignition switch.
It’s important to note that these symptoms could also be caused by other components in the car’s electrical system. If you experience any of these signs, it’s recommended to consult a mechanic to diagnose the issue accurately.
III. Tools and Equipment Needed
Before embarking on the car starter replacement process, it’s crucial to gather the necessary tools and equipment. Having the right tools not only makes the replacement process smoother but also ensures the job is done correctly and safely. Here are the essential tools and equipment you’ll need:
- Wrenches and sockets: These tools will be required to loosen and tighten bolts and nuts during the replacement process. Make sure to have a variety of sizes to fit different parts of the car.
- Screwdrivers: Screwdrivers will be needed to remove screws and other fasteners holding various components in place.
- Jack and jack stands: These are necessary for lifting and supporting the car safely while working underneath it.
- Safety gear: It’s essential to protect yourself while working on your car. Wearing gloves, goggles, and other safety equipment will shield you from potential hazards.
Each tool serves a specific purpose in the replacement process. Wrenches and sockets ensure that nuts and bolts are properly tightened, while screwdrivers allow for the removal of various components. Jacks and jack stands provide stability and safety when working underneath the car. Safety gear is crucial to avoid any injuries that may occur during the process.
If you don’t have these tools readily available, they can usually be purchased or even rented from your local auto parts store. Some stores also offer tool rental programs, which can be cost-effective if you don’t plan on using the tools regularly.
IV. Step-by-Step Guide
Now that you have all the tools and equipment ready, let’s break down the process of replacing a car starter into step-by-step instructions:
- Disconnect the battery: Before starting any work on your car’s electrical system, it’s crucial to disconnect the battery. This step ensures your safety and prevents any accidental electrical damage.
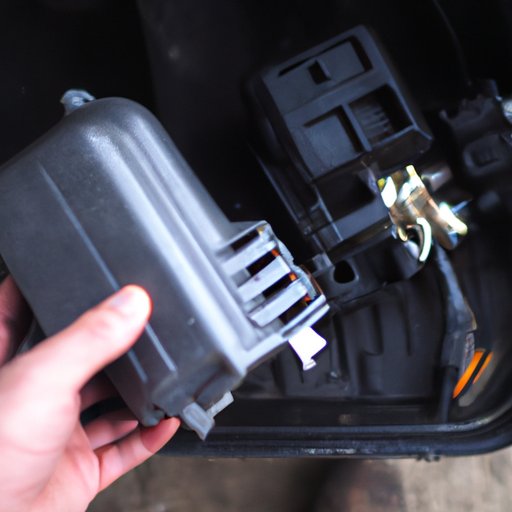
- Locate and remove the old starter: The starter is typically located near the bottom of the engine, attached to the transmission or engine block. Consult your car’s manual or online resources to locate the starter and remove any components obstructing access.
- Install the new starter: Carefully install the new starter and secure it in place using the appropriate bolts or fasteners. Make sure to connect any electrical connections that may be required for the starter to function correctly.
- Reconnect the battery: Once the new starter is securely in place, reconnect the battery by attaching the positive and negative terminals. Ensure the connections are tight and secure.
Following these steps will guide you through the process of replacing a car starter. It’s crucial to consult your car’s manual or online resources specific to your make and model to ensure accuracy throughout the replacement process.
V. Troubleshooting Tips
While replacing a car starter is generally a straightforward process, it’s possible to encounter some challenges along the way. Here are a couple of common troubleshooting issues you may face:
- Difficulties with starter removal: Depending on your car’s make and model, accessing and removing the starter may require the removal of other components. If you encounter difficulties, refer to the car’s manual or online resources for guidance.
- Wiring complications: Sometimes, electrical connections can be tricky, leading to complications during installation. Double-check that all connections are secure and follow a wiring diagram if available.
If you encounter any problems during the replacement process, don’t hesitate to seek assistance from a professional or consult online forums where automotive enthusiasts and experts can provide guidance.
VI. Benefits of DIY Car Starter Replacement
Opting to replace your car starter yourself offers several advantages:
- Cost savings: Replacing a car starter yourself can save you a significant amount of money compared to hiring a mechanic. While the cost of the new starter may be comparable, the labor cost is eliminated.
- Time efficiency: When you take your car to a mechanic, you may have to wait for an available appointment and lose valuable time without your vehicle. Performing the replacement yourself allows you to get your car back on the road as soon as possible.
- Sense of accomplishment: Successfully replacing a car starter can provide a great sense of satisfaction and accomplishment. It allows you to take ownership of your vehicle’s maintenance and repairs.
To ensure a safe and effective replacement process:
- Safety precautions: Always prioritize safety by wearing appropriate safety gear and following proper procedures when working on your car.
- Double-checking connections: Take the time to double-check all connections and tighten all fasteners to avoid any issues that may arise from loose connections.
- Testing the new starter before completion: Before finalizing the replacement process, test the new starter to ensure it functions correctly. This will save you from potential issues after reassembling everything.
VII. Conclusion
Replacing a car starter may seem daunting at first, but with the right tools, knowledge, and careful execution, it can be successfully accomplished. This article has outlined the common signs of a failing starter, provided a list of necessary tools, offered a step-by-step guide, troubleshooting tips, and highlighted the benefits of doing it yourself.
By taking the initiative to replace your car starter, you can save money, time, and gain a sense of accomplishment in maintaining your vehicle. So, don’t hesitate to take action and confidently replace your car starter yourself.
(Note: Is this article not meeting your expectations? Do you have knowledge or insights to share? Unlock new opportunities and expand your reach by joining our authors team. Click Registration to join us and share your expertise with our readers.)