I. Introduction
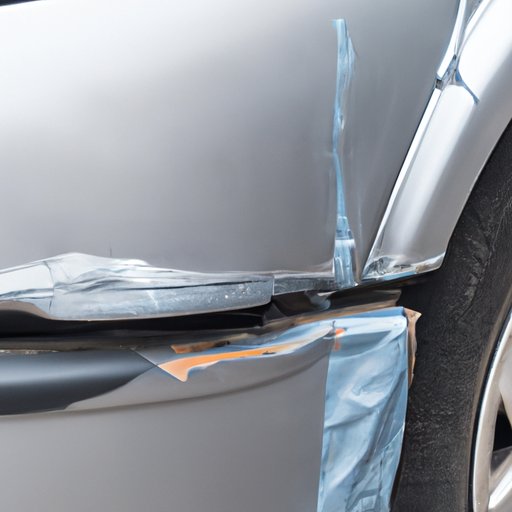
A car is more than just a machine; it is an essential part of our daily lives. It takes us to work, school, and everywhere in between. However, over time, scratches inevitably appear on our dear vehicles, which can be frustrating. Deep scratches, in particular, can be a nightmare for any car owner. Such scratches not only affect the appearance of the car but also decrease its resale value. In this article, we are providing the ultimate guide to fixing deep scratches on your car.
Fixing deep scratches at a car service center can be expensive. However, with some knowledge and guidance, it is completely possible to fix deep scratches at home. This article is designed to help you restore your car’s surface to like-new condition without spending hundreds of dollars.
II. The Ultimate Guide to Fixing Deep Scratches on Your Car: A Step-by-Step Approach
Here is our step-by-step guide to fix deep scratches on your car:
Step 1: Evaluate the Severity of the Scratch
The first step in repairing a deep scratch is evaluating its severity. If the scratch is too deep and exposes the metal, it is preferable to take your car to a professional. However, if the scratch is only on the surface, you can easily repair it yourself.
Step 2: Clean the Affected Area
Cleaning the affected area before repair is important. Use soap and water to clean the scratch, make sure it is free from dirt and debris. This step ensures that the repair will last longer.
Step 3: Sand the Scratch
To get a smooth and even surface, use a sandpaper or microfiber cloth and sand the affected area gently. Sand the area until the scratch is level to the rest of the car’s surface.
Step 4: Apply a Base Coat
You can buy a touch-up paint kit to match the color of your car. Apply this base coat to the sanded area and let it dry for a few hours.
Step 5: Apply a Clear Coat
Finally, apply a clear coat to the affected area to protect it and give it a glossy finish.
It’s essential to follow each step carefully to get the best results. However, this process does require precaution measures such as wearing gloves and not allowing the paint to get in your eyes or mouth.
III. DIY Car Scratch Repair: How to Restore Your Car’s Surface to Like-New Condition
Although the process mentioned above is easy, it requires specific tools to make it a success. Here are some basic tools that you will need for a DIY repair:
- Touch-up paint to match the car’s color
- Sandpaper or microfiber cloth
- A clear coat for the finish
- A brush or pen to apply the paint
- A primer if the scratch is too deep
Once you have collected the necessary equipment, you can start the repairing process by following these steps:
Step 1: Sand the Area
Use sandpaper gently, on the affected area to remove any rust or debris that may be covering the scratch. Be sure to use a fine-grit sandpaper to avoid further damage to the car’s surface.
Step 2: Clean the Area
Clean the area with soap and water and allow it to dry completely.
Step 3: Apply Filling Material
If the scratch is too deep and cannot be removed with sandpaper alone, use a filling material, usually found in your local auto body shop. Apply the filler gently to the affected area, avoiding the excess from spreading to other parts of the car.
Step 4: Sand the Area Again
Once the filling material has dried, use sandpaper to smoothen the surface. Make sure to sand the area until it is level with the rest of the car’s surface.
Step 5: Apply Paint
Once the scratch has been smoothened, choose a paint color that matches your car’s color and apply it to the affected area. If you are unsure about the color match, you can order a touch-up paint kit from your car’s dealer.
Step 6: Let it Dry
Once the paint has been applied, allow it to dry for a few hours and don’t let any debris or dust on it. Once the paint is dry, you can apply a clear coat to give it a glossy finish.
IV. Homemade Remedies for Deep Car Scratches: Save Hundreds on Auto Body Repair
There are also natural remedies that can be used to repair deep car scratches. They are affordable and easy to use. Here are some DIY tricks that you can try.
1. Toothpaste
Believe it or not, toothpaste is an excellent remedy for scratches. Clean the affected area, apply toothpaste to a microfiber cloth and gently rub it in a circular motion for a few minutes. Clean it with a damp cloth, and the scratches will disappear. Toothpaste acts as a gentle abrasive that removes dirt and debris and fills in the scratches.
2. Baking Soda
Baking soda is another easy remedy for scratches. Mix baking soda and water in equal parts to make a paste. Apply the paste to the scratched area and rub it gently for 10-15 minutes. Wipe the area clean with a damp cloth to remove the excess baking soda paste. Baking soda acts as filler material that can help eliminate scratches.
V. Easy Fixes for Deep Car Scratches: Tips and Tricks From the Pros
Professionals use various techniques to fix deep scratches that you can try at home.
1. Use Color-Coded Pens
You can purchase color-coded pens that match the color of your car. Apply the paint to the scratched area and let it dry naturally. If the scratch is too deep, you may need to apply multiple coats to level the surface.
2. Use Nail Polish
Women’s nail polish can also be a quick fix for light scratches. Choose a color that matches your car’s color and apply it to the affected area. Once it dries, apply a clear coat to protect the surface and give it a glossy finish.
VI. A Beginner’s Guide to Repairing Deep Scratches on Your Car: Achievable Solutions to Keep Your Car Looking Brand New
If you are a beginner and looking for easy-to-follow solutions, just follow these tips.
1. Clean the Affected Area
Clean the area with warm soapy water to remove dirt and debris. Rinse and dry the area before starting the repair process.
2. Apply a Primer
If the scratch is deep, apply a primer to the affected area to make the paint adhere evenly. Follow the manufacturer’s instructions and allow it to dry before proceeding.
3. Apply Touch-up Paint
Choose a color that matches your car’s color, and apply touch-up paint to the affected area. Use a small brush to apply it. Let it dry for a few hours and check if the color matches the rest of the car.
4. Apply a Clear Coat
Once the paint is dry, apply a clear coat to give it a glossy finish and protect the surface. Let it dry overnight before washing the car or exposing it to rain.
VII. Top 5 Ways to Repair Deep Scratches on Your Car: Affordable and Effective Techniques for DIY Auto Repairs
Here are our top 5 ways to fix deep car scratches at home:
1. Touch-up Paint Kit
A touch-up paint kit is an affordable and easy solution to fix deep scratches. Choose a color that matches your car’s color and follow the instructions provided in the kit to repair the scratches.
2. Filling Material
If the scratch is too deep, you can fill the area with filler materials to even out the surface. Follow the manufacturer’s instructions carefully and use a sandpaper to smoothen the surface.
3. DIY Remedies
You can try natural remedies like toothpaste, baking soda, or nail polish to fix a light scratch at home. These remedies can be a quick fix and save you money in repairs.
4. Color-Coded Pens
You can purchase a color-coded pen that matches your car’s color and use it to fill in the scratches. Apply multiple coats if necessary and let it dry for a few hours.
5. Seek Professional Help
If you are not confident in your repairing skills, you can always seek professional help. If the scratch is too deep or extensive, it is better to take your car to a professional for repair.
VIII. Conclusion
Deep scratches can be frustrating for any car owner, but it is essential to fix them promptly to maintain the car’s original condition. We have provided several solutions to fix deep scratches, from affordable DIY remedies to professional repair services. Each method has its own pros and cons, so pick the one that suits you best. It is always better to follow precaution measures while repairing your car. We hope our guide will help you restore your car’s surface to like-new condition and save you money in repairs.
(Note: Is this article not meeting your expectations? Do you have knowledge or insights to share? Unlock new opportunities and expand your reach by joining our authors team. Click Registration to join us and share your expertise with our readers.)