I. Introduction
If you have a car, you know how important it is to keep it looking good. Repainting your car hood is one way to give your vehicle a fresh new look. This article aims to provide you with a comprehensive guide on how to repaint an entire car hood at home. Whether you’re a car owner or a DIY enthusiast, this guide is for you. Here are the topics we will be covering:
- Why it’s necessary to repaint a car hood and the benefits of doing it
- List and describe all the necessary tools and materials needed for repainting
- Discuss safety precautions that should be followed when repainting
- Provide a detailed step-by-step guide on how to repaint a car hood at home
- Discuss tips and advice on the order of tasks, spray painting techniques, etc.
- FAQs on repainting a car hood
- Pro tips for achieving professional-looking results
- Before and after showcase for inspiration
- DIY vs. professional: the pros and cons
II. Step-by-step guide
Before repainting your car hood, there are some important steps you need to follow to ensure a successful outcome. Here are the necessary steps:
1. Why is it necessary to repaint a car hood?
There are several reasons why you might need to repaint your car hood:
- Old or faded paint
- Scratches and chips
- Rust or corrosion
- Customization purposes
Repainting your car hood not only improves its appearance but also protects it from environmental damage.
2. Necessary tools and materials
Before you begin repainting a car hood, you must gather the following tools and materials:
- Paint sprayer or spray can
- Air compressor
- Sandpaper (220, 400, 600 grit)
- Masking tape and newspaper or plastic sheeting
- Spray gun cleaner
- Primer and paint
- Respirator or mask
- Safety glasses
- Gloves
3. Safety precautions
When repainting a car hood, it’s essential to follow safety precautions to avoid any accidents or harm to your health. Here are some safety tips:
- Wear protective gloves, a respirator or mask, and safety glasses while sanding or painting
- Work in a well-ventilated area to prevent inhalation of harmful fumes
- Avoid smoking, eating, or drinking in the working area
- Keep the working area clean and well-organized
- Unplug the power supply before dismantling any component of the car
4. Step-by-step guide on how to repaint a car hood at home
Here’s how to repaint a car hood:
- Prepare the car hood: First, remove any hardware or decals on the hood that may interfere with the repainting process. Clean the hood and sand it with 220-grit sandpaper to remove contaminants and rough up the surface to make primer adhesion easier. Once you are done, use a 400-grit sandpaper to smooth out any roughness. Rinse off the hood with water to remove dirt and debris and then dry it with a clean cloth.
- Apply masking tape: Apply masking tape and newspaper or plastic sheeting to the areas around the hood to protect them from overspray.
- Apply primer: Apply a coat of primer to the entire hood surface and let it dry. Make sure you follow the manufacturer’s instructions for the drying time.
- Sand the primer: Once the primer is dry, sand the hood surface with 600-grit sandpaper to smoothen it out.
- Apply the base coat: Mix the paint according to the instructions provided by the manufacturer. Apply the base coat by using the paint sprayer to the entire hood surface. Apply two to three layers of coat with a waiting time of 10-15 minutes in between coats.
- Apply the clear coat: After the base coat is dry, it’s time to apply the clear coat. This coat will protect the base coat from environmental damage. Apply two to three layers of clear coat in the same manner as the base coat. Let the coat dry as per the manufacturer’s instruction.
- Remove the masking tape: Once the clear coat is dry, remove the masking tape from the surrounding areas of the hood.
5. Tips and advice
When painting a car hood, the following tips and advice can help you to achieve the best possible outcome:
- Apply the primer and paint thinly
- Don’t forget to wear gloves and safety glasses
- Make sure the car hood is cleaned adequately before you start painting
- Work in a well-ventilated area
- Use a paint gun instead of a spray can as it provides better control and coverage
- Apply even coats and wait for the necessary time before applying another coat
III. Video tutorial
For an even better tutorial, a visual tutorial is an excellent way to learn and get a better understanding of the process. Here’s an excellent video tutorial from the popular YouTube channel ChrisFix that demonstrates how to repaint a car hood at home.
IV. FAQs
Here are some frequently asked questions about repainting a car hood:
1. What type of paint should I use?
The type of paint you use depends on your car’s model, make, and year. It’s best to check your car’s manual or consult with an expert to determine the best paint for your car hood.
2. How long does it take to dry?
The drying time depends on the manufacturer’s instructions and conditions such as humidity and temperature. It can take anywhere from an hour to a day for the paint to dry completely.
3. How often should I repaint my car hood?
Repainting your car hood depends on a lot of factors, including the quality of the paint, the weather, and how often you drive your car. Typically, a car’s paint job lasts seven to ten years before showing signs of fading or damage.
V. Pro tips
Here are some pro tips for achieving professional-looking results:
- Start with a coat of self-etching primer
- Use a high-quality paint sprayer and paint that’s specifically designed for automotive use
- Use a foam roller to avoid drips and ensure smooth paint application
- For even application, maintain a consistent distance between the paint sprayer and the hood surface
- Allow enough time for each coat to dry completely before applying the next one
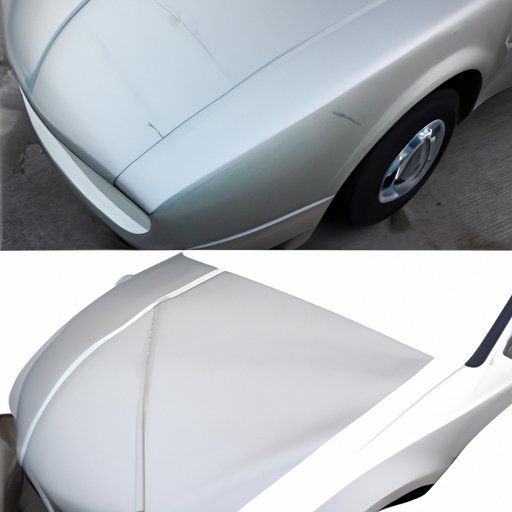
VI. Before and after showcase
Check out these incredible before-and-after photos that showcase the transformation of a car hood from old and worn-out to fresh and stylish. These photos provide inspiration for those who want to repaint their car hood and see the potential difference it could make:

VII. DIY vs. professional
Now that you know the process of repainting a car hood, you may be wondering whether it’s worth doing it yourself or hiring a professional. Here’s a comparison between DIY and professional car hood repainting:
DIY
- Less expensive than hiring a professional
- Provide satisfaction in doing it yourself
- More time-consuming as you need to research and gather all the materials
- Not recommended for high-end vehicles or difficult repairs.
Professional
- Provide a faster, more polished result
- Reliable and high quality, often comes with a warranty
- Expensive, with an average cost starting at $2000 depending on the level of work that needs to be done
- Might require more extended periods of time.
If you have the necessary skills and enjoy what you do, DIY is a great way to repaint your car hood. However, if you want a professional-looking result or don’t have the necessary time and effort, hiring a professional is also a good option.
VIII. Conclusion
Repainting your car hood can seem like a daunting task, but with the right tools, materials, and technique, it’s a task that many people find to be rewarding. We hope this guide has helped to show you how to repaint an entire car hood at home. Whether you decide to DIY or hire a professional, the most important thing is to make sure you’re happy with the results and have an automobile that looks just the way you want it to!
Don’t forget to share your experiences and provide feedback.
(Note: Is this article not meeting your expectations? Do you have knowledge or insights to share? Unlock new opportunities and expand your reach by joining our authors team. Click Registration to join us and share your expertise with our readers.)