Introduction
If you own a car, you are likely to experience the annoyance and frustration of scratches on your vehicle’s paint job. From minor blemishes to deep gouges, scratches can be a real eyesore. The good news is that you don’t have to spend a fortune on professional repairs. In this article, we will guide you through 5 simple DIY methods to remove car scratches at home.
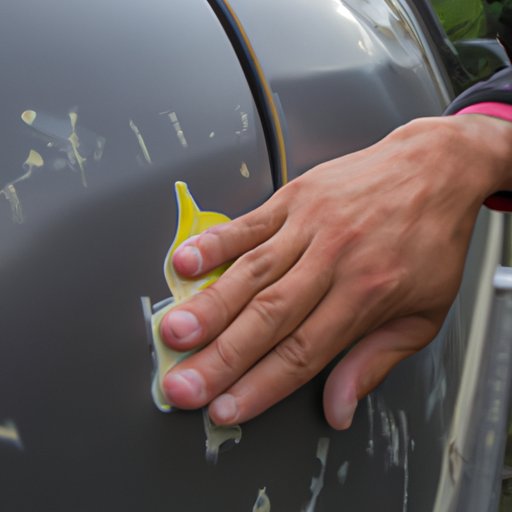
5 Simple DIY Methods to Remove Car Scratches at Home
Method 1: Toothpaste
Believe it or not, toothpaste can be used to remove light scratches on your car. Here’s how:
1. Start by cleaning the scratched surface with soap and water.
2. Squeeze a small amount of toothpaste onto a damp microfiber cloth.
3. Rub the toothpaste onto the scratched surface in circular motions for several minutes.
4. Rinse the area with water and dry with a clean cloth.
5. Repeat the process until the scratch is no longer visible.
Method 2: Baking Soda
Baking soda is known for its versatility when it comes to cleaning, and it works great for removing light scratches. Here is how you can use it:
1. Mix 2 parts baking soda with 1 part water to create a paste.
2. Apply the paste to the scratched area and rub it in gently with a microfiber cloth.
3. Wipe the area clean with a damp cloth and dry with a clean towel.
4. Reapply the paste if necessary until the scratch is no longer visible.
Method 3: Nail Polish
Nail polish can be used to fill in and hide small scratches. Here’s how to use it:
1. Clean the scratched area and dry it with a clean cloth.
2. Choose a nail polish that matches the color of your car.
3. Apply a small amount of nail polish directly onto the scratch.
4. Use a toothpick to spread the nail polish evenly over the scratch.
5. Allow the nail polish to dry completely before wiping away any excess with a microfiber cloth.
Method 4: Sandpaper and Polish
For deeper scratches, you can use sandpaper and polish to remove them. Here’s how:
1. Clean the scratched area and dry it with a clean towel.
2. Choose sandpaper with a grit that matches the depth of the scratch.
3. Sand the scratched area gently in the direction of the scratch.
4. Repeat this process with sandpaper of increasingly finer grits until the scratch is no longer visible.
5. Apply a small amount of polish to a microfiber cloth and buff the area until it shines.
Method 5: Scratch Removal Products
You can also use scratch removal products designed specifically for car scratches. Here’s how:
1. Choose a scratch removal product that matches the depth of the scratch.
2. Clean the scratched area and follow the product’s instructions carefully.
3. Rub the product onto the scratched area in circular motions for several minutes.
4. Wipe the area clean with a microfiber cloth and inspect for any remaining scratches.
5. Reapply the product if necessary until the scratch is gone.
How to Fix Car Scratches Without Spending a Fortune
Professional repairs for car scratches can be expensive, depending on the severity of the damage. However, there are DIY methods to save money!
Why Professional Repair Can be Expensive
Professional repair shops charge not only for labor but also for the materials used in the repair process, which can add up quickly, especially for severe damage. Additionally, the repair process may require specialized equipment, adding to the cost.
DIY Methods to Save Money
Using household materials, such as toothpaste and nail polish, can be a cost-effective solution. Scratch removal products are also a relatively inexpensive alternative to professional repair.
The Ultimate Guide to Getting Rid of Car Scratches at Home
Detailed Steps for Each DIY Method
We have already discussed the steps for each DIY method, but as a recap, they are as follows:
– Toothpaste: Clean, apply toothpaste, rub, rinse, and dry. Repeat until scratch is gone.
– Baking Soda: Mix with water, apply, rub, wipe clean, and dry. Reapply until scratch is gone.
– Nail Polish: Clean, apply polish, spread with toothpick, let dry, and wipe away excess.
– Sandpaper and Polish: Clean, sand in direction of scratch with progressively finer grits, apply polish, and buff.
– Scratch Removal Products: Clean, follow product instructions, rub, wipe, inspect, and reapply if necessary.
Recommendation for Which Method to Use Based on Scratch Severity
For light scratches, toothpaste and baking soda are great options. For slightly deeper scratches, try nail polish or scratch removal products. For the deepest scratches, sandpaper and polish may be necessary.
Save Money with These Home Remedies for Car Scratches
Overview of Cost Savings Through DIY Methods
As previously noted, DIY methods can save a significant amount of money compared to professional repairs.
Comparison of the Cost of Professional Repair vs. DIY
Professional repairs can cost anywhere from a few hundred to a few thousand dollars, depending on the damage. By contrast, using household materials can often cost less than $20.
Top 6 Tricks for Removing Scratches on Your Car Paintjob
Overview of Additional Methods and Tricks
In addition to the 5 DIY methods we’ve already discussed, there are a few additional tricks you can try:
– Use a scratch-removing pen to fill in small scratches.
– Apply a cutting compound to the scratch.
– Buff the scratch with toothpaste and a cloth.
– Add heat and pressure to the scratch with a hairdryer and cloth.
– Apply a gel coat to the scratch.
Explanation of How They Work and When to Use Them
These tricks essentially follow the same principles as the DIY methods. They can work well for small to medium-sized scratches. However, for deeper scratches, the 5 DIY methods we’ve outlined above will be more effective.
DIY Car Scratch Removal – Step-by-Step Guide with Common Household Items
Detailed Step-by-Step Guide for the Most Effective DIY Method
The most effective DIY method is using scratch removal products. Here is a step-by-step guide for using them with household items:
1. Clean the scratched area with soap and water.
2. Tape off the scratched area to prevent stray product application.
3. Apply a small amount of baking soda to a damp cloth and rub it gently into the scratch.
4. Apply scratch removal product according to the instructions carefully.
5. Rub the product onto the scratched area with a microfiber cloth in circular motions.
6. Wipe the area clean with the cloth and inspect for any remaining scratches.
7. Reapply the product if necessary until the scratch is gone.
Explanation of the Required Household Items and Their Specific Purposes
The household items required for this method are baking soda and a microfiber cloth. The baking soda is used in conjunction with the scratch removal product to create a more abrasive effect, helping to remove deeper scratches.
Conclusion
Car scratches are a common annoyance, but with these 5 simple DIY methods and additional tricks, you can easily remove them at home without breaking the bank. Remember to follow the instructions carefully and be patient.
(Note: Is this article not meeting your expectations? Do you have knowledge or insights to share? Unlock new opportunities and expand your reach by joining our authors team. Click Registration to join us and share your expertise with our readers.)