
Introduction
Car dents are a common problem that can occur from time to time; even the most careful drivers can end up with a bumper dent. Whether it’s from a minor fender bender or backing into a pole, a dent on your car can be an eyesore, and you may be looking for ways to remove the dents. In this article, we will discuss 7 easy methods on how to remove dents from car bumpers at your home.
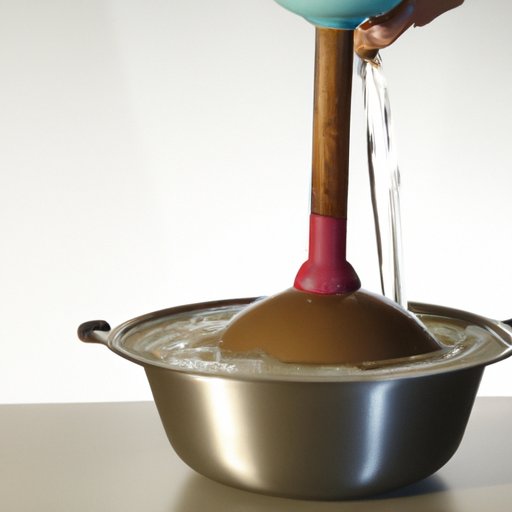
Method 1: Use Boiling Water and a Plunger
The first method is one of the most common and easiest ways to remove dents from car bumpers. Here are the steps you need to follow:
- Boil a pot of water and pour it over the dent.
- Immediately place the plunger over the dent and press down firmly.
- With force, pull the plunger back towards you. Repeat this process until the dent pops out.
- If the plunger doesn’t work, try using a larger or smaller plunger.
- Be careful not to use too much force, as it can cause more damage to the bumper.
Method 2: Use a Vacuum Cleaner and Bucket
The second method requires a vacuum cleaner and a bucket of water. Follow these steps to remove a dent from the bumper:
- Make a small hole in the bottom of the bucket.
- Place the bucket upside down on the dent and press down firmly to create a seal.
- Insert the hose of the vacuum cleaner into the hole and turn it on.
- Allow the vacuum to run for about three minutes, and the dent will pop out.
- Make sure that the vacuum cleaner is set to its highest suction power to achieve better results.
- After completing the process, pour hot water over the affected area to remove any leftover marks.
Method 3: Use a Hair Dryer and Compressed Air
The third method involves the use of heat and cold air. Here are the steps you need to follow:
- Use a hairdryer to heat the dent for about two minutes until it becomes warm.
- Turn the hairdryer off and quickly spray compressed air onto the dent for about 20 to 30 seconds.
- As the bumper expands due to the heat, spraying the compressed air will cause it to contract and “pop” the dent away.
- Be careful not to hold the compressed air can too close to the bumper, as it can cause the paint to crack.
- You may need to repeat this process a few times to fix the dent completely.
Method 4: Use Dry Ice and a Hair Dryer
The fourth method is similar to the third method, but instead of compressed air, you will use dry ice. Here are the steps you need to follow:
- Wear hand gloves while handling dry ice.
- Rub the dry ice on the dent for a few seconds until the area becomes extremely cold.
- Use a hairdryer to heat the area for about two minutes.
- As in the third method, the bumper will expand due to the heat, and as it contracts from the cold, the dent will pop back into place.
- Repeat this process a few times until the bumper is nearly back to its original shape.
Method 5: Use a Plunger and Hot/Cold Water
The fifth method is nearly similar to the first one, but you will be using hot and cold water. Here are the steps you need to follow:
- Wash the affected area with hot soapy water and then rinse it with cold water.
- Place the plunger over the dent and press it down firmly.
- With force, pull the plunger back towards you in a straight, constant motion.
- Combine hot and cold water to create steam, and pour it over the dent. This process will cause the metal to expand, and the plummeting temperatures created by the cold water will contract, pulling the dent out.
- You may need to repeat the process a few times, but be careful not to overdo it.
Method 6: Use a Hammer and Wooden Block
The sixth method is a bit more manual, and it involves using a hammer and wooden block. Here are the steps:
- Place a block of wood on the inside of the bumper, directly behind the dent.
- With the help of a rubber mallet or hammer, gently tap the dent until it begins to even out.
- Use the wooden block to distribute the force of the hammer blow and protect the bumper’s paint.
- You may need to repeat the process several times with different-sized blocks depending on the size and depth of the dent.
Method 7: Use a Dent Removal Tool
The seventh method involves using a dent removal tool, which can be purchased online. Here are the steps to follow:
- Choose a dent removal tool that is appropriate for the size and location of the dent on your car.
- Insert the tool’s adhesive release agent into the dent removal tool kit and apply it to the glue tabs.
- Attach the glue tabs to the spots on the dented portion of the bumper.
- When the adhesive dries, pull the tabs carefully until the dent pops out of the bumper.
- Once the dent is removed, gently scrape or peel the adhesive residue from the bumper to clean it up completely.
Conclusion
Removing dents from a car bumper doesn’t have to be expensive or complicated. Using the above seven methods, you can fix car dents at home without having to take it to a repair shop. However, these methods should be used carefully and with caution, following the provided instructions, to avoid causing any additional damage to your car. We encourage you to give one or more of these methods a try to improve the appearance of your vehicle.
(Note: Is this article not meeting your expectations? Do you have knowledge or insights to share? Unlock new opportunities and expand your reach by joining our authors team. Click Registration to join us and share your expertise with our readers.)