I. Introduction
As a car owner, you’re likely no stranger to the wear and tear that comes with everyday driving. Whether it’s scratches, swirl marks, or fading paint, your car’s exterior can take a beating over time. Fortunately, re-polishing your car can give it a much-needed refresh and help it maintain a showroom-quality finish for years to come. In this article, we’ll show you how to re-polish your car at home using simple DIY techniques.
II. DIY Car Detailing: How to Re-Polish Your Car at Home
Before diving into the specifics of re-polishing your car, it’s important to note the significance of proper preparation. Failing to prepare adequately can lead to subpar results and even damage your car’s finish. Additionally, you’ll need some necessary tools and products to get the job done right.
A. Importance of Proper Preparation Before Polishing
The first step in re-polishing your car is to ensure it’s clean and free of any debris or contaminants. Thoroughly washing and drying your car removes any dirt, grime, or bird droppings that may interfere with your polishing efforts. It’s also important to park your car in a cool, shaded area to prevent the sun from drying out your cleaning solution too quickly and leaving behind unsightly residues.
B. Necessary Tools and Products
You’ll need a few tools and products to get started, including:
- Two buckets
- Car wash soap
- Microfiber wash mitt
- Microfiber drying towel
- Scratch remover
- Polishing compound
- Polishing pad
- Electric buffer
- Sealant or wax
C. Step-by-step Instructions for Re-polishing Your Car at Home
Now that you have your tools and products ready, follow these simple steps to re-polish your car at home:
III. 5 Simple Steps to Re-Polish Your Car like a Pro
A. Overview of the 5 Steps
To make the process easier, we’ve broken it down into five simple steps:
- Wash and dry your car
- Removing scratches and swirl marks
- Applying compound and polish
- Buffing the surface with a buffer
- Protecting the finish with a sealant or wax
B. Details of Each Step
1. Washing and Drying Your Car
Fill one of your buckets with soapy water and the other with clear water. Using the microfiber wash mitt, thoroughly wash your car section by section, rinsing after each area. Don’t forget to wash the wheels and tires, too. Once you’re done, dry your car completely with the microfiber drying towel.
2. Removing Scratches and Swirl Marks
Apply the scratch remover to a microfiber applicator pad and rub it onto the affected area using circular motions. After a minute or two, wipe away the excess with a clean microfiber towel. Repeat this process until the scratches or swirl marks are no longer visible.
3. Applying Compound and Polish
Next, apply the polishing compound to the polishing pad and start buffing it onto your car’s surface using light pressure. Work in small sections and keep the pad moving in circular motions. Allow the compound to dry for a few minutes, then wipe away the excess with a clean microfiber towel. Repeat this process with the polishing pad and the polish, being careful not to overuse either product.
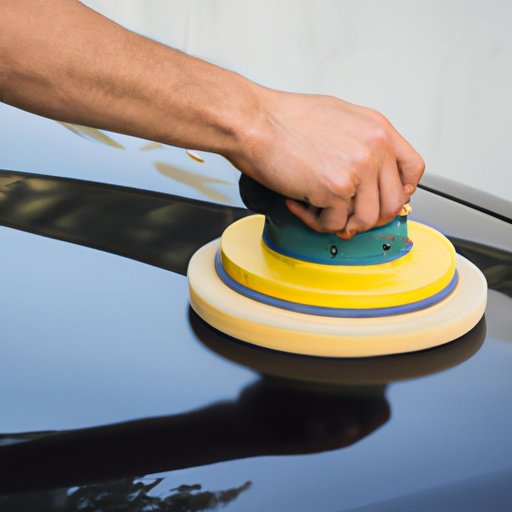
4. Buffing the Surface with a Buffer
Once you’ve applied the compound and polish, it’s time to use the electric buffer. Attach the polishing pad to the buffer, turn it on, and start buffing your car’s surface using light pressure. Keep the buffer moving in circular motions, and work in small sections. After a few minutes, wipe away the excess product with a clean microfiber towel.
5. Protecting the Finish with a Sealant or Wax
The final step in re-polishing your car is to apply a sealant or wax to protect the finish. Apply the product onto a foam applicator pad and rub it onto your car’s surface using circular motions. Allow the product to dry for a few minutes, then wipe away the excess with a clean microfiber towel. Repeat this process as necessary to achieve the desired level of protection.
IV. The Top Car Polishing Products for At-Home Detailing
A. Explanation of the Importance of Choosing the Right Products
Choosing the right products is essential to achieving a high-quality finish when re-polishing your car. Different finishes require different products, and using the wrong ones can lead to subpar results or even damage your car’s paint. It’s worth investing in high-quality products from reputable brands to ensure the best outcome.
B. Product Recommendations for Different Types of Finishes
Here are some of the top car polishing products for at-home detailing, depending on your car’s finish:
- For clear coats and light swirls: Meguiar’s Ultimate Compound
- For moderate swirls and scratches: Turtle Wax Scratch Repair & Renew
- For heavy oxidation and deeper scratches: 3M Performance Finish
C. How to Use Each Product Effectively
Each product comes with its own set of instructions, but here are some general guidelines to follow:
- Apply products sparingly to avoid buildup and ensure an even finish
- Work in small sections and keep the pad or applicator moving in circular motions
- Use a clean microfiber towel to wipe away excess product after each step
V. From Dull to Dazzling: The Ultimate Guide to Re-polishing Your Car
A. In-depth Explanation of the Tools and Materials Needed
To achieve a showroom-quality finish, you’ll need a few more tools and materials than what we covered earlier. These include clay bar, ultra-fine sandpaper, and a dual-action orbital polisher. Before getting started, it’s important to understand the relative abrasiveness of each product and tool to ensure you’re using them in the correct order.
B. Step-by-step Instructions for Achieving a Showroom-quality Finish
We won’t go into the specifics of each step in this section, as we’ve already covered them earlier in this article. However, we will emphasize the importance of taking your time with each step and ensuring the paint is completely free of any imperfections before moving onto the next one. When done correctly, your car will look like it just rolled off the showroom floor.
C. Troubleshooting Common Problems
If you encounter any issues during the re-polishing process, don’t panic. Here are some common problems and how to fix them:
- Streaks or residue: Use a clean microfiber towel to wipe away the excess product, or rinse the area with clear water and start over.
- Product buildup: Apply less product or use a more absorbent pad or towel to remove excess.
- Dull finish: Double-check that you’ve removed all scratches and swirl marks before moving on to the polishing phase. If the finish still appears dull, try using a finer polishing compound or working in smaller sections.
VI. Give Your Car a Fresh Shine with These DIY Polishing Techniques
A. Overview of Different Techniques for Polishing Your Car
Depending on your car’s specific needs, there are several different techniques you can use to re-polish your car at home, including removing scratches, restoring faded paint, and achieving an all-over shine. Here’s a brief overview of each technique:
- Removing scratches: Use a scratch remover or ultra-fine sandpaper to gently buff out scratches, working in small sections and light pressure.
- Restoring faded paint: Use a paint restoration kit or polishing compound to even out the paint’s surface and restore its luster.
- Achieving an all-over shine: Use a high-quality polishing compound and electric buffer to give your car an all-over shine, paying special attention to problem areas like the hood and doors.
B. Explanation of How to Remove Scratches, Restore Faded Paint, and Achieve an All-over Shine
We’ve already covered the step-by-step instructions for removing scratches and achieving an all-over shine, but for restoring faded paint, you’ll need to start with a more abrasive compound or kit and work your way up to a finer one, depending on the severity of the fading. Be sure to use an electric buffer with an appropriate polishing pad to achieve the best results.
C. Tips for Maintaining Your Car’s Finish
After re-polishing your car, you’ll want to take steps to maintain its appearance. Here are some tips:
- Wash your car regularly to remove dirt and debris that can damage the finish.
- Buff out any scratches or swirl marks as soon as you notice them to prevent them from getting worse.
- Avoid parking your car in direct sunlight for long periods of time, as it can cause fading and damage the finish.
VII. Conclusion
Re-polishing your car at home is a simple and cost-effective way to keep your car looking like new. By following the step-by-step instructions in this article and using the right tools and products, you can achieve a showroom-quality finish in no time. Remember to take your time with each step and troubleshoot any issues as they arise. With a little effort, your car will be the envy of the neighborhood.
(Note: Is this article not meeting your expectations? Do you have knowledge or insights to share? Unlock new opportunities and expand your reach by joining our authors team. Click Registration to join us and share your expertise with our readers.)