How to Plug in Your Car Charger at Home: A Step-by-Step Guide
As the usage of electric cars continues to grow, so does the need for home charging solutions. And while many may think that plugging in a car charger at home is a daunting task, it’s actually quite simple. This article will provide you with a step-by-step guide to help you plug in your car charger at home safely and efficiently.
Step-by-Step Guide for Plugging in Your Car Charger at Home
The first and most important step before plugging in your car charger at home is to make sure you have the proper equipment. There are different types of electric car charging cables, and it’s essential to choose the right one for your car. The best way to determine which cable to use is by checking your car’s manual or contacting the manufacturer.
Once you have the correct cable, follow these steps:
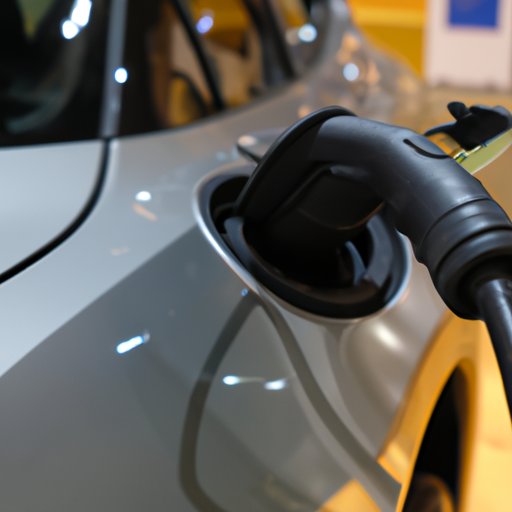
- Locate the charging port on your car.
- If your car is not turned off, turn it off before connecting the cable.
- Connect the charging cable to the charging port on your car.
- Connect the other end of the charging cable to the outlet or charging station.
- Turn on the charging station or plug in the outlet. The charging process will start automatically.
The Do’s and Don’ts of Charging Your Car at Home
When it comes to charging your car at home, safety should always come first. Here are some important do’s and don’ts to keep in mind:
- Do not charge your car in the rain or any other wet conditions. This could lead to electrical shock.
- Do not use an indoor extension cord to plug in your car charger. This could cause a fire or damage the charger.
- Do monitor the charging process and avoid charging your car for too long, as this could damage the battery.
- Do check the connections periodically to ensure they are secure.
Things You Should Know Before Plugging in Your Car Charger at Home
Before purchasing a home car charger, there are a few things to consider:
- Check whether your car is compatible with the charger you plan on buying.
- Make sure the charger you purchase matches the outlet or charging station in your home.
- Consider the charging speed of the charger, as this can vary depending on the brand.
- Plan for any necessary installation preparations, such as hiring a professional electrician if needed.
Tips for Preventing Damage to Your Car while Connecting the Charger
While connecting your car charger at home is relatively easy, there are still some precautions you should take to avoid damaging your car:
- Before connecting the charger, make sure the cable is clean, free of debris, and not tangled.
- When connecting the cable to your car’s charging port, do it gently to avoid scratches or dents.
- Check the charging port and cable periodically for any signs of damage or wear and tear.
The Best Type of Outlet to Connect Your Car Charger To
When choosing an outlet for your home car charger, there are various types to choose from:
- Standard 120V outlets: These are the most common outlets found in homes but may have a slower charging rate.
- 240V outlets: These outlets provide a faster charging rate and are suitable for overnight charging.
- Level 2 charging stations: These stations require professional installation but provide the fastest charging rate.
The best type of outlet for your home car charger will depend on your specific charging needs and the compatibility of your car and charger.
A Comprehensive Explanation of the Different Types of Car Chargers Available on the Market
There are various types of EV chargers available on the market, each with its features and benefits:
- Level 1 chargers: These chargers use a standard 120V outlet and provide about 4-5 miles of range per hour of charging time.
- Level 2 chargers: These chargers require a 240V outlet and provide about 10-20 miles of range per hour of charging time.
- DC fast chargers: These chargers can provide up to 60-80 miles of range per 20 minutes of charging time but require special equipment and professional installation.
The type of EV charger that’s best for you will depend on factors such as your car’s charging capacity, your charging needs, and the availability of charging stations in your area.
How to Troubleshoot Common Issues with Connecting Your Car Charger at Home
While connecting your car charger at home is relatively simple, some issues can arise that may require troubleshooting:
- If the charging process does not start, check the connections and make sure the outlet has power.
- If the charging process seems to be taking longer than usual, check the cable and the car’s charging capacity.
- If there is an issue with the outlet, try connecting the charger to a different one.
If these issues persist or are more complicated, it’s best to contact a professional for assistance.
Conclusion
Plugging in your car charger at home may seem daunting at first, but it’s a relatively simple process that can be done safely and efficiently with the right equipment and precautions. Remember to always prioritize safety, and if you encounter any issues, don’t hesitate to seek professional help. Share this article with your friends and family who also own electric cars and may struggle with plugging in their car charger at home.
(Note: Is this article not meeting your expectations? Do you have knowledge or insights to share? Unlock new opportunities and expand your reach by joining our authors team. Click Registration to join us and share your expertise with our readers.)