Introduction
Painting your car hood at home can seem like an intimidating task, but it doesn’t have to be. With the right tools, supplies, and instructions, you can easily give your car a new look without breaking the bank. This article will walk you through each step of the process, from gathering the necessary materials to adding the finishing touches.

Gather Necessary Tools and Supplies
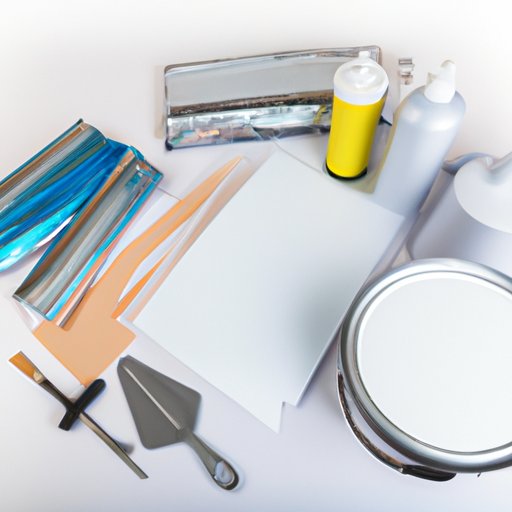
Before you start painting, you need to gather all the tools and supplies you’ll need for the job. The items you’ll need may vary depending on the type of project you’re undertaking, but some basic tools and supplies you should have on hand include:
- Safety goggles
- Dust mask
- Sandpaper
- Masking tape
- Painter’s tape
- Primer
- Base coat
- Clear coat
- Varnish
- Paintbrush
- Spray gun
In addition to the tools listed above, you’ll also need to choose the type of paint you want to use. There are several types of automotive paints available, including acrylic enamel, single-stage urethane, and two-stage urethane. Each type of paint has its own advantages and disadvantages, so make sure you do your research before choosing one.
Prepare Car Hood for Painting
Once you’ve gathered all the necessary tools and supplies, the next step is to prepare the car hood for painting. Start by thoroughly cleaning the surface of the hood to remove any dirt, debris, or other contaminants that could interfere with the paint job. Then, use masking tape and painter’s tape to cover any areas of the hood that you don’t want to paint. This will protect those areas from being accidentally covered in paint.
Next, use sandpaper to rough up the surface of the hood. This will help the primer and paint adhere better to the surface. Once you’ve finished sanding, use a damp cloth to wipe away any dust or debris that might remain. Finally, apply a thin layer of primer to the hood, making sure to cover all exposed surfaces. Allow the primer to dry completely before moving on to the next step.
Choose Paint Type and Color
Now it’s time to choose the type and color of paint you want to use. As mentioned earlier, there are several types of automotive paints available, so make sure you do your research and choose the one that best suits your needs. When it comes to color, you have virtually limitless options. Consider the other colors on your car and choose a shade that complements the existing palette. If you’re feeling adventurous, you can even choose a completely different color for the hood.

Apply Primer and Base Coat
With the paint type and color chosen, it’s time to start applying the primer and base coat. Before you start, make sure the area is well-ventilated and that you’re wearing safety goggles and a dust mask. Begin by preparing the primer according to the manufacturer’s instructions. Once the primer is ready, apply a thin layer to the hood using a paintbrush or a spray gun. Allow the primer to dry completely before moving on to the base coat.
Once the primer is dry, it’s time to apply the base coat. Again, make sure the area is well-ventilated and that you’re wearing safety gear. Begin by preparing the base coat according to the manufacturer’s instructions. Once the base coat is ready, apply a thin layer to the hood using a paintbrush or a spray gun. Allow the base coat to dry completely before moving on to the next step.

Add Details with Clear Coat and Varnish
The last step in painting the car hood is to add some details with clear coat and varnish. Begin by preparing the clear coat according to the manufacturer’s instructions. Once the clear coat is ready, apply a thin layer to the hood using a paintbrush or a spray gun. Allow the clear coat to dry completely before moving on to the varnish.
Once the clear coat is dry, it’s time to add the finishing touches with varnish. Begin by preparing the varnish according to the manufacturer’s instructions. Once the varnish is ready, apply a thin layer to the hood using a paintbrush or a spray gun. Allow the varnish to dry completely before you take the car out for a spin.
Conclusion
Painting a car hood at home may seem daunting at first, but with the right tools, supplies, and instructions, it can be a relatively simple and rewarding task. Start by gathering all the necessary tools and supplies. Then, prepare the hood for painting by cleaning the surface, masking off areas, and sanding and priming. Once that’s done, choose the type and color of paint you want to use. Apply primer and base coat, then add details with clear coat and varnish. And finally, allow the paint to dry completely before taking the car out for a spin.
(Note: Is this article not meeting your expectations? Do you have knowledge or insights to share? Unlock new opportunities and expand your reach by joining our authors team. Click Registration to join us and share your expertise with our readers.)