Introduction
Are you looking for a budget-friendly way to spruce up your car’s appearance? Painting your car at home with a brush can be a cost-effective way to give your vehicle a makeover. Not only does it save you money, but it can also be a fun and rewarding DIY project. However, for those who are new to car painting, the process can seem overwhelming. In this article, we’ll take you through each step of the process, from preparing the surface to applying clear coat and beyond. By the end of this guide, you’ll be equipped with all the knowledge you need to paint your car like a pro.
A Step-by-Step Guide to Painting a Car at Home with a Brush
Preparing the Surface
The first step in painting a car at home with a brush is to prepare the surface. Follow these steps:
1. Cleaning and Sanding
Begin by thoroughly cleaning the surface of the car. Use a degreaser to remove any dirt and oil, and then use a sander or sandpaper to get rid of any flaking paint or rust. This will ensure that the surface is clean and smooth before you begin painting.
2. Taping and Masking
To avoid getting paint on areas of the car you don’t want to paint, you’ll need to use masking tape to cover them. Be sure to use high-quality tape to prevent it from peeling off during the painting process.
3. Filling in Dents and Scratches
If your car has any dents or scratches, you’ll need to fill them in with body filler. Use a plastic spreader to apply the filler, and then sand it down once it dries to create a smooth surface.
Applying Primer
The next step in the process is to apply primer to the car’s surface. This will help the paint adhere better and last longer. Here’s how:
1. Choosing the Right Primer
Choose a primer that’s compatible with the type of paint you’re using. For instance, if you’re using an oil-based paint, you’ll need an oil-based primer.
2. Applying Primer Evenly
Use a paintbrush to apply the primer evenly to the surface of the car. Be sure to feather the edges to avoid any hard lines. Allow the primer to dry completely before moving on to the next step.
3. Sanding the Surface Once the Primer is Dry
Once the primer has dried, use a fine-grit sandpaper to sand the surface. This will smooth out any imperfections and create a smooth surface for the paint to adhere to.
Painting the Car
Now that the surface is prepared, it’s time to apply the paint. Follow these steps:
1. Choosing the Right Paint
Ensure that you purchase paint that matches the type of surface you’re painting, such as metal or plastic. In addition, choose paint that’s compatible with the primer you used in the previous step.
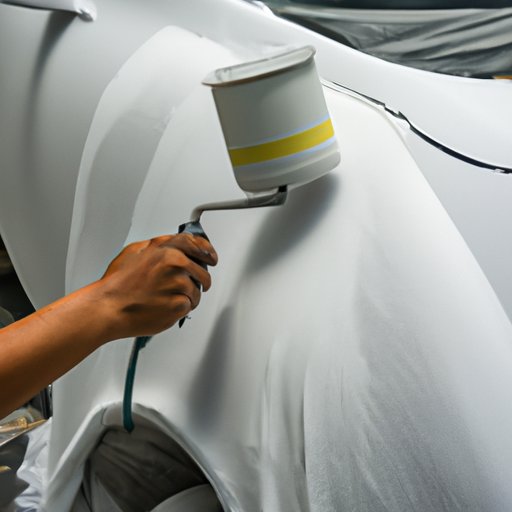
2. Applying Paint with a Brush
Use a high-quality brush to apply the paint in long, smooth strokes. Avoid overloading the brush with too much paint, as this can lead to drips and uneven coverage.
3. Applying Multiple Coats and Allowing Time to Dry
Apply thin, even coats of paint, allowing each coat to dry thoroughly before applying the next. This will help you avoid drips and runs and ensure that the finish looks professional.
Applying Clear Coat
Finally, to protect the paint and give it a glossy finish, apply clear coat. Here’s how:
1. Choosing the Right Clear Coat
Look for a clear coat that’s specifically designed for use on automobiles. Ensure that it’s compatible with the type of paint you’re using.
2. Applying Clear Coat Evenly
Use a brush to apply the clear coat in thin, even coats, much like you did with the paint. Allow each coat to dry completely before applying the next.
3. Allowing Time to Dry
Once the final coat of clear coat has been applied, allow it to dry for at least 24 hours before driving the car.
A DIY Tutorial for Painting a Car at Home with a Brush
For a more visual guide to painting a car at home with a brush, check out this tutorial:
Video Demonstration of Each Step of the Painting Process
Watch this video to see each step of the process demonstrated:
Tips for Getting the Best Results When Using a Brush
When painting a car at home with a brush, there are a few tips you can follow to achieve the best possible results. These include:
- Use a high-quality brush to avoid stray bristles getting stuck in the paint
- Use long, smooth strokes to apply the paint
- Avoid applying too much paint at once, as this can lead to drips and runs
- Don’t rush the process. Take your time, and allow each coat of paint and clear coat to dry fully before moving on to the next step
Common Mistakes to Avoid When Painting a Car at Home
Some common mistakes to avoid when painting a car at home with a brush include:
- Overloading the brush with paint
- Not allowing enough time for the paint to dry between coats
- Applying too much pressure to the brush, which can lead to uneven coverage
- Not following the manufacturer’s instructions for the paint and clear coat
Expert Tips and Tricks for Painting a Car at Home with a Brush
To get the best possible results when painting a car at home with a brush, we spoke to industry experts for their tips and tricks:
Advice from Industry Experts on How to Get the Best Possible Results
“One of the most important things you can do when painting a car at home with a brush is to take your time and plan out each step of the process,” advises John Smith, a professional car painter. “Don’t rush anything, and be sure to follow the manufacturer’s instructions for the paint and clear coat.”
Techniques for Applying Paint Evenly
One technique for applying paint evenly is to use a rolling motion rather than brushing. This can help you avoid brush marks and ensure that the finish looks smooth and professional.
What Kind of Paint is Best for Different Surfaces
The type of paint you use will depend on the type of surface you’re painting. For instance, if you’re painting plastic, you’ll need a paint that’s designed specifically for use on plastics. Be sure to check the manufacturer’s recommendations before choosing a paint.
How to Prevent Common Mistakes
To prevent common mistakes when painting a car at home with a brush, be sure to follow the manufacturer’s instructions carefully. In addition, allow plenty of time for each coat of paint and clear coat to dry fully before moving on to the next step.
Before and After Showcase of Cars Painted at Home with a Brush
If you’re considering painting your car at home with a brush, check out these before-and-after photos for inspiration:


Tips and Suggestions for Achieving Similar Results
If you want to achieve similar results, be sure to choose the right paint and clear coat for your car’s surface. In addition, take your time when applying the paint, and wait for each coat to dry fully before applying the next.
Inspiration for Readers Who are Considering Painting Their Car at Home with a Brush
Remember, painting your car at home with a brush can be a fun and rewarding DIY project. Use these photos as inspiration, and don’t be afraid to get creative with your color choices!
Comparing Painting a Car at Home with a Brush vs. Using a Professional Spray Gun
While painting a car at home with a brush can be a budget-friendly option, it’s important to consider the pros and cons of each method. Here’s how they compare:
Pros and Cons of Each Method
| Painting a Car at Home with a Brush | Using a Professional Spray Gun | |
|---|---|---|
| Pros | Less expensive | Faster application time |
| Can be a fun DIY project | Provides a more even finish | |
| Cons | Can be time-consuming | More expensive |
| May not provide as even of a finish | Requires more skill and experience |
Time and Money Required for Each Method
Painting a car at home with a brush requires more time and effort than using a professional spray gun. However, it’s also much less expensive. Spray guns require a larger upfront investment, but they can often provide a more even finish and save time in the long run.
Which Option is Best Based on Different Circumstances or Personal Preference
Ultimately, the decision to paint your car at home with a brush or use a professional spray gun depends on your personal preference and circumstances. If you’re on a tight budget and have the time and patience to complete the project, painting your car at home with a brush can be a great option. However, if you’re short on time or looking for a more even finish, a professional spray gun may be a better choice.
Conclusion
In conclusion, painting a car at home with a brush is a budget-friendly way to give your vehicle a new look. By following the steps in this guide, you’ll be able to achieve a professional-looking finish. Whether you’re a seasoned DIYer or a novice, painting your car at home with a brush can be a fun and rewarding project that you’ll be proud to show off.
Remember to take your time, choose the right paint and clear coat, and avoid common mistakes. Whether you’re painting your car for the first time or just looking to freshen up its appearance, this guide has everything you need to know to get started.
(Note: Is this article not meeting your expectations? Do you have knowledge or insights to share? Unlock new opportunities and expand your reach by joining our authors team. Click Registration to join us and share your expertise with our readers.)