Introduction
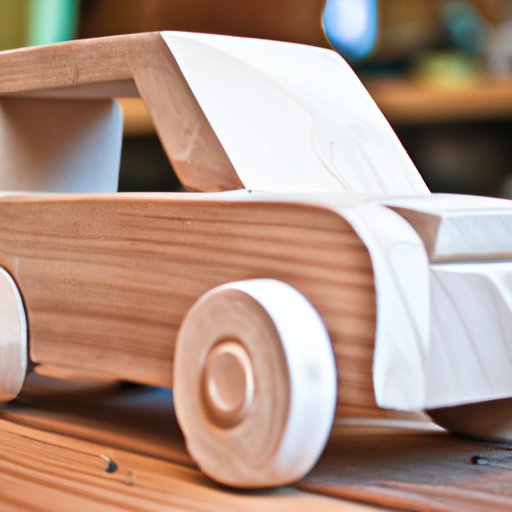
Have you ever dreamed of creating your own handmade wooden car from scratch, but didn’t know where to start? Look no further! In this article, we will guide you through the process of selecting materials, shaping and carving the parts, assembling and painting the car, and obtaining the right proportions for your wooden car. Whether you’re an experienced woodworker or a beginner, this step-by-step guide will provide all the information you need to make your own wooden car at home.
Materials and Tools
To make a wooden car, you will need the following materials and tools:
- Wood planks (such as oak, cherry, or maple)
- Carving tools (such as chisels, gouges, and saws)
- Sandpaper (ranging from coarse to fine grit)
- Paint and brushes
- Adhesives (such as wood glue and epoxy)
The type of wood you choose for your car will affect its durability, weight, and appearance. Hardwoods such as oak and mahogany are popular choices due to their strength and durability, while softwoods such as pine and spruce are more lightweight and easier to work with. Consider the pros and cons of each type of wood before making your selection.
When purchasing materials, be sure to choose high-quality ones that are free of knots and defects. Local lumber yards, hardware stores, and online retailers are all good sources for materials.
Creating the Parts
The first step in creating your wooden car is to carve and shape the different parts, such as the wheels, chassis, and body panels. To achieve a smooth and polished finish, follow these steps:
- Sketch out the design of your car on paper, and use this as a guide as you carve the different parts.
- Trace the template or pattern onto the wood, and use a saw or chisel to rough out the shape.
- Refine the shape using a combination of chisels, gouges, and sandpaper. Work slowly and carefully to avoid removing too much material or damaging the wood.
- Smooth out the surface using progressively finer-grit sandpaper, starting with 80-grit and working up to 220-grit or higher.
- Apply a finish to the wood, such as wax or oil, to protect it from moisture and give it a rich, lustrous appearance.
Be creative and experiment with different shapes and designs for your car. You can also add additional details such as headlights, tail lights, and doors to give your car a more realistic appearance.
Assembling and Painting the Car
Once you have created all the parts, it’s time to assemble them into a finished car. Follow these steps:
- Use adhesives and screws to join the different parts together. Be sure to use the right type of adhesive for the materials you are working with, and allow each joint to dry fully before moving onto the next one.
- Sand down any rough edges or uneven surfaces for a smooth finish.
- Apply a base coat of paint to the car. Use a spray gun or brush to layer on the paint thinly to avoid clumps and unevenness.
- Add any detail work desired to the car, such as racing stripes, license plates, and decals.
- Allow the car to dry for at least 24 hours, then apply a coat of clear varnish to protect the paint and add shine.
Don’t be afraid to experiment with different colors and patterns for your car. You can also try your hand at creating custom designs using stencils or freehand techniques.
Obtaining the Right Proportions
An important aspect of creating a wooden car is obtaining the perfect proportions. These are critical in ensuring that the car is well-balanced, stable, and aerodynamic. Follow these steps:
- Calculate the wheelbase, track width, and center of gravity for the car using a formula or equation.
- Use diagrams and charts to double check that the proportions are accurate.
- Make any necessary adjustments to the parts to achieve the desired proportions.
- Dry fit the parts together to ensure that they are well connected and that the car is correctly aligned.
- Make any final adjustments as necessary, and then fix the parts together for a stable and functional car.
It may take some trial and error to obtain the correct proportions for your car, so be patient and don’t be afraid to adjust the parts until you achieve the desired result.
Sourcing Materials and Resources
If you need help or advice during the project, there are many resources available to you. These include:
- Local woodworking or DIY groups
- Online forums and communities
- Woodworking or DIY classes
- Woodworking or DIY magazines and books
These resources can provide valuable guidance and support as you work on your wooden car, so be sure to take advantage of them if needed.
Conclusion
Creating a wooden car from scratch is a rewarding and enjoyable project that allows you to flex your creativity and artistic skills. By following the steps outlined in this guide, you’ll be well on your way to making a beautiful and functional wooden car that you can be proud of. Remember to be patient, take your time, and be open to experimenting with different designs and techniques.
(Note: Is this article not meeting your expectations? Do you have knowledge or insights to share? Unlock new opportunities and expand your reach by joining our authors team. Click Registration to join us and share your expertise with our readers.)
