Introduction
A toy car engine is essentially a miniature version of a real car engine that can power small toy cars. It involves principles of mechanics such as gear ratios, power transfer, and motion. Making a toy car engine at home can be a fun and educational activity for individuals of all ages, as it allows you to experiment with different materials and mechanical concepts. Not only that, but creating a toy car engine can also be a rewarding way to stretch your creativity and imagination.
In this article, we will cover all the necessary steps involved in making a toy car engine from scratch. We’ll show you how to build a basic toy car engine using common materials and tools, how to customize and add features to make it your own, and even involve your kids in the process! Read on to learn more about this exciting and fulfilling DIY project.
DIY Toy Car Engine: The Ultimate Guide for Beginners
Before we dive into the details, let’s go over some of the basics that beginners should be aware of. As with any DIY project, you’ll need some tools and materials to get started. For building a toy car engine, you’ll need basic tools such as scissors, glue, and tape, along with some materials such as cardboard, plastic, or metal. You’ll also need some foundational knowledge of mechanics, such as how gears work, how to transfer energy from one place to another, and how to troubleshoot common problems.
From Scrap to Fun: Building a Toy Car Engine with Everyday Materials
One of the benefits of making a toy car engine from home is that you can use a variety of materials to build it. For example, cardboard is a cheap and accessible material that is easy to cut and shape. You can also use plastic bottles, metal cans, or even wooden blocks depending on the look and functionality you want to achieve. When building a toy car engine, let your creativity guide you and experiment with different materials until you find what works best for you.
Step-by-Step Instructions for Crafting Your Own Toy Car Engine from Scratch
Now that you have your materials assembled, it’s time to begin building your toy car engine. Here is a step-by-step guide:
- First, gather all your materials and decide on the general shape and look of your toy car engine. This will depend on the materials you have, but you can use a pre-designed template or create your own design.
- Cut out your materials based on the design you’ve chosen, taking care to measure and cut accurately.
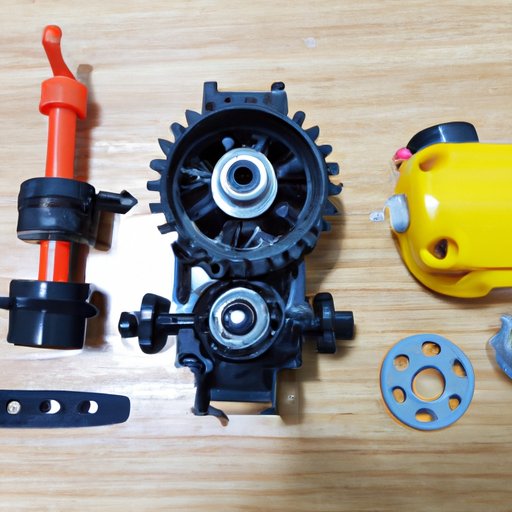
- Begin assembling the engine by putting together the components, such as the pistons and crankshaft. Use glue or tape to keep everything in place.
- Add gears and other mechanical components to transfer energy from one part of the engine to the other. This might involve some trial and error, but keep adjusting until you achieve the desired output.
- Check for any loose parts or misalignments that could throw off the engine. Make any necessary adjustments.
- Paint or decorate your engine to your liking. You now have your very own toy car engine!
Unleash Your Inner Mechanic: How to Build and Customize a Toy Car Engine
After you’ve built a basic toy car engine, you can begin to explore the possibilities of customization. Adding features such as sound effects or lights can be a fun way to further personalize your creation. You can even experiment with different gear ratios or power transfers to see how the changes affect the engine’s performance. Let your imagination run wild and explore the different ways you can make your toy car engine even more unique!
Household Materials to the Rescue: How to Create a Toy Car Engine on a Budget
While making a toy car engine can be a fulfilling project, it can also come with a cost. However, there are many ways to stretch your budget without sacrificing the quality of your finished product. For example, you can use recycled or repurposed materials from around your house instead of buying new materials. You can also search online for free or low-cost materials. Don’t let your budget hold you back from creating a toy car engine that you can be proud of!
Making Memories: Creating a Toy Car Engine with Your Kids
Building a toy car engine is a great way to spend quality time with your children while also teaching them about mechanics in a fun and interactive way. You can involve them in every step of the process, from choosing materials to assembling the different components. Depending on the child’s age, you can adjust the level of complexity of the project accordingly. Not only will you make memories together, but you’ll also be encouraging creativity and problem-solving skills in your child.
Turning Trash into Treasure: Build a Toy Car Engine Using Recyclable Materials
In addition to using household materials, you can also build a toy car engine using recyclable or repurposed materials. This not only helps the environment by reducing waste but also challenges your creativity to find new uses for everyday materials. You can use old plastic bottles, cardboard boxes, or even metal cans to build a one-of-a-kind toy car engine. Just remember to handle these materials safely and responsibly.
Conclusion
Now that you have all the necessary tools and information, it’s time to start building your very own toy car engine! Remember to be creative and have fun with the process, and don’t be afraid to experiment with different techniques and materials. Whether you’re building a toy car engine for yourself or with your kids, this is an exciting and rewarding DIY project that you’re sure to enjoy.
(Note: Is this article not meeting your expectations? Do you have knowledge or insights to share? Unlock new opportunities and expand your reach by joining our authors team. Click Registration to join us and share your expertise with our readers.)