Introduction
Making a toy car at home is a fun and rewarding activity for both adults and children alike. Whether you’re looking to create a custom design that you can’t find in stores, or simply want to spend some quality time with your kids, building a toy car is a great way to put your creativity and problem-solving skills to the test. In this article, we’ll provide a step-by-step guide for making a toy car at home, exploring different types of designs and materials you can use, as well as tips for customizing and improving your creations.
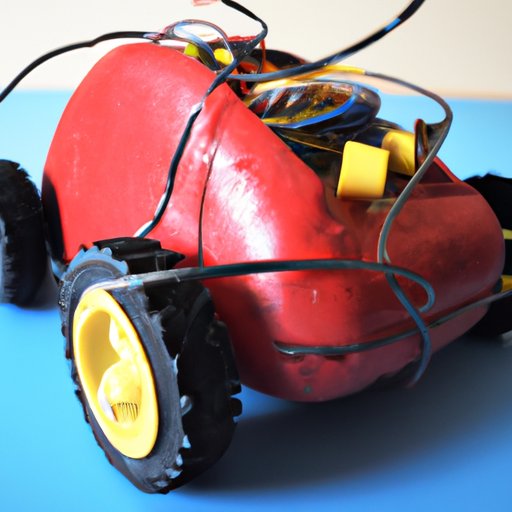
How to Make a Toy Car at Home: A Step-By-Step Guide
The first step in making a toy car is designing the car itself. This can be as simple or complex as you like, depending on your level of experience and skill. Some people prefer to draw out their design on paper first, while others may prefer to experiment with different shapes and sizes to see what works best. Once you have a clear idea of what you want your toy car to look like, it’s time to gather your materials and tools.
At a minimum, you’ll need the following materials to make a basic toy car:
– Wood or other rigid material (such as cardboard or plastic)
– Axles (such as skewers, toothpicks, or wooden dowels)
– Wheels (such as buttons, beads, or plastic caps)
– Glue or other adhesive
– Decorative materials (such as paint, stickers, or decals)
For tools, you’ll need:
– A saw or other cutting tool
– Sandpaper or other smoothing tool
– Scissors or other cutting tool (for decorative materials)
Once you’ve gathered your materials and tools, it’s time to start building your toy car. Follow these steps to assemble your creation:
1. Cut out the car body: Cut out the shape of your car body from your chosen material. You can use a template or pattern to guide you, or simply freehand the shape if you’re feeling confident. Make sure the body is the right size and shape to accommodate your wheels and axles.
2. Sand the edges: Use sandpaper or another smoothing tool to sand the edges of your car body, smoothing out any rough spots or jagged edges.
3. Add the axles: Cut the axles to length and attach them to the underside of your car body using glue or adhesive. Make sure the axles are straight and properly aligned, as this will affect how your car rolls.
4. Attach the wheels: Attach the wheels to the ends of the axles, securing them in place with glue or adhesive. Make sure the wheels are properly spaced and aligned, and that they turn freely.
5. Decorate your car: Once your basic car is assembled, it’s time to get creative with paint, stickers, or decals. Add your own personal touch to your car to make it truly unique.
DIY Toy Car Tutorial: Making Your Own Miniature Cars at Home
Making miniature toy cars at home can be a fun and rewarding challenge, as it allows you to work with smaller materials and create more intricate designs. Here are some specific tips and techniques for making miniatures:
– Use toothpicks or other small, lightweight materials for your axles to keep the size of your car proportional to its wheels.
– Experiment with different materials for your wheels, such as beads or buttons, to achieve different looks and styles.
– Consider creating custom decals or stickers using a computer and a printer to add a professional touch to your miniature cars.
The Ultimate Guide to Building Toy Cars: Easy Homemade Designs for Kids
Building toy cars with kids can be a fun and engaging activity that fosters creativity, problem-solving skills, and teamwork. Here are some easy homemade designs that are perfect for kids:
– Simple box car: Cut out a rectangular box shape from a cardboard box, add wheels, and decorate with paint.
– Paperclip race car: Bend a large paperclip into the shape of a race car, add wheels, and decorate with markers or stickers.
– Flying car: Attach a toy airplane or helicopter to a wooden block or other base to create a unique flying car design.
Remember to allow kids to be creative and experiment with their designs, even if it means the final product doesn’t look exactly like a real car. You can also adapt designs to match a child’s skill level, such as by simplifying the design or providing extra support during the building process.
Toy Car Building at Home: A Fun and Engaging Activity for You and Your Children
Building toy cars at home is not only a fun activity but can also be an engaging one for both you and your children. Here are some tips for making it fun:
– Incorporate races or challenges to make building and playing with toy cars even more exciting.
– Invite friends or family over for a toy car building party to make it a social activity.
– Involve children of different ages and skill levels by adapting the activity and providing support as needed.

Homemade Toy Car Ideas: Choosing the Right Materials and Tools to Get Started
Choosing the right materials and tools is critical to creating a successful homemade toy car. Here are some tips for getting started:
– Consider the size and weight of your materials when choosing your design, and make sure they are appropriate for your axles and wheels.
– Experiment with different types of materials, such as plastic, foam, or metal, to achieve different textures and looks.
– Use high-quality tools and adhesives, especially if you have limited experience with woodworking.
Creative Ways to Customize Your Homemade Toy Cars and Make Them Unique
Customizing and personalizing toy cars is a great way to make them unique and add a personal touch to your creations. Here are some ideas for customization:
– Experiment with different paint colors and patterns to achieve a unique look and style.
– Create custom decals or stickers using a computer and a printer to add text, logos, or designs to your car.
– Use unconventional materials such as fabric, buttons, or shells to create a one-of-a-kind look.
Tips and Tricks for Making Your Homemade Toy Cars Perform Like a Pro
Improving the functionality and performance of your toy cars is an important part of the building process. Here are some tips for making your cars perform like a pro:
– Ensure proper weight distribution by placing heavier materials closer to the axles.
– Experiment with different wheel types to achieve different speeds and handling characteristics.
– Troubleshoot problems such as cars that don’t roll smoothly by adjusting the alignment of your axles or the spacing of your wheels.
Conclusion
Whether you’re a seasoned DIY enthusiast or just looking for a fun project to do with your kids, making a toy car at home can be a rewarding and engaging activity. By following the step-by-step guide in this article, experimenting with different materials and designs, and incorporating your own creative touch, you can create unique and functional toy cars that you and your family will enjoy for years to come.
(Note: Is this article not meeting your expectations? Do you have knowledge or insights to share? Unlock new opportunities and expand your reach by joining our authors team. Click Registration to join us and share your expertise with our readers.)