Introduction
Sourdough starter is a fermented mixture of flour and water that’s used to make bread. The fermentation process creates natural yeast and bacteria that are essential to the rising and flavor of sourdough bread. In this article, you’ll learn how to make your own sourdough starter from scratch, along with a beginner’s guide to sourdough chemistry and tips for crafting a delicious starter.
Step-by-Step Guide to Making Sourdough Starter
Making your own sourdough starter is easy and requires just two ingredients: flour and water. Here’s a step-by-step guide to crafting your own starter:
1. Gather Necessary Ingredients: You’ll need a type of flour (such as all-purpose, whole wheat, rye, or spelt) and filtered water. If possible, use organic, unbleached flour for best results.
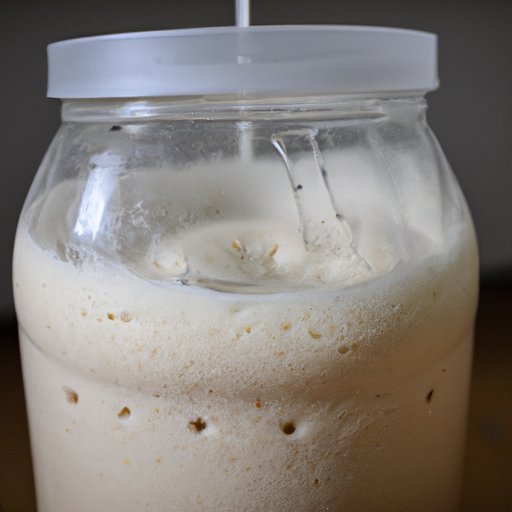
2. Create a Mixture of Flour and Water: Mix together 1/4 cup of flour and 1/4 cup of lukewarm water in a glass jar or bowl. Stir until it forms a thick paste. Cover the container with a towel or cheesecloth and let it sit overnight at room temperature.
3. Feed the Starter Every 12-24 Hours: After the first 8-12 hours, the mixture should start to bubble and become slightly sour smelling. At this point, you’ll need to “feed” the starter by adding another 1/4 cup of flour and 1/4 cup of lukewarm water. Stir to combine and cover again. Repeat this process every 12-24 hours for a total of 7-10 days, or until the starter is active and bubbly.
4. Discard Some of the Starter Before Each Feeding: As the starter continues to ferment, it will produce more and more bubbles and take on a stronger sour odor. Before each feeding, discard half of the starter and then add the fresh flour and water mixture. This will help keep the starter healthy and prevent it from becoming too sour.
5. Monitor Progress of Starter’s Activity: As the starter ferments, you should see increased activity with each day. The starter may double in size, have a pleasant sour smell, and be full of bubbles. If the starter becomes too sour or doesn’t seem very active, discard it and start again.
6. Transfer Starter to New Container When Ready: Once the starter has been fermenting for 7-10 days, it should be ready to use. Transfer the starter to a new glass jar or bowl and store it in the refrigerator. Feed the starter weekly to keep it alive and active.
A Beginner’s Guide to Sourdough Chemistry
Understanding the chemistry of sourdough can help you create the perfect starter. Here’s a brief overview of the science behind sourdough:
Introduction to Sourdough Chemistry: Sourdough is created when wild yeast and lactobacilli bacteria feed on the sugars in flour. This process produces carbon dioxide, which causes the dough to rise and gives it its distinctive flavor. The wild yeast and bacteria also produce lactic acid, which helps preserve the dough and gives it a tangy flavor.
Explanation of How Starter Works: Sourdough starter works by providing a source of wild yeast and lactobacilli bacteria for the dough. The starter is “fed” regularly with flour and water, allowing the yeast and bacteria to multiply and become active. When added to dough, the starter promotes fermentation and gives the resulting bread its unique flavor and texture.
Types of Flours Used in Starters: Any type of flour can be used to make a sourdough starter, but certain flours work better than others. All-purpose, whole wheat, rye, and spelt flours are all popular choices, as they provide the necessary nutrients for the yeast and bacteria to thrive.
Common Mistakes to Avoid: One of the most common mistakes when making a starter is not discarding some of the starter before each feeding. This can lead to an overly sour starter that won’t rise properly. It’s also important to monitor the progress of the starter and discard it if it doesn’t seem active or has a strong sour odor.
How to Create the Perfect Sourdough Starter
Creating the perfect sourdough starter requires some experimentation, but there are a few key factors to keep in mind:
Temperature Control: The ideal temperature for a sourdough starter is around 70-75°F. Too hot or too cold and the starter won’t ferment properly. To maintain the right temperature, you can use an oven with the light turned on or a heating pad set on low.
Hydration Levels: The amount of water in the starter is also important. Too much water and the starter won’t rise; too little and it will be too dense. A good rule of thumb is to use a ratio of 1 part flour to 1 part water.
Yeast and Bacteria Balance: The right balance of yeast and bacteria is essential for a successful starter. Too much yeast and the starter will be overly sour; too much bacteria and it won’t rise properly. Regular feedings and discarding will help maintain the right balance.

The Benefits of Making Your Own Sourdough Starter
Making your own sourdough starter has several advantages, including cost savings, improved flavor, and health benefits:
Cost Savings: Buying pre-made starters can be expensive, but making your own starter is much cheaper. With just a few ingredients and some patience, you can craft a delicious sourdough starter without breaking the bank.
Improved Flavor: Homemade starters tend to have a more complex flavor than store-bought starters. This is because homemade starters contain more wild yeast and bacteria, which give the bread a richer, deeper flavor.
Health Benefits: Sourdough bread is easier to digest than other types of bread due to its lower pH level. The fermentation process also breaks down the gluten, making it easier for those with gluten sensitivities to enjoy.

Tips for Crafting a Delicious Sourdough Starter
Here are a few tips to help you craft a delicious sourdough starter:
Use Filtered Water: Tap water can contain chlorine and other chemicals that can interfere with the fermentation process. For best results, use filtered or spring water.
Choose Organic, Unbleached Flour: Organic, unbleached flour contains more natural enzymes and nutrients that help the starter ferment properly. Bleached flour can interfere with the fermentation process, so avoid using it.
Experiment with Different Types of Flour: Different types of flour will produce different flavors and textures in the final bread. Experiment with different flours to find the one that works best for you.
Use a Digital Scale for Accurate Measurements: For best results, use a digital scale to measure out the flour and water for each feeding. This will help ensure that the starter ferments properly.
Store Starter in an Airtight Container: Once the starter is ready to use, transfer it to an airtight container and store it in the refrigerator. This will help keep the starter fresh and active.
Conclusion
Making your own sourdough starter is a simple and rewarding process. With just a few basic ingredients and some patience, you can craft a delicious starter that will make your breads taste even better. Feel free to experiment with different flours and hydration levels to find the perfect combination for your tastes.
(Note: Is this article not meeting your expectations? Do you have knowledge or insights to share? Unlock new opportunities and expand your reach by joining our authors team. Click Registration to join us and share your expertise with our readers.)