Introduction
Remote control cars are a thrilling and enjoyable hobby for people of all ages. Whether you’re a parent looking for an engaging activity to do with your kids or an enthusiast eager to construct a custom car, building a remote control car is a fulfilling experience. This article will provide you with step-by-step instructions to create your own remote control car from scratch.
DIY Remote Control Car: A Step-by-Step Guide
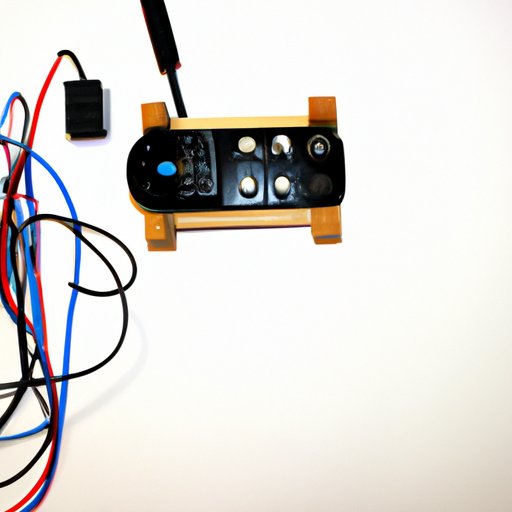
To build a remote control car, you will need a few materials and tools. These include a chassis, wheels, an electric motor, a battery, a receiver, a transmitter, and a servo. You can purchase a complete kit from hobby shops or purchase each component individually. Once you have the necessary equipment, you can follow these step-by-step instructions:
- First, assemble the chassis by following the manufacturer’s instructions.
- Attach the motor to the chassis, ensuring the motor’s shaft fits correctly in the gear train.
- Attach the wheels to the axles and connect the motor to them using gears or drive belts.
- Add a battery holder to the chassis and connect it to the motor. Make sure you choose a battery that is compatible with your motor and receiver.
- Mount the receiver, servo, and transmitter on the chassis, as per the manufacturer’s instructions.
- Connect the servo to the front wheels to steer the car.
- Finally, test your car by turning on the transmitter and making sure the car responds appropriately.
Following these simple steps will help you make a remote control car of your own. To ensure success, here are a few tips and tricks:
- Choose the right equipment: Make sure all your equipment is compatible and works together to ensure the best performance.
- Pay attention to details: Even a small mistake can result in a malfunctioning car. So, be careful while working on the car.
- Test your car’s performance: Make sure you test your car’s speed, steering, and handling to ensure it operates smoothly.
5 Simple Steps to Build Your Own Remote Control Car
For beginners, building a remote control car can be a daunting task. Here are the five most critical steps to help you build your own remote control car:
- Plan it out: Before you start building, make sure you plan everything out so that you have all the necessary tools and materials
- Assemble the components: Go by instructions manual to install the components and gears correctly
- Connect the power source: Using appropriate voltage and type of batteries to connect it to the motor will determine the performance of the car
- Attach the Steering mechanism: Position the servo accurately to ensure the stability of the car while cornering
- Test drive: A final step to see if the car is running smoothly ahead of show-off.
Remember, building your first remote control car will not happen in a day; it requires patience and accuracy.
Building a Remote Control Car from Household Materials
If you don’t have the basic materials and tools at home, do not worry. You can still build a remote control car using things you have around the house. Here is how you can make a remote control car from household materials:
- Materials needed: You need two circular bottle caps of same size, DC motor, AA battery, bottle cap, cardboard, and glue
- Make the base: Fix the DC motor onto the bottle cap using glue, and place the battery in another bottle cap.
- Attach the wheels: Make wheels with cardboard and fix them to the motor.
- Add finishing touch: You can customize it using food colour, adding headlights, fan exhaust, and much more as per your creativity.
- Test drive: Press the switch, and your DIY car will come into life.
The Ultimate Beginner’s Guide to Making a Remote Control Car
Building your first remote control car may be overwhelming, and all the technical terms can be confusing. Here is the ultimate beginner’s guide to making a remote control car:
- Understanding the basics: Know the basics of the components such as chassis, motor, battery, and steering mechanism.
- Gather materials & equipment: Get all components such as transmitter, receiver, servo, electronic speed controller, motor, battery holder, chassis and wheels
- Assembling the car: Follow instructions manual strictly to install the components, hardware and gears on the right place.
- Testing the car: Turn on the transmitter and make sure your remote control car responds appropriately to the transmitter’s commands.
- Modifying the car: Modify the car by adding LED lights, sound effects, or other modifications like turbo, added power, etc.
Remember, building your first remote control car will require time and patience. Be prepared to spend a significant amount of time researching, planning, and constructing your car.
Customize Your Own Remote Control Car with These Easy Tips
If you are looking to add some personality to your remote control car or personalize it to make it truly unique, here are some easy tips and tricks:
- Add LED lights: Adding LED lights to your remote control car can look cool and make it more visible in the dark.
- Add sound effects: Use small speakers to add sound effects like the engine revving, horn honking, or race car noises to add realism to your car racing sessions.
- Add modifications: Adding modifications like nitro, turbochargers and other performance upgrades to your car can significantly improve the overall performance of your remote control car while giving it a unique look.
Remember, when customizing a remote control car, make sure the modifications complement the car’s overall design, and all the modifications are done correctly and professionally.
Creating a Remote Control Car from Scratch: Everything You Need to Know
If you want to challenge yourself, you can attempt to construct a remote control car entirely from scratch. While this is more complex and time-consuming, it allows you to create the car exactly to your specifications. Here’s what you need to do:
- Gather electronic components: Gather electronic components like microcontrollers, motors, sensors, and batteries.
- Learn about programming and electronics concepts: Programming experience is necessary to work with the microcontroller, and basic electronics knowledge is essential to work with other components like sensors and motors.
- Design the motor and mechanical components: You can use software like AutoCAD to design the mechanical components of the car.
- Assembling the car: Follow the design and instructions carefully to construct the car.
- Testing the car: Finally, test the car and all its components to ensure everything is working as intended.
Remember, building a remote control car from scratch is the most advanced and challenging way of making a remote control car.
Conclusion
Building a remote control car can be a rewarding and fun experience. Whether you are a hobbyist or a beginner, this article has provided you with the information you need to make a remote control car from scratch, household materials, or from a kit. To succeed, you need to have patience and pay attention to detail while constructing the car. So, gather your materials, follow the steps, and start constructing your dream car today.
(Note: Is this article not meeting your expectations? Do you have knowledge or insights to share? Unlock new opportunities and expand your reach by joining our authors team. Click Registration to join us and share your expertise with our readers.)