Introduction
If you’re an RC car enthusiast, you know how important a functional remote control is. But what happens if your remote stops working, or you simply want to customize your RC car controls? Fear not, as we have a solution! In this DIY guide, we will show you how to create your own RC car remote control on a budget. We’ll explore different methods of building your own remote control, including a custom design with 3D printing and a Bluetooth remote using Arduino.
DIY Guide: How to Create Your Own RC Car Remote Control on a Budget
Making your own RC car remote control is a feasible option, and it offers you several benefits. Firstly, it allows you to customize your remote control design which creates an opportunity for you to learn about electronics and programming. Secondly, it’s budget-friendly and a great way to save money on expensive remote control replacements.
Budget-friendly ideas for building your remote
Building your own remote doesn’t have to break the bank. Here are some budget-friendly ideas for you:
– Start with an old remote control
– Use commonly available household materials
– Focus on simplicity: you don’t need the most high-end remote to control your RC car
Step-by-Step Instructions: Building a Custom RC Car Remote with Common Household Materials
Building a custom RC car remote control using household materials is an excellent option. You can start with basic materials such as cardboard, duct tape, and wires. Here are the step-by-step instructions:
List of materials needed
– Cardboard
– Duct tape
– Wires
– 9-volt battery
– Switches
– Buttons
Step-by-step walkthrough for building a remote using household materials:
1. Sketch out the remote design on cardboard.
2. Cut the cardboard to the design shape.
3. Use duct tape to attach the wires to the cardboard.
4. Solder the push buttons or switches to the wires.
5. Insert the 9-volt battery in the battery holder.
6. Solder the battery holder leads to the wires if necessary.
7. Test and adjust the switches to see which wires are necessary to control which functions of the RC car.
Tips for building and testing the remote
– Take your time and ensure that everything is connected correctly.
– Test everything on a breadboard before soldering components together.
– Double-check and test everything before using the remote control on the RC car.
Hack Your Old TV Remote to Create an RC Car Controller
If you have an old TV remote control lying around, don’t throw it away! You can hack it and turn it into a remote control for your RC car. Here’s how to get started:
Step-by-step guide for getting started
1. Choose the correct TV remote for your RC car – This will depend on the frequency of the RC car. If you’re not sure which frequency your car needs, check the manual or contact the manufacturer.
2. Remove any unnecessary parts from the TV remote.
3. Solder wires on push buttons or switches.
4. Test and adjust the switches to the needs of your RC car.
Tips for selecting the right type of TV remote
– The remote should be compatible with the frequency of your RC car.
– Don’t choose a remote that’s too complex, as it will be harder to work with.
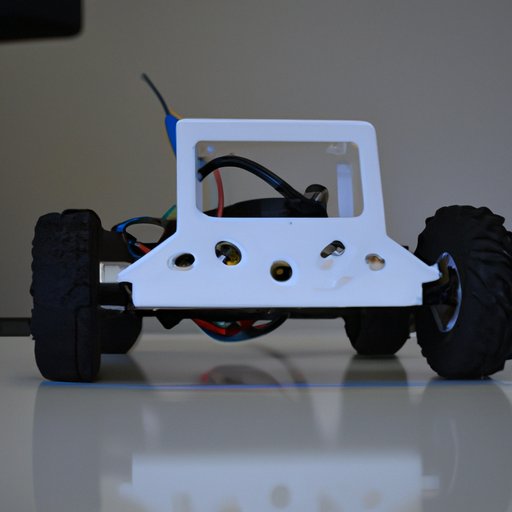
Get Creative: Build a Customized RC Car Remote with 3D Printing
3D printing is a great option for building custom remote controls. You can design and customize your remote control and then print it out using your 3D printer. Here’s how to do it:
Step-by-step guide for building a remote control with 3D printing
1. Choose the 3D design software of your choice.
2. Design your remote control – Use previously available content, or start from scratch.
3. Print the remote using your 3D printer.
4. Solder push buttons or switches to the wires.
5. Test and adjust the switches to the needs of your RC car.
Tips for selecting the right 3D printer and software
– The size of the remote is essential. Make sure the printer you choose can handle the necessary dimensions.
– Choose the right software for you, depending on your skill level.
Expert Tips: How to Program Your Own RC Car Remote Control
Programming your own RC car remote control takes some practice, but it’s worth it. Here’s what you need to know:
Explanation of the programming process
– Program your remote control: this function allows you to control your car.
– Encode your remote control: this function ensures that your remote is safe from other remote controls.
Overview of the different types of programming methods
– Manual programming: This method requires manual installation of the software on your computer and the remote controller.
– Online programming: This method is easy to use, as the software is available online, but requires a reliable internet connection.
– App programming: This method is suitable for smartphone and tablet users who prefer to use apps instead of programming languages.
Tips for successful programming
– Take your time and read the instructions.
– Do not skip any steps.
– Use a reliable internet connection.
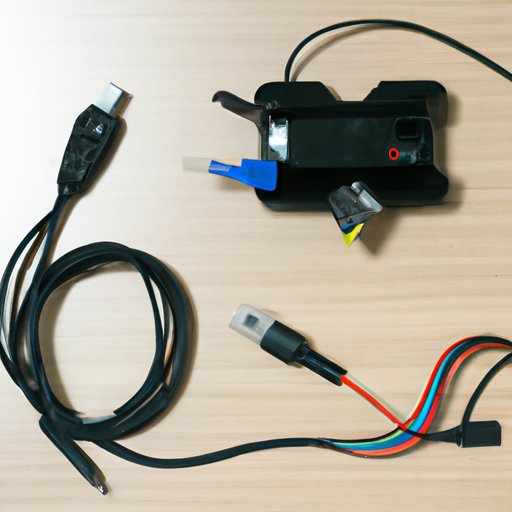
Go Wireless: How to Make a Bluetooth RC Car Remote using Arduino
Bluetooth technology can be used to control your RC cars remotely. Here’s how to do it:
Explanation of how Bluetooth technology can be used in remote control building
– You will link your RC car with your computer via Bluetooth technology.
– You can use a smartphone, tablet, or desktop computer as a remote control device.
Step-by-step guide to building a Bluetooth remote using Arduino
1. Download the Arduino software on your computer.
2. Connect the Bluetooth module to the Arduino board.
3. Install the Bluetooth module and Arduino board, and connect to your computer using a USB cable.
4. Program the remote control device using the Arduino software.
5. Test your newly-built Bluetooth RC car remote with your RC car.
Tips for troubleshooting common issues
– Ensure that the Bluetooth module is compatible with the Arduino board.
– Make sure your Bluetooth is within range of your computer.
Simplify Your RC Car Controls: How to Create a Simple Remote with Minimal Components
Sometimes, the simplest solution is the best option. Here’s how to create a pared-down control with minimal components:
Explanation of the benefits of building a simple remote
– Creating a simple remote eliminates the possibility of using the wrong button, which can be confusing.
– It’s also easier to teach others how to use it, especially children.
Step-by-step guide for building a simple remote
1. Cut a piece of cardboard into a rectangle shape.
2. Label buttons and switches according to the functional needs of your RC car.
3. Solder push buttons or switches to the wires.
4. Test and adjust the switches to the needs of your RC car.
Tips for testing and troubleshooting
– Test everything on a breadboard before soldering components together.
– Double-check and test everything before using the remote control on the RC car.
Conclusion
In this DIY guide, we learned about different methods of how to create an RC car remote control at home. Whether you choose to hack an old TV remote control or invest in 3D printing or Bluetooth technology, building your own remote control is a budget-friendly and fun way to improve your RC car experience. With careful planning and expert tips, you’ll be back on the road in no time!
We encourage you to try building a remote control at home. Not only will you learn about electronics and programming, but you’ll also have fun working on a DIY project.
(Note: Is this article not meeting your expectations? Do you have knowledge or insights to share? Unlock new opportunities and expand your reach by joining our authors team. Click Registration to join us and share your expertise with our readers.)