Introduction
Remote Control (RC) cars are exciting toys that provide hours of entertainment. But what if you could customize your own RC car? Making an RC car at home is an excellent way to explore the world of RC cars, and it’s more straightforward than you might think. In this article, we’ll guide you through the process of making an RC car at home and explore the benefits of doing so.
Explanation of the problem
Many people believe that building an RC car at home requires advanced technical skills and expensive equipment, stopping them from exploring this exciting hobby.
Overview of the article
In this article, we’ll provide a comprehensive step-by-step guide to making an RC car at home, including all the materials you’ll need, where to buy them, and assembly instructions. We’ll also provide tips and tricks to make the building process easier, along with detailed descriptions of each tool you’ll need.
Benefits of making an RC car at home
Building an RC car at home has many benefits. You’ll learn new skills, enjoy a creative process, and develop a sense of accomplishment from building something with your hands. Plus, by making an RC car at home, you can customize it to suit your needs and preferences better. In addition, building an RC car at home is more cost-effective than buying a pre-made one.
Step-by-step tutorial
Overview of the process
The process of making an RC car at home involves a few simple steps: gathering materials, assembling the components, and customizing it as per your preference. Let’s dive into the details.
Materials required
You’ll need the following materials to make an RC car at home:
- RC car chassis
- DC motor
- Battery pack
- Motor controller circuit
- Wheels
- Remote controller
- Wire
- Soldering iron and soldering wire
Assembly instructions
Here’s how you can assemble your RC car:
- Attach the motor to the chassis using screws.
- Connect the battery pack to the motor using wire.
- Attach the wheels to the motor shaft on either side.
- Solder the wires from the motor to the motor controller circuit.
- Connect the battery pack to the motor controller circuit.
- Solder the wires from the motor controller circuit to the remote controller.
- Attach the battery pack to the chassis.
- Your RC car is now ready to run!
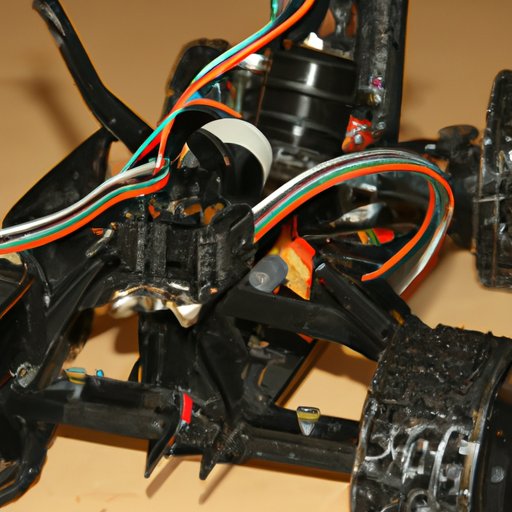
Images and diagrams for reference
Visual aids can be incredibly helpful in understanding the assembly process better. Try using images, diagrams, and videos to help guide you through the process.
Final product presentation
Once you’ve assembled your RC car successfully, it’s time to show it off! Share photos and videos of your creation on social media, and even take it out for a spin.
Video tutorial
Introduction to the process
If reading detailed instructions isn’t your thing, don’t worry. You can find several video tutorials online that walk you through the process of building an RC car step-by-step.
Narrated video with visuals
The best video tutorials include narrated visuals that explain each step in detail. They often provide close-ups of individual components and highlight the soldering process to make it easier to follow.
Detailed explanation of each step
The video tutorial should include a detailed explanation of each step, along with visual cues to make it easier to understand. This makes it easier to follow and replicate the process at home.
Pros and cons of video tutorial
One of the pros of video tutorials for building an RC car is the visual aids that they provide. However, if the video is too fast-paced, it may be challenging to keep up. Similarly, it may be challenging to get help or ask questions if you get stuck. Keep these pros and cons in mind when deciding if a video tutorial is right for you.
Advanced build
Types of engines available
For those interested in an advanced build, there are several engine options to choose from, including the nitro engine or brushless electric engine.
Different types of car design
You can also choose from multiple car designs, such as touring cars, buggies, and racing cars. Each design has its specific purpose, so choose one that suits your needs best.
Materials required for each advanced build
The materials required for an advanced build can vary, but generally, you’ll need more expensive components, such as a superior motor and higher-quality battery pack, so factor in these costs when planning your RC car’s design.
Comparison of a simple vs. advanced build
The primary difference between simple and advanced builds is the complexity of the parts used. While simple builds use basic components and require minimal assembly, advanced builds involve more intricate parts and a more in-depth understanding of the RC car’s mechanics.
Final product presentation
Once you’ve completed your advanced build, it’s time to show it off! Take your RC car out for a spin and enjoy the hard work and dedication you’ve put into creating your customized vehicle.
Tools required
Overview of the tools required
The tools required to build an RC car aren’t overly complex, but it’s best to have a basic understanding of how they work. Here’s a checklist of essential tools you’ll need:
- Screwdriver set
- Wire cutters
- Pliers
- Soldering iron
- Multimeter
- Battery tester
- Heat sink
- Crimping tool
Description of each tool
Each tool has a specific function in the building process. For example, screwdrivers are used to attach screws, pliers are used to hold wires in place, and crimping tools are used to cut and strip wires.
Where to purchase the tools
You can purchase the tools required for building an RC car at your local hardware store or online. Online stores like Amazon or eBay offer a wide variety of options at reasonable prices.
Tips for beginners
If you’re new to RC car building, here are a few tips to help make your experience smoother:
- Don’t hesitate to ask for help if you need it.
- Be patient. Building an RC car takes time and dedication, so don’t rush the process.
- Practice soldering before beginning the build to avoid making mistakes.
Tips & tricks
Common mistakes to avoid
When building an RC car, it’s easy to make mistakes such as incorrect wiring, using the wrong components, or short-circuiting the motor. To avoid these issues, double-check each step and follow the instructions carefully.
How to troubleshoot issues with the car
If your RC car isn’t working correctly, see if the issue is a loose wire, dead battery, or damaged component. Use a multimeter to test the electrical circuits in the car and identify the problematic component.
What to do if something goes wrong in the building process
If something goes wrong during the building process, don’t panic. Slow down, identify the issue, and find a solution. If you need help, reach out to online forums or local hobby stores for assistance.
Conclusion of the article
Building your own RC car at home is an exciting and satisfying experience. It’s a chance to learn new skills, put your creativity to use, and have some fun. With our step-by-step guide, you can build your own RC car in no time.
Conclusion
Recap of the article
In this article, we discussed the benefits of building your own RC car, provided a step-by-step tutorial on the process, a video tutorial, tools required, tips and tricks, and solutions to common issues in the building process.
Final thoughts
Building your own RC car is an excellent way to explore your creative side, develop your technical skills, and have fun. We hope this article has inspired you to try your hand at building an RC car at home.
Call to action
Get started on building your own RC car by gathering the materials required and following our step-by-step tutorial.
(Note: Is this article not meeting your expectations? Do you have knowledge or insights to share? Unlock new opportunities and expand your reach by joining our authors team. Click Registration to join us and share your expertise with our readers.)