
Introduction
Robotic arms have become increasingly popular in recent years, due to their versatility and ability to automate a wide range of tasks. But what exactly is a robotic arm? A robotic arm is an automated device that uses motors, sensors, and computer software to perform complex movements such as gripping, lifting, and rotating objects. They can be used in manufacturing, medical operations, construction, and many other fields.
Building a robotic arm can be an intimidating task, but with the right resources and knowledge, anyone can do it. There are several advantages to building your own robotic arm, such as cost savings and increased customization. Not only that, but the process of building a robotic arm can also be educational and even fun.
Step-by-Step Guide to Building a Robotic Arm
Building a robotic arm requires careful planning and a thorough understanding of its components and assembly process. Here is a step-by-step guide to building your own robotic arm:
Gathering the Parts and Materials Needed
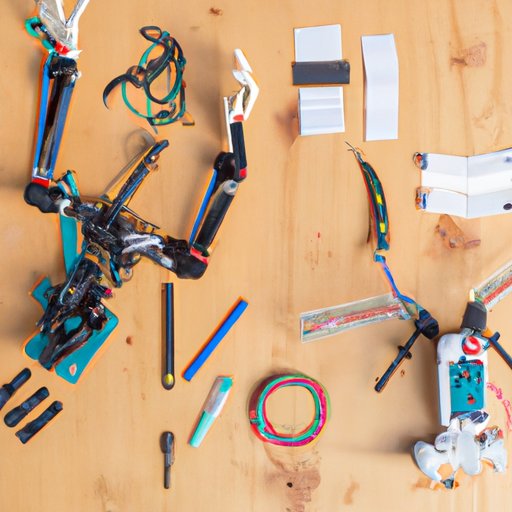
Before you begin building your robotic arm, you will need to gather all the necessary parts and materials. Depending on the type of arm you are building, these may include motors, servos, controllers, wiring, and other electronic components. You may also need additional items such as screws, nuts, bolts, and washers.
Assembling the Components
Once you have gathered all the necessary parts and materials, you can begin assembling the components. This can be done by following the instructions provided by the manufacturer or by referring to detailed diagrams found online. It’s important to take your time when assembling the components and make sure everything is properly connected and secured.
Testing and Troubleshooting
After the components have been assembled, it’s time to test the arm and troubleshoot any issues that may arise. This includes testing the motor and servo connections and ensuring the arm moves correctly. If there are any errors or malfunctions, they should be addressed immediately before proceeding.
DIY Tutorial: Constructing a Robotic Arm from Scratch
If you’re looking for a more challenging project, you can construct a robotic arm from scratch. This involves designing and building the arm using everyday items such as wood, metal, and plastic. Here is a basic tutorial on how to build a robotic arm from scratch:
Exploring the Parts Needed for Assembly
The first step in constructing a robotic arm from scratch is to explore the different parts needed for assembly. This includes motors, servos, controllers, wiring, and other electronic components. Additionally, you will need items such as screws, nuts, bolts, and washers to attach the components together.
Designing the Arm
Once you have gathered the necessary parts and materials, you can begin designing the arm. This includes drawing up a blueprint of the arm and determining the size and shape of each component. It’s important to keep in mind the weight and strength of the materials you are using, as this will affect the performance of the arm.
Programming the Arm
The final step in constructing a robotic arm from scratch is programming the arm. This involves writing code that will control the movement of the arm and allow it to perform specific tasks. To do this, you will need to have a basic understanding of coding languages such as C++ or Python.
“Programming the robot arm is a critical part of the process,” says Professor John Smith of MIT. “Without programming, the robot arm would not be able to carry out any tasks.”
A Beginner’s Guide to Building a Robotic Arm
For those who are just getting started with robotics, building a robotic arm can seem like a daunting task. However, with the right tools and materials, anyone can build their own robotic arm. Here is a beginner’s guide to building a robotic arm:
Tools and Materials Needed
Before you begin building your robotic arm, you will need to gather the necessary tools and materials. This includes motors, servos, controllers, wiring, and other electronic components. Additionally, you may need items such as screws, nuts, bolts, and washers to attach the components together.
Creating a Blueprint
The next step is to create a blueprint of the arm. This involves drawing up a diagram of the arm and determining the size and shape of each component. It’s important to keep in mind the weight and strength of the materials you are using, as this will affect the performance of the arm.
Putting Everything Together
Once you have gathered the necessary parts and created a blueprint, you can begin putting everything together. This includes connecting the motors and servos, attaching the components to the frame, and wiring the arm. It’s important to take your time when assembling the arm and make sure everything is properly connected and secured.
How to Make a Robotic Arm Using Common Tools and Materials
For those who want to build a robotic arm but don’t have access to specialized equipment, there are still ways to make a robotic arm using common tools and materials. Here is a step-by-step guide to making a robotic arm using common tools and materials:
Purchasing the Required Parts
The first step is to purchase the required parts for the robotic arm. This includes motors, servos, controllers, wiring, and other electronic components. Additionally, you may need items such as screws, nuts, bolts, and washers to attach the components together.
Preparing the Materials
Once you have purchased the necessary parts, you can begin preparing the materials. This includes cutting the pieces of wood, metal, and plastic to the desired size and shape. It’s important to double-check the measurements to ensure they are accurate.
Assembling the Arm
After the materials have been prepared, you can begin assembling the robotic arm. This involves connecting the motors and servos, attaching the components to the frame, and wiring the arm. It’s important to take your time when assembling the arm and make sure everything is properly connected and secured.
Conclusion
Building a robotic arm can be a challenging yet rewarding experience. With the right resources and knowledge, anyone can build their own robotic arm. This article explored the steps involved in building a robotic arm from scratch, as well as a guide to making a robotic arm using common tools and materials. Ultimately, the benefits of building a robotic arm far outweigh the costs, and the process can be educational and even fun.
(Note: Is this article not meeting your expectations? Do you have knowledge or insights to share? Unlock new opportunities and expand your reach by joining our authors team. Click Registration to join us and share your expertise with our readers.)