Introduction
Towing a travel trailer can be a lot of fun, but it also comes with certain challenges. One of the biggest challenges is swaying, which can cause accidents and damage to both the trailer and the tow vehicle. Fortunately, sway bars are an effective way to prevent swaying and ensure a safe and smooth towing experience. In this article, we’ll explore the basics of sway bars, the importance of proper installation, and provide a comprehensive step-by-step guide on how to install a sway bar for a travel trailer.
What Are Sway Bars and How Do They Work?
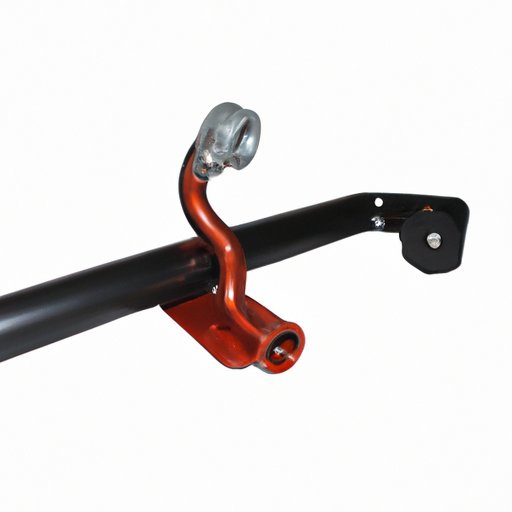
A sway bar is a metal bar that connects the trailer’s frame to the tow vehicle’s frame. The purpose of a sway bar is to provide stability and prevent swaying while the trailer is being towed. It works by transferring the weight of the trailer from one wheel to another, thus reducing the amount of sway that takes place.
The science behind how sway bars work is based on Newton’s third law of motion, which states that for every action, there is an equal and opposite reaction. When a trailer sways from side to side, the sway bar resists the movement and creates an opposite force that stabilizes the trailer and reduces sway.
Why Proper Sway Bar Installation is Important
Improper installation of a sway bar can be dangerous and lead to accidents on the road. It can also cause damage to the trailer or tow vehicle. It’s important to take the time to ensure that the sway bar is installed correctly to prevent these negative outcomes.
Tips for ensuring that the sway bar is properly installed include reading the manufacturer’s instructions carefully, using the right tools for installation, and checking for tightness and tension before hitting the road.
Step-by-Step Guide on How to Install a Sway Bar for a Travel Trailer
Before beginning the installation process, ensure that you have all the necessary tools and materials, including the sway bar kit, a torque wrench, a socket set, and a drill. The installation process involves the following steps:
- Decide on the sway bar’s placement on both the trailer and the tow vehicle. This can vary depending on the type of sway bar being used and the specific trailer and tow vehicle.
- Using the drill and the provided screws, attach the sway bar’s bracket to the trailer frame.
- Attach the sway bar’s bracket to the tow vehicle’s frame.
- Insert the sway bar into both brackets and tighten the bolts with a torque wrench.
- Adjust the tension of the sway bar to ensure that it is holding the trailer in place without being too tight.
- Attach any additional components, such as chains or safety cables, according to the manufacturer’s instructions.
- Test the sway bar before hitting the road to ensure that it is properly installed and functioning
It’s important to note that the installation process can vary depending on the specific sway bar being used. Always refer to the manufacturer’s instructions for best results.
Video Tutorial Highlighting Key Steps
For a visual demonstration of the key steps involved in installing a sway bar, check out this helpful video tutorial:
(Embedded video tutorial)
Comparing Different Types of Sway Bars and Choosing the Best One
There are several types of sway bars available on the market, including friction sway bars, dual-cam sway bars, and more. Choosing the best one for your specific travel trailer depends on the size and weight of the trailer, as well as personal preference.
Some sway bars are easier to install than others, and some provide better results in terms of reducing sway. Be sure to do your research and compare prices and benefits before making a final decision.
Common Mistakes When Installing Sway Bars and How to Avoid Them
Some common mistakes people make when installing sway bars include incorrect tension, improper attachment to the tow vehicle, and not reading the manufacturer’s instructions carefully.
To avoid these mistakes, take the time to carefully read and follow the manufacturer’s instructions, use the right tools for installation, and check the tension of the sway bar before hitting the road.
Frequently Asked Questions
Here are some commonly asked questions about installing sway bars:
- How long does it take to install a sway bar?
- How much does it cost to install a sway bar?
- How often should I check the tension of my sway bar?
- How do I maintain my sway bar?
- Can a sway bar be installed on any type of travel trailer?
The installation process can take anywhere from 30 minutes to an hour, depending on the specific sway bar being installed.
The cost of installing a sway bar varies depending on the type of sway bar being installed and whether or not you choose to install it yourself or hire a professional. On average, you can expect to pay between $200 and $500 for installation.
You should check the tension of your sway bar before each trip to ensure that it is properly tightened and functioning.
Regular maintenance for a sway bar involves checking and tightening bolts and replacing any worn or damaged parts.
Yes, most travel trailers can have a sway bar installed, regardless of their size or weight.
Conclusion
Installing a sway bar for your travel trailer can make a big difference in terms of safety and stability on the road. It’s important to take the time to ensure that the sway bar is properly installed and adjusted to prevent swaying and accidents. Always read and follow the manufacturer’s instructions, use the right tools, and check the tension of the sway bar before hitting the road. With a little effort and care, you can enjoy a safe and smooth towing experience with your travel trailer.
(Note: Is this article not meeting your expectations? Do you have knowledge or insights to share? Unlock new opportunities and expand your reach by joining our authors team. Click Registration to join us and share your expertise with our readers.)