Introduction
Installing a starter motor is an essential part of vehicle maintenance and repair. Having a functioning starter motor is necessary for your car to start, so it’s important to know how to properly install one. This guide will walk you through the basics of replacing a starter motor, the components involved, and provide tips on troubleshooting common issues.
Step-by-Step Guide to Installing a Starter
The first step in installing a starter is to gather the necessary parts and tools. You will need a new starter motor, a screwdriver, wrenches, and other tools depending on the make and model of your vehicle. Once you have these items, you can begin the installation process.
Next, you will need to disconnect the battery by removing the negative cable first and then the positive cable. This will help prevent any electrical shocks or damage to the vehicle.
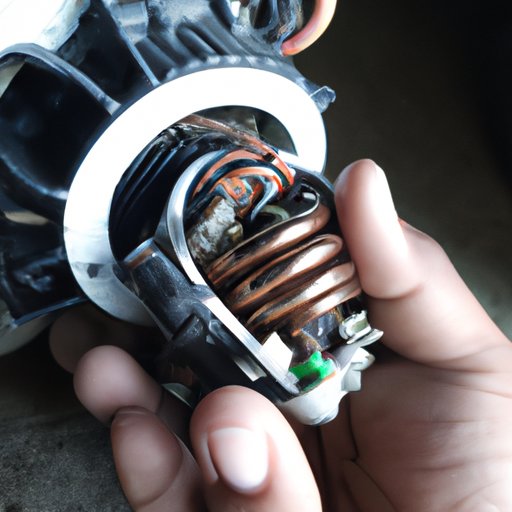
Once the battery is disconnected, you can remove the old starter motor. This can be done by loosening the bolts that hold the starter in place and then pulling it out. Be sure to keep track of any wires or components that are attached to the old starter.
After the old starter is removed, you can install the new starter. This involves connecting the wiring and mounting the starter in the correct position. Make sure all the connections are secure and that the starter is mounted correctly.
Finally, you will need to reattach the battery and test the new starter. To do this, turn the key in the ignition and see if the engine starts. If it does, the installation was successful. If not, you may need to check the connections or troubleshoot the issue.
DIY: How to Install a Starter in 7 Easy Steps
Installing a starter motor is a relatively simple task if you know what you are doing. Here is a step-by-step guide on how to install a starter in 7 easy steps:
Step 1: Gather the necessary parts and tools. This includes a new starter motor, a screwdriver, wrenches, and other tools depending on the make and model of your vehicle.
Step 2: Disconnect the battery by removing the negative cable first and then the positive cable.
Step 3: Remove the old starter motor by loosening the bolts that hold it in place and then pulling it out. Be sure to keep track of any wires or components that are attached to the old starter.
Step 4: Install the new starter by connecting the wiring and mounting the starter in the correct position.
Step 5: Reattach the battery.
Step 6: Test the new starter by turning the key in the ignition and seeing if the engine starts.
Step 7: Take precautions for future maintenance. Make sure to check the connections periodically and perform regular maintenance as recommended by the manufacturer.

How to Replace a Starter Motor: A Comprehensive Guide
Replacing a starter motor is a straightforward process, but there are certain steps you should take to ensure the installation is successful. Here is a comprehensive guide on how to replace a starter motor:
Pre-Installation Checks: Before beginning the installation, it’s important to check the starter motor for signs of wear and tear. Make sure the connections are secure and that the starter is compatible with your vehicle.
Removing the Old Starter: Once the pre-installation checks are complete, you can begin removing the old starter. This involves loosening the bolts that hold the starter in place and then pulling it out. Be sure to keep track of any wires or components that are attached to the old starter.
Installing the New Starter: Installing the new starter involves connecting the wiring and mounting the starter in the correct position. Make sure all the connections are secure and that the starter is mounted correctly.
Testing the New Starter: After the new starter is installed, you will need to test it to make sure it works. To do this, turn the key in the ignition and see if the engine starts. If it does, the installation was successful.

Installation Tips for Replacing a Starter
When replacing a starter, there are several tips you should keep in mind to ensure a successful installation. These tips include:
Selecting the Right Starter: When selecting a new starter, make sure to get one that is compatible with your vehicle. Check the size and type of starter required for your specific make and model.
Preparing the Vehicle: Before beginning the installation, make sure the vehicle is in a safe and secure location. This will help protect you and the vehicle from any potential harm.
Working with Connections: When working with the electrical connections, make sure they are secure and free of corrosion. This will help ensure the starter operates correctly.
Troubleshooting Common Issues: If the starter does not work after installation, you may need to troubleshoot the issue. This could involve checking the connections or testing the starter motor itself.
Installing a Starter: A Basic Guide for Beginners
Installing a starter motor is a straightforward process that anyone can do with the right tools and knowledge. Here is a basic guide for beginners on how to install a starter:
What You Will Need: To install a starter, you will need a new starter motor, a screwdriver, wrenches, and other tools depending on the make and model of your vehicle.
Safety Considerations: Before beginning the installation, make sure the vehicle is in a safe and secure location. This will help protect you and the vehicle from any potential harm.
Steps to Follow: The installation process involves disconnecting the battery, removing the old starter motor, installing the new starter, reattaching the battery, and testing the new starter. If you follow these steps, the installation should be successful.

All You Need to Know About Installing a Starter Motor
Installing a starter motor is an important part of vehicle maintenance and repair. Knowing how to properly install one can save you time and money in the long run. Here is all you need to know about installing a starter motor:
Understanding the Basics of the System: It’s important to understand the basics of the starter system before attempting to install a starter motor. This includes knowing the components involved, the location of the starter, and how to access it.
Components Involved: When replacing a starter motor, you will need to gather the necessary parts and tools. This includes a new starter motor, a screwdriver, wrenches, and other tools depending on the make and model of your vehicle.
Preparation for Installation: Before beginning the installation, make sure the vehicle is in a safe and secure location. This will help protect you and the vehicle from any potential harm.
Installing the Starter Motor: Installing the starter motor involves disconnecting the battery, removing the old starter motor, installing the new starter, reattaching the battery, and testing the new starter.
Testing and Troubleshooting: After the installation is complete, you will need to test the starter motor to make sure it works. If it does not work, you may need to troubleshoot the issue. This could involve checking the connections or testing the starter motor itself.
Conclusion
Installing a starter motor is an essential part of vehicle maintenance and repair. With the right tools and knowledge, anyone can do it themselves and save money in the long run. This guide provides a step-by-step guide on how to install a starter motor, as well as tips for troubleshooting common issues. Following these steps will ensure a successful installation.
(Note: Is this article not meeting your expectations? Do you have knowledge or insights to share? Unlock new opportunities and expand your reach by joining our authors team. Click Registration to join us and share your expertise with our readers.)