Introduction
Installing a remote car starter is a great way to stay warm in the winter months and cool in the summer. With the push of a button, you can start your car from the comfort of your home or office, allowing the vehicle’s climate control system to adjust the temperature to your desired level before you even get in the car. But installing a remote car starter can be a daunting task for beginners, especially if you don’t know what you’re doing. That’s why we’ve put together this comprehensive guide to help you get started with installing a remote car starter in your vehicle.

Overview of Remote Car Starters
A remote car starter is an electronic device that allows you to start your car from a distance. This device works by sending a signal from the remote to the receiver, which then sends the signal to the starter motor. Depending on the type of starter you have, the system may also allow you to unlock and lock the doors, open and close windows, and activate and deactivate other features such as security systems. Remote car starters are available in two basic types: one-way and two-way. One-way starters only allow you to start the car remotely, while two-way starters allow you to receive feedback from the car when the command has been executed.

Benefits of Installing a Remote Car Starter
Installing a remote car starter has a number of benefits beyond just convenience. Research has shown that remote car starters can improve fuel efficiency by up to 10%, reduce wear and tear on the engine, and increase the life of the battery. Additionally, having a remote car starter installed can make your vehicle more secure, as it allows you to check on your car from a distance and make sure that it is locked or unlocked as necessary. Finally, a remote car starter can help make your morning commute more comfortable, as you can pre-warm or pre-cool your vehicle before getting inside.
Step-by-Step Guide to Installing a Remote Car Starter
Installing a remote car starter requires some basic knowledge of car electronics and the ability to work with tools. Before beginning, make sure that you have all the necessary parts and tools at hand, including the remote starter unit, wiring harness, and any additional components required for your specific vehicle. For a detailed list of the necessary parts and tools, refer to the manufacturer’s instructions.
Gather Necessary Parts and Tools
Before starting the installation process, make sure that you have all the necessary parts and tools on hand. This includes the remote starter unit, wiring harness, and any additional components required for your specific vehicle. Refer to the manufacturer’s instructions for a detailed list of the necessary parts and tools.
Read the Manual Carefully
The next step is to read the manual carefully. The manual will provide detailed instructions on how to properly install the remote starter and should include diagrams that illustrate each step. Take the time to familiarize yourself with the installation process before beginning, as this will help ensure that the installation goes smoothly.
Disconnect the Battery
Once you have gathered all the necessary parts and tools and read the manual, it’s time to begin the installation process. The first step is to disconnect the battery. Make sure to take appropriate safety precautions when working with the car’s electrical system, as there is a risk of electric shock. After disconnecting the battery, it’s a good idea to wait a few minutes before continuing with the installation.
Mount the Remote Starter Unit
The next step is to mount the remote starter unit. Refer to the manufacturer’s instructions for specific mounting instructions, as different models may require different steps. Generally speaking, the unit should be mounted in an easily accessible location, such as the dashboard or glove box.
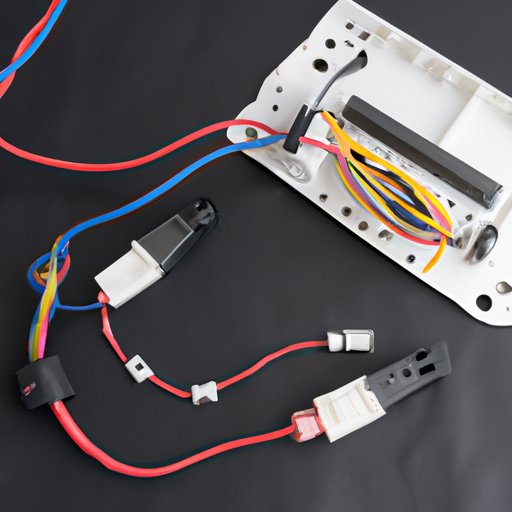
Connect the Wiring Harness
Once the unit is mounted, it’s time to connect the wiring harness. Again, refer to the manufacturer’s instructions for specific instructions as different models may require different steps. Make sure to double check all connections to ensure that they are secure.
Test the System
After connecting the wiring harness, it’s time to test the system. Make sure that the remote starter is working properly by activating it from a distance. If the system is working correctly, the car should start without any issues. If not, check the connections and make sure they are secure.
Re-Connect the Battery
Once you have tested the system and confirmed that it is working properly, it’s time to re-connect the battery. Make sure to take appropriate safety precautions when working with the car’s electrical system, as there is a risk of electric shock. After re-connecting the battery, it’s a good idea to wait a few minutes before starting the car.

DIY: Installing a Remote Car Starter in 5 Easy Steps
If you’re feeling confident enough to tackle the installation process yourself, here is a quick step-by-step guide on how to install a remote car starter in five easy steps:
Step 1: Gather Necessary Parts and Tools
The first step is to gather all the necessary parts and tools, including the remote starter unit, wiring harness, and any additional components required for your specific vehicle. Refer to the manufacturer’s instructions for a detailed list of the necessary parts and tools.
Step 2: Read the Manual Carefully
The next step is to read the manual carefully. The manual will provide detailed instructions on how to properly install the remote starter and should include diagrams that illustrate each step. Take the time to familiarize yourself with the installation process before beginning, as this will help ensure that the installation goes smoothly.
Step 3: Disconnect the Battery
Once you have gathered all the necessary parts and tools and read the manual, it’s time to begin the installation process. The first step is to disconnect the battery. Make sure to take appropriate safety precautions when working with the car’s electrical system, as there is a risk of electric shock. After disconnecting the battery, it’s a good idea to wait a few minutes before continuing with the installation.
Step 4: Mount the Remote Starter Unit
The next step is to mount the remote starter unit. Refer to the manufacturer’s instructions for specific mounting instructions, as different models may require different steps. Generally speaking, the unit should be mounted in an easily accessible location, such as the dashboard or glove box.
Step 5: Connect the Wiring Harness
Once the unit is mounted, it’s time to connect the wiring harness. Again, refer to the manufacturer’s instructions for specific instructions as different models may require different steps. Make sure to double check all connections to ensure that they are secure.
How to Get Started with Installing a Remote Car Starter
If you’re considering installing a remote car starter in your vehicle, there are a few things you should do first. Here are three tips to get you started:
Understand Your Car’s Electrical System
Before attempting to install a remote car starter, it’s important to understand the basics of your car’s electrical system. Knowing the basics will help you better understand the installation process and can help prevent any potential problems.
Research the Right Remote Starter for Your Vehicle
The next step is to research the right remote starter for your vehicle. Different vehicles have different requirements, so it’s important to make sure that you get the correct model for your car. Do your research and read reviews to make sure that the model you choose is compatible with your vehicle and offers the features you need.
Gather All Necessary Parts and Tools
Finally, make sure that you have all the necessary parts and tools on hand before you begin the installation process. This includes the remote starter unit, wiring harness, and any additional components required for your specific vehicle. Refer to the manufacturer’s instructions for a detailed list of the necessary parts and tools.
A Beginner’s Guide to Installing a Remote Car Starter
If you’re a beginner to installing a remote car starter, here are a few tips to keep in mind:
Check the Manufacturer’s Instructions
Make sure to read the manufacturer’s instructions carefully before beginning the installation process. The manual will provide detailed instructions on how to properly install the remote starter and should include diagrams that illustrate each step. Take the time to familiarize yourself with the installation process before beginning, as this will help ensure that the installation goes smoothly.
Take Precautions When Working with the Car’s Electrical System
When working with the car’s electrical system, it’s important to take appropriate safety precautions. Make sure to disconnect the battery before beginning the installation process and wear protective gear, such as gloves and goggles, to protect yourself from electric shock.
Test the System After Installing the Remote Starter
After connecting the wiring harness, it’s important to test the system to make sure that it is working properly. Make sure that the remote starter is working properly by activating it from a distance. If the system is working correctly, the car should start without any issues. If not, check the connections and make sure they are secure.
Installation Tips for Installing a Remote Car Starter
Here are a few tips to keep in mind when installing a remote car starter:
Wear Protective Gear
When working with the car’s electrical system, it’s important to take appropriate safety precautions. Make sure to wear protective gear, such as gloves and goggles, to protect yourself from electric shock.
Double Check All Connections
When connecting the wiring harness, make sure to double check all connections to ensure that they are secure. This will help prevent any potential problems down the line.
Make Sure to Ground the Remote Starter
Finally, make sure to ground the remote starter. This will help ensure that the system works properly and prevents any potential problems.
All You Need to Know About Installing a Remote Car Starter
If you’re considering installing a remote car starter in your vehicle, here are a few key points to keep in mind:
What Types of Remote Starters are Available?
Remote car starters are available in two basic types: one-way and two-way. One-way starters only allow you to start the car remotely, while two-way starters allow you to receive feedback from the car when the command has been executed.
What is the Difference Between a Basic and Advanced Remote Starter?
Basic remote starters offer basic features, such as the ability to start the car remotely, while advanced remote starters offer more features, such as the ability to unlock and lock the doors, open and close windows, and activate and deactivate other features such as security systems.
What Are Some Common Problems with Remote Starters?
Some common problems with remote starters include poor range, interference from other electronic devices, and incorrect wiring. If you are experiencing any of these problems, make sure to double check the wiring and make sure that all connections are secure.
Conclusion
Installing a remote car starter can be a daunting task for beginners. However, with the right knowledge and preparation, it is possible to successfully install a remote car starter in your vehicle. This guide provides a step-by-step guide on how to install a remote car starter and offers helpful tips and advice. We hope that this guide has been helpful in getting you started with installing a remote car starter in your vehicle.
Summary
This comprehensive guide provides a step-by-step guide on how to install a remote car starter and offers helpful tips and advice. It covers everything from gathering the necessary parts and tools to testing the system after installation. Additionally, it provides a beginner’s guide and installation tips to help you get started with installing a remote car starter in your vehicle.
Final Thoughts
Installing a remote car starter can seem intimidating, but with the right knowledge and preparation, it is possible to successfully install a remote car starter in your vehicle. We hope that this guide has been helpful in getting you started with installing a remote car starter in your vehicle.
(Note: Is this article not meeting your expectations? Do you have knowledge or insights to share? Unlock new opportunities and expand your reach by joining our authors team. Click Registration to join us and share your expertise with our readers.)