A Beginner’s Guide to Hooking Up a Starter Solenoid
Are you interested in learning how to hook up a starter solenoid? If so, you’ve come to the right place. In this guide, we will cover everything you need to know about hooking up a starter solenoid, including how to troubleshoot common issues and tips to ensure a professional installation. Whether you’re a seasoned mechanic or a novice DIYer, this guide will provide valuable insights and step-by-step instructions to help you successfully install a starter solenoid in your vehicle.
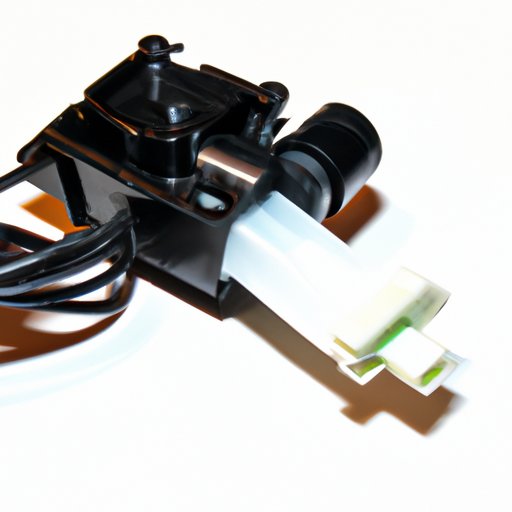
What is a Starter Solenoid?
Before we dive into the process of installing a starter solenoid, it’s important to understand what it is and why it’s necessary for a vehicle. A starter solenoid is a small, electro-mechanical component that helps to start the engine of a vehicle. It’s typically located on the starter motor or on a separate solenoid relay located near the battery. When the ignition key is turned, the solenoid is activated, and it uses an electromagnetic force to engage the starter motor and crank the engine. Without a starter solenoid, the starter motor won’t receive the necessary electrical current to start the engine.
Tools and Materials Needed
Before we begin the installation process, let’s take a look at the tools and materials you will need. Make sure you have all of the following items on hand before starting the installation process:
- Socket and wrench set
- Screwdrivers
- Wire stripper/cutter
- Electrical tape
- Multimeter
- Starter solenoid that matches your vehicle’s make and model
- Wire connectors and crimping tool (if necessary)
- Fuses (if necessary)
Step-by-Step Instructions
Now that you have all of the necessary tools and materials, let’s get started. Follow these step-by-step instructions to hook up a starter solenoid:
- Disconnect the negative battery cable to prevent accidental electrical shocks or damage to the vehicle’s electrical system.
- Locate the existing starter and starter solenoid (if applicable) on your vehicle. The starter is typically located on the side or bottom of the engine block, while the starter solenoid may be mounted on the starter motor or near the battery.
- Remove the wiring connections from the old starter solenoid, making sure to label each wire according to its corresponding connection point.
- Remove the old starter solenoid from the vehicle using a socket and wrench set.
- Install the new starter solenoid using the socket and wrench set. Make sure it’s securely fastened to the vehicle.
- Connect the wiring connections to the new starter solenoid according to the labels you made in step 3. Use wire connectors and a crimping tool if necessary.
- Reconnect the negative battery cable.
- Turn the ignition key to test the starter solenoid and ensure that it’s functioning properly.
- If the starter solenoid is not working, use a multimeter to troubleshoot the electrical connections and diagnose the problem.
- If necessary, replace any faulty wiring or components to ensure a proper connection.
Congratulations! You have successfully hooked up a starter solenoid in your vehicle.
Troubleshooting Starter Solenoids: What to Do When It Won’t Work
While hooking up a starter solenoid is a simple process, sometimes things don’t go according to plan. If you’re having trouble getting your starter solenoid to work properly, don’t worry. Here are some common problems and solutions to help you troubleshoot your starter solenoid:
Problem: Starter Solenoid Clicks But Won’t Start
Sometimes the starter solenoid will click but won’t start the engine. This is usually caused by a low battery or faulty wiring connections. Here’s what to do:
- Check the battery to make sure it’s fully charged and has enough voltage to start the engine.
- Check the wiring connections to make sure they’re clean, tight, and free of corrosion.
- If the wiring connections are faulty, replace them with new connectors and crimping tools.
Problem: Starter Solenoid Doesn’t Click
If the starter solenoid doesn’t click at all, it may be due to a bad starter solenoid or a faulty ignition switch. Here’s what to do:
- Use a multimeter to test the solenoid’s voltage and check for continuity between the electrical connections.
- If the solenoid is faulty, replace it with a new one that matches your vehicle’s make and model.
- If the solenoid is working properly, check the ignition switch to make sure it’s functioning correctly.
Problem: Starter Motor Doesn’t Turn
If the engine doesn’t crank when you turn the ignition key, it may be due to a faulty starter motor or a problem with the engine itself. Here’s what to do:
- Use a multimeter to test the starter motor’s voltage and check for continuity between the electrical connections.
- If the starter motor is faulty, replace it with a new one that matches your vehicle’s make and model.
- If the starter motor is working properly, check the engine for any signs of damage or wear and tear.
Tools for Troubleshooting
In addition to the tools and materials listed in section II, you may want to have the following items on hand for troubleshooting purposes:
- Multimeter probes
- Electrical contact grease
- Fuse puller
- Replacement fuses
- Spare wiring connectors
5 Tips for Hooking Up a Starter Solenoid Like a Professional
If you want to install a starter solenoid like a professional, here are some tips to help you get the job done right:
Tip #1: Disconnect the Battery
Before you start working on your vehicle, always disconnect the battery. This will ensure that you don’t accidental shock yourself or damage the vehicle’s electrical system.
Tip #2: Label Your Wires
When you’re removing the wiring connections from the old starter solenoid, make sure to label each wire according to its corresponding connection point. This will make it easier to reconnect the wiring to the new starter solenoid without making any mistakes.
Tip #3: Use Proper Connectors
To ensure a secure and long-lasting connection, always use the proper connectors for your wiring connections. Crimp connectors are an excellent choice for securing wiring connections, as they provide a strong, reliable connection.
Tip #4: Use Electrical Contact Grease
To prevent corrosion and improve conductivity, apply electrical contact grease to your wiring connections before crimping them together. This will help to ensure a clean and reliable connection for years to come.
Tip #5: Test Your Starter Solenoid
Before you reconnect the battery and start the engine, test your starter solenoid to make sure it’s functioning properly. Use a multimeter to check for continuity between the electrical connections and make sure there are no loose or faulty connections.
What You Need to Know Before Hooking Up Your Starter Solenoid
If you’re planning to install a starter solenoid in your vehicle, there are a few things you need to know beforehand. Let’s take a closer look:
Background Information
As we mentioned earlier, a starter solenoid is a crucial component for starting your vehicle’s engine. It works by using an electromagnetic force to engage the starter motor and crank the engine. Without a starter solenoid, your engine won’t start.
Safety Precautions
When working on your vehicle, it’s important to follow proper safety precautions. Make sure to disconnect the battery before starting any work on the electrical system, and use proper protective equipment (such as gloves and safety glasses) to prevent injury.
Tools and Materials
Before you start the installation process, make sure you have all of the necessary tools and materials on hand. These may include items such as a socket and wrench set, wire connectors, and electrical tape.
How to Install a Starter Solenoid in 10 Easy Steps
Here’s a quick recap of the information we covered in this guide. Follow these simple 10 steps to install a starter solenoid in your vehicle:
- Disconnect the negative battery cable.
- Locate the existing starter and starter solenoid.
- Remove the wiring connections from the old starter solenoid.
- Remove the old starter solenoid from the vehicle.
- Install the new starter solenoid.
- Connect the wiring connections to the new starter solenoid.
- Reconnect the negative battery cable.
- Turn the ignition key to test the starter solenoid.
- Troubleshoot any issues that arise.
- Enjoy your newly installed starter solenoid!
Conclusion
Congratulations! You’ve successfully learned how to hook up a starter solenoid. Whether you’re a seasoned mechanic or a DIY novice, the tips and instructions in this guide will help you tackle this important maintenance task in no time. Remember to always follow proper safety precautions, use the appropriate tools and materials, and troubleshoot any issues that arise along the way. With these tips in mind, you’ll be well on your way to a smooth and hassle-free starter solenoid installation.
(Note: Is this article not meeting your expectations? Do you have knowledge or insights to share? Unlock new opportunities and expand your reach by joining our authors team. Click Registration to join us and share your expertise with our readers.)