Introduction
Dragons are majestic creatures that have captured the imagination of people for centuries. They are often depicted in mythology, movies, and books as fierce and powerful creatures that possess magical abilities. One way to bring these mythical creatures to life is by drawing them. In this article, we will provide a step-by-step guide on how to draw a dragon art. We will also share tips and tricks to help you improve the precision and creativity of your dragon art.
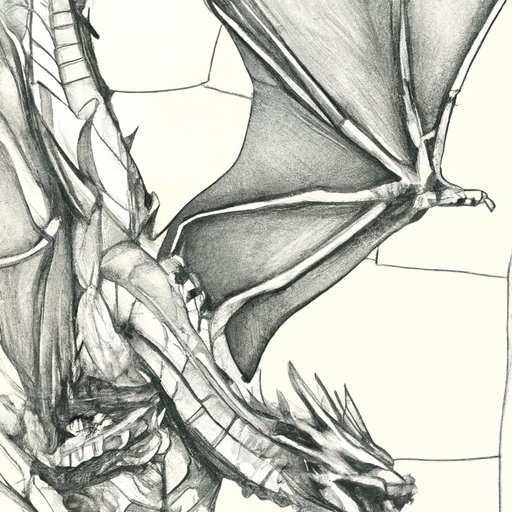
7 Simple Steps to Draw an Imaginative Dragon Art
Before you start your dragon art, it’s important to gather all the necessary materials and choose a reference photo or image that you would like to base your dragon on. Once you have all the materials ready, follow these simple steps:
Step 1: Sketching the Basic Structure
The first step in drawing a dragon art is to sketch the basic structure. Start by drawing a circle for the head and a slanted line for the body. Then, draw a line for the tail and four lines for the legs. This will help you form the foundation for your dragon art.
Step 2: Adding Details to the Head and Face
After sketching the basic structure, you can start adding details to the head and face. Draw the eyes, nostrils, and mouth of your dragon. This is where you can showcase your creativity by deciding how you want your dragon’s facial features to look like!
Step 3: Sketching the Body and Limbs
Now that you’ve added some details to your dragon’s head and face, it’s time to sketch the body and limbs. Use the foundation you made earlier as a guide and start fleshing out your dragon’s body. Draw the muscles and curves of your dragon’s body, making sure to maintain the right body proportions.
Step 4: Adding Scales and Texture
What’s a dragon without scales? To make your dragon art more realistic, add scales and texture to your dragon’s body. You can do this by drawing small scale-like shapes all over your dragon’s body, or by drawing detailed textures like rough, scaly skin.
Step 5: Adding Wings and a Tail
Once you’ve finished adding scales and texture to your dragon’s body, it’s time to add wings and a tail. Draw the wings of your dragon by sketching a long, curved shape on either side of the body. Then, add the tail by sketching a long, pointed shape that extends from the lower back.
Step 6: Coloring Your Dragon Art
Now that your dragon art has taken shape, it’s time to add some color to it! Pick your desired color scheme and start coloring your dragon art. You can use colored pencils, markers, watercolors – whatever you prefer. Just make sure to use gentle strokes to avoid coloring outside the lines.
Step 7: Shading and Highlighting Your Dragon Art
To add depth and dimension to your dragon art, you can use shading and highlighting techniques. Shade the areas that would naturally appear darker, such as under the dragon’s arms or legs. Highlight areas that would catch the light, such as the dragon’s snout or crest. This technique will make your dragon art pop with detail and textures!
Exploring the World of Dragon Art: Tips and Tricks for Drawing with Precision
If you want to create precise and realistic-looking dragon art, there are a few tips and tricks that you can follow:
Hand Positioning and Posture
It’s important to use the right hand positioning and posture when drawing your dragon art. Use a relaxed grip on your drawing tool, and maintain good posture to avoid straining your back or shoulder muscles. This will help you create smooth and precise lines while drawing your dragon art.
Shading and Lighting Techniques
Shading and lighting techniques can help add depth and dimension to your dragon art. You can use techniques like cross-hatching or stippling to create realistic textures and shadows. By adding highlights to the areas that catch light, you can create an illusion of three-dimensionality in your dragon art.
Perspective, Shadows, and Highlights
When drawing your dragon art, it’s important to consider the perspective, shadows, and highlights. These elements can help create a sense of depth and realism in your dragon art. Pay attention to light sources and how they affect your dragon’s body and surroundings.
The Artistic Anatomy of Dragons: Understanding the Skeletal and Muscular Structure
Understanding the skeletal and muscular structure of dragons can help you make better decisions when creating your dragon art. Here are some of the main aspects of dragon anatomy:
Bone Structure
Dragons have a complex bone structure that consists of a skull, rib cage, pelvis, and limbs. The skull usually has a variety of horns and crests, while the ribs and pelvis are broad and designed to protect the internal organs.
Muscle Placement
Just like humans, dragons have a muscular system that is responsible for movement and other bodily functions. Understanding the placement of muscles can help you create realistic-looking dragon art. Dragons have powerful back muscles and leg muscles, which they use to move around and fly.
Creative Dragon Drawing Techniques for Kids and Adults Alike
If you’re looking for some fun and creative dragon art techniques, here are some ideas:
Drawing Dragons in Unusual Poses
Try drawing your dragon art in unusual poses, such as hanging upside down or roaring mid-flight. This will help you explore different perspectives and angles in your dragon art.
Mixing and Blending Colors
Experiment with mixing and blending colors to create unique effects in your dragon art. Have fun playing with different shades and tones to create a multi-dimensional look!
Experiment with Different Art Supplies
Don’t be afraid to experiment with different art supplies when creating your dragon art. Try using watercolors, glitter pens, or even collage materials to add some texture and fun to your dragon art.
Mastering the Art of Dragon Portraiture: Tips and Tricks for a Stunning Dragon Portrait
Dragon portraits can be tricky, but with these tips and tricks, you can create stunning and memorable dragon art:
Placement of Eyes and Nostrils
When drawing a dragon’s face, pay special attention to the placement of the eyes and nostrils. This will help bring your dragon’s face to life and give it character and personality.
Use Contrasting Colors
Using contrasting colors can help make your dragon portrait pop. For example, use a lighter or brighter color for the dragon’s eyes to draw attention to them.
Add Depth and Dimension to the Face
Adding depth and dimension to the face can help bring your dragon art to life. Use shading and highlighting techniques to create texture and contrast, and don’t forget to accentuate the dragon’s unique features, such as its horns or snout.
Conclusion
Drawing a dragon art can be both challenging and fun. By following our step-by-step guide and applying the tips and tricks we have shared, you can create stunning and imaginative dragon art.
(Note: Is this article not meeting your expectations? Do you have knowledge or insights to share? Unlock new opportunities and expand your reach by joining our authors team. Click Registration to join us and share your expertise with our readers.)