Introduction
The Charleston is an iconic jazz-age dance that was popularized in the 1920s. It’s characterized by its high energy, lively footwork, and quirky arm movements. The dance has been featured in countless films and musicals, from The Great Gatsby to Cabaret. It’s a timeless classic that continues to be enjoyed by dancers all over the world.
Whether you’re a beginner looking to learn the basics or an experienced dancer looking to refine your technique, this guide will show you how to dance the Charleston. Read on to learn step-by-step instructions, watch video tutorials, explore essential moves and techniques, and discover fun drills and exercises to help you master the Charleston.
Step-by-Step Guide to the Charleston
The Charleston is a 8-count dance that can be done solo or with a partner. It’s a relatively easy dance to learn, but mastering it takes practice and dedication. Here’s a step-by-step guide to help you get started.
The Basic Steps
The basic steps of the Charleston are as follows:
- Step 1: Start with your feet together.
- Step 2: Step forward with your left foot.
- Step 3: Step back with your right foot.
- Step 4: Step to the side with your left foot.
- Step 5: Step together with your right foot.
- Step 6: Step back with your left foot.
- Step 7: Step to the side with your right foot.
- Step 8: Step together with your left foot.
Essential Moves and Techniques
Once you’ve mastered the basic steps, you can start to incorporate some of the more advanced moves and techniques into your Charleston. These include the kick step, swing step, shuffle step, and Charleston walk. As you become more comfortable with these moves, try adding in arm movements and styling elements to give your Charleston more flair.
Tips for Perfecting Your Charleston Technique
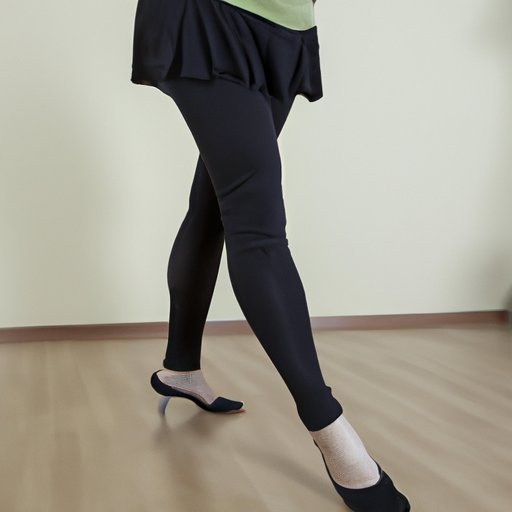
To perfect your Charleston technique, focus on your posture, timing, and footwork. Make sure your spine is straight and your shoulders are relaxed. Pay attention to the music and practice counting the beats in your head to keep your timing on point. Lastly, focus on keeping your steps light and bouncy to really bring the Charleston to life.
Learn the Charleston Through Video Tutorials
Video tutorials are a great way to learn the Charleston. They provide visual demonstrations of the steps and techniques, allowing you to see exactly what you need to do. Plus, they’re a great way to practice at home without having to attend classes or hire a teacher.
Benefits of Video Tutorials
Video tutorials allow you to learn the Charleston at your own pace. You can pause, rewind, and repeat sections as many times as you need until you feel comfortable with the material. This makes them ideal for beginners who want to take their time learning the basics.
Where to Find Quality Video Tutorials
You can find quality video tutorials online from a variety of sources. YouTube is a great place to start, as there are countless instructional videos available for free. You can also find tutorials on sites like Coursera and Udemy, which offer paid courses taught by experienced instructors.
Breakdown of Essential Charleston Moves
Now let’s take a closer look at some of the essential moves of the Charleston. Here’s a breakdown of the four most important moves: the basic step, kick step, swing step, and shuffle step.
Move 1: Basic Step
The basic step is the foundation of the Charleston. It consists of eight counts and is danced in a “rock step” pattern. Start with your feet together, then step forward with your left foot, back with your right foot, to the side with your left foot, and together with your right foot. Repeat this sequence in reverse.
Move 2: Kick Step
The kick step is an optional move that adds an extra layer of complexity to the Charleston. It involves kicking your leg out to the side on count 8. To do this, lift your right leg up and kick it out to the side before bringing it back down and stepping together with your left foot.
Move 3: Swing Step
The swing step is another optional move that adds flair to the Charleston. To do this, step forward with your left foot and swing your right leg around in a circular motion before bringing it back down and stepping together with your left foot.
Move 4: Shuffle Step
The shuffle step is a more advanced move that requires good coordination and timing. To do this, step forward with your left foot and quickly step together with your right foot. Then, step backward with your left foot and quickly step together with your right foot.
Master the Charleston with Fun Drills and Exercises
Once you’ve mastered the basic steps and essential moves, you can start to work on refining your technique with drills and exercises. These drills and exercises will help you develop good posture, timing, and footwork, and will also help you break down complex moves into manageable chunks.
Practice Drills for Improving Timing
Timing is one of the most important aspects of the Charleston. To practice your timing, try doing a drill called the “count and clap”. This involves counting the beats out loud as you dance and clapping on the 8th beat. Doing this drill regularly will help you stay on beat and give your Charleston a more polished feel.
Creative Exercises to Improve Technique
To improve your technique, try doing creative exercises such as “high-low-freeze”. This involves starting in your basic step and then raising your arms up on the 8th beat. On the next 8th beat, lower your arms and freeze. This exercise will help you learn how to sync your arm movements with your footwork.
How to Dance the Charleston with Style and Grace
Now that you have the basics down, it’s time to focus on adding style and grace to your Charleston. Good posture and movement are key here. Make sure your spine is straight and your shoulders are relaxed. Also, pay attention to the music and use your arms and facial expressions to express the feeling of the song.
Posture and Movement
Good posture is essential for the Charleston. Stand tall with your shoulders back and your chest lifted. Keep your weight evenly distributed between both feet and make sure your knees are slightly bent. As you dance, focus on making smooth transitions between steps and using your arms to create interesting shapes.
Musicality and Expression
The Charleston is all about expressing the music. Listen closely to the rhythm and use your body to convey the feeling of the song. Move your arms and face to the music and use your feet to emphasize the beats. With practice, you will be able to move with the music and add your own unique style to the Charleston.

Spice Up Your Charleston with Creative Variations
Once you’ve mastered the basics, start experimenting with creative variations. Add footwork variations to mix up the routine and keep things interesting. Or, try incorporating styling elements such as turns, twists, and dips to add an extra layer of complexity to your Charleston.
Add Footwork Variations
Footwork variations are a great way to mix up your Charleston. Try adding hops, skips, and jumps to your routine. Or, experiment with different rhythms and patterns to create a unique and interesting dance. Have fun and don’t be afraid to try something new!
Incorporate Styling Elements
Styling elements are a great way to add an extra layer of complexity to your Charleston. Try adding turns, spins, and dips to your routine. You can even incorporate jazz hands and other arm movements to really bring the dance to life. With practice, you’ll be able to add your own unique style to the Charleston.
Conclusion
Learning how to dance the Charleston can be a fun and rewarding experience. With the right instruction and practice, you can master the basic steps, essential moves, and styling elements. Use video tutorials to learn the basics, practice drills and exercises to refine your technique, and add your own unique style to the Charleston to make it your own.
With this guide, you now have the tools and knowledge to start your Charleston journey.
(Note: Is this article not meeting your expectations? Do you have knowledge or insights to share? Unlock new opportunities and expand your reach by joining our authors team. Click Registration to join us and share your expertise with our readers.)