Introduction
A jump starter is an essential tool if you own a car. It is a portable device that can be used to start your vehicle’s engine when the battery fails. Jump starters are a convenient way to get back on the road without having to call for assistance or wait for help. In this article, we will provide a step-by-step guide on how to charge a jump starter for maximum performance.
Step-by-Step Guide to Charging a Jump Starter
Before you begin charging your jump starter, it is important to gather the necessary materials: a power source (such as a car charger, wall outlet, or generator), jumper cables, and the jump starter itself. Once you have everything you need, you can start the charging process.
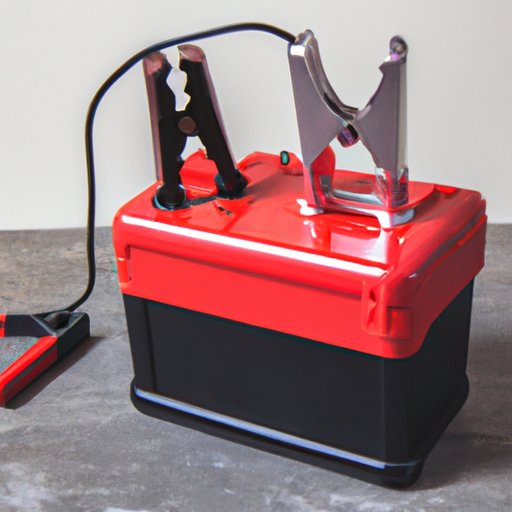
Connecting the Cables
The first step is to connect the jumper cables to the jump starter. Make sure the red cable is attached to the positive terminal and the black cable is attached to the negative terminal. For safety purposes, do not allow the cables to touch each other.
Plugging into an Electrical Source
Once the cables are securely connected to the jump starter, plug it into an electrical source. You can use a car charger, a wall outlet, or a generator to power the device. Make sure the voltage is compatible with the jump starter before plugging it in.
Monitoring the Charge
Allow the jump starter to charge for several hours until the indicator light turns green. This indicates that the battery is fully charged and ready for use. Do not overcharge the jump starter as this can damage the battery.
How to Use a Jump Starter for Maximum Performance
In order to maximize the performance of your jump starter, it is important to understand battery capacity and prepare the vehicle for a jump start. The battery capacity is the amount of energy stored in the battery and is measured in ampere-hours (Ah). A higher Ah rating means the battery can store more energy, making it more powerful and reliable.
Preparing the Vehicle for a Jump Start
Before attempting to jump start the vehicle, make sure all lights and accessories are turned off. Check the battery terminals for corrosion and clean them if necessary. If the battery is still not functioning properly, you may need to replace it.
Jump Starting the Vehicle
Once the vehicle is prepared, connect the jumper cables to the jump starter and the vehicle’s battery. Make sure the red cable is connected to the positive terminal and the black cable is connected to the negative terminal. Turn on the jump starter, then start the vehicle. Allow the vehicle to run for several minutes before disconnecting the jumper cables.

What You Need to Know Before Charging a Jump Starter
Before charging a jump starter, there are a few safety precautions that should be taken. Always wear protective gear such as gloves and safety glasses when working with the battery. Never attempt to jump start a frozen battery as this could cause damage. Additionally, never leave the jump starter plugged in unattended.
Pre-Charging Tips
It is also important to check the battery terminals for corrosion before charging. If the terminals are corroded, use a wire brush or baking soda solution to clean them. Additionally, make sure the voltage of the power source is compatible with the jump starter before plugging it in.

Tips and Tricks for Charging a Jump Starter
There are several tips and tricks you can use to ensure your jump starter charges efficiently and performs at its best. When selecting a power source, choose one with a high voltage output as this will charge the battery faster. Additionally, it is important to maintain the battery by ensuring it is not overcharged or left idle for long periods of time.
Choosing the Right Power Source
When selecting a power source, it is important to choose one that has a high voltage output. Car chargers tend to have the highest voltage output and are the most reliable option. Wall outlets and generators are also suitable options, but they may take longer to charge the battery.
Maintaining the Battery
To ensure your jump starter performs optimally, it is important to maintain the battery. Overcharging can cause permanent damage to the battery, so make sure to monitor the charge and unplug the jump starter once it is fully charged. Additionally, never leave the jump starter idle for long periods of time as this can reduce the battery’s lifespan.
Cleaning the Terminals
Cleaning the battery terminals is another important step in maintaining your jump starter. If the terminals are corroded, use a wire brush or baking soda solution to clean them. This will help ensure the battery has a good connection and will maximize the performance of the jump starter.

Troubleshooting Common Issues When Charging a Jump Starter
If you encounter any issues when charging your jump starter, there are several steps you can take to troubleshoot the problem. First, diagnose low voltage by checking the power source and the cables. If the power source is functioning correctly, check the cables for fraying or damage. If the cables are in good condition, then the issue is likely due to a dead battery.
Identifying Corrosion
Corrosion can also cause issues when charging a jump starter. To identify corrosion, inspect the battery terminals for white or green residue. If present, use a wire brush or baking soda solution to clean the terminals. Additionally, you can use a multimeter to test the voltage of the battery.
Checking the Alternator
If the jump starter does not charge the battery, it is possible that the alternator is not functioning properly. To check the alternator, use a multimeter to measure the voltage output. If the voltage is below 12 volts, the alternator is likely the problem and needs to be replaced.
Frequently Asked Questions About Charging a Jump Starter
What is the Best Way to Charge a Jump Starter?
The best way to charge a jump starter is to use a car charger. Car chargers typically have the highest voltage output and will charge the battery faster than other power sources.
How Long Does it Take to Charge a Jump Starter?
It typically takes several hours to charge a jump starter, depending on the power source. Car chargers tend to charge the battery faster than wall outlets or generators.
Is it Safe to Leave a Jump Starter Plugged In Overnight?
No, it is not safe to leave a jump starter plugged in overnight. Doing so can cause permanent damage to the battery, so it is important to monitor the charge and unplug the jump starter once it is fully charged.
Conclusion
Charging a jump starter is a relatively simple process that can be done in a few easy steps. By following the steps outlined in this guide, you can ensure your jump starter is charged efficiently and performs at its best. Additionally, it is important to remember to take safety precautions and follow pre-charging tips for maximum performance.
(Note: Is this article not meeting your expectations? Do you have knowledge or insights to share? Unlock new opportunities and expand your reach by joining our authors team. Click Registration to join us and share your expertise with our readers.)