Introduction
Anemo travelers are small, lightweight aircrafts that use air currents to stay aloft. They’re powered by motors and propellers, and they’re often used for recreational purposes. Building an anemo traveler can be a fun and rewarding experience, and it’s not as difficult as you might think. With the right materials and a bit of patience, anyone can construct their own anemo traveler.
Why Build an Anemo Traveler?
Building an anemo traveler is a great way to explore your creativity and gain new skills. It’s also a great way to get outside and enjoy the fresh air. Anemo travelers are relatively inexpensive to build, and you can customize them with different colors and designs. Once you’ve built your anemo traveler, you can take it out for a test flight and marvel at its ability to stay aloft using nothing more than the power of the wind.
Step-by-Step Guide to Building an Anemo Traveler
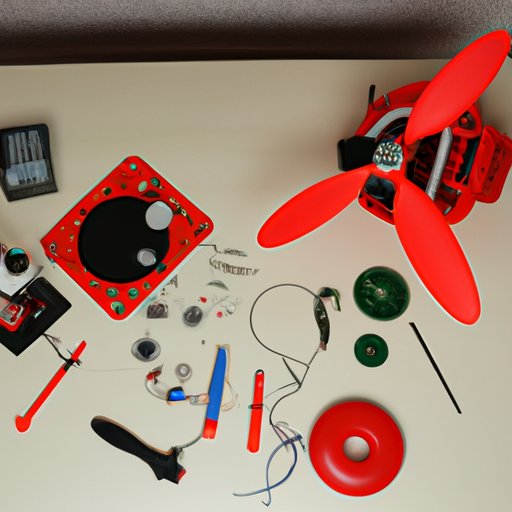
The first step in constructing an anemo traveler is to gather the necessary materials. You’ll need a frame, wings, motors, propellers, and a battery. The exact materials you’ll require will depend on the size and type of anemo traveler you’re building, so be sure to research the specific parts needed before beginning.
Gather the Necessary Materials
The materials you’ll need to build an anemo traveler include: a frame, wings, motors, propellers, and a battery. You should choose materials that are light but strong, such as aluminum or carbon fiber. Additionally, you’ll need tools such as drill bits, screwdrivers, and wrenches.
Assemble the Base
Once you have all the necessary materials, you can begin assembling the base of the anemo traveler. Start by attaching the frame to the wings using screws or bolts. Then attach the motors and propellers to the frame. Make sure they’re securely attached, as they’ll be responsible for providing the lift necessary for the anemo traveler to stay aloft.
Attach the Wings
Next, attach the wings to the frame. Make sure they’re firmly attached, as they’ll be responsible for providing stability during flight. You may want to add additional support to the wings by using extra pieces of material or reinforcement bars.
Connect the Motors
Now it’s time to connect the motors to the frame. This requires soldering the wires together in order to create a circuit. Be sure to double check your connections to make sure everything is secure before proceeding.
Install the Battery
Once the motors are connected, you can install the battery. Make sure it’s firmly secured to the frame and connected to the motors. This will provide the power necessary for the anemo traveler to stay aloft.
Finishing Touches and Test Flight
Once you’ve assembled the anemo traveler, it’s time to give it a test flight. Before doing so, double check the connections and make sure everything is secure. If everything looks good, you can take it out for a test flight. Be sure to fly in an open area with minimal wind and no obstacles. After the test flight, you can make any adjustments that may be necessary.

How to Assemble an Anemo Traveler from Scratch
If you’re starting from scratch, the process of building an anemo traveler is slightly different. Here’s a step-by-step guide to help you get started.
Gather the Materials
The first step is to gather the materials you’ll need to build an anemo traveler. This includes a frame, wings, motors, propellers, and a battery. Make sure to choose materials that are lightweight yet strong, such as aluminum or carbon fiber.
Construct the Frame
Once you have the materials, you can begin constructing the frame. This involves cutting and drilling the pieces of material according to the desired shape and size. Be sure to use the proper tools and techniques to ensure a sturdy frame.
Install the Motor and Propellers
Next, attach the motors and propellers to the frame. Make sure the connections are secure and that the propellers are spinning freely. This will help ensure the anemo traveler has enough power to stay aloft.
Attach the Battery
The last step is to attach the battery to the frame. Make sure the connection is secure and that the battery is properly charged. This will provide the necessary power for the anemo traveler to stay aloft.
Final Assembly and Test Flight
Once you’ve finished assembling the anemo traveler, it’s time to give it a test flight. Make sure to fly in an open area with minimal wind and no obstacles. After the test flight, you can make any adjustments that may be necessary.
Tips and Tricks for Constructing an Anemo Traveler
Building an anemo traveler isn’t as difficult as it may seem. Here are some tips and tricks to help you get started:
Choose the Right Materials
The key to building a successful anemo traveler is choosing the right materials. Make sure to select lightweight but strong materials such as aluminum or carbon fiber.
Don’t Skimp on Quality
It’s important to use quality materials when constructing an anemo traveler. Cheap materials may save you money in the short term, but they won’t last as long or perform as well.
Use the Appropriate Tools
Make sure you have the right tools for the job. Having the right tools can make the process much easier and ensure that your anemo traveler is constructed correctly.
The Beginner’s Guide to Building an Anemo Traveler
For those who are just getting started with building an anemo traveler, here’s a basic overview of the process:
Basic Construction
The first step is to gather the materials you’ll need to construct the anemo traveler. This includes a frame, wings, motors, propellers, and a battery. Once you have the materials, you can begin constructing the frame, attaching the wings and motors, and installing the battery.
Choosing the Right Parts
When selecting the materials for your anemo traveler, make sure to choose lightweight but strong materials. Additionally, you’ll want to choose quality parts that will last and perform well.
Connecting the Electronics
To power the anemo traveler, you’ll need to connect the motors and the battery. This requires soldering the wires together in order to create a circuit. Make sure the connections are secure before proceeding.

A Comprehensive Guide to Crafting an Anemo Traveler
For those who want to take their anemo traveler construction to the next level, here’s a comprehensive guide:
Understanding the Basics
Before you start building an anemo traveler, it’s important to understand the basics. This includes researching the types of materials you’ll need and how to assemble each component.
Selecting the Materials
Once you’ve gathered the necessary materials, you can begin constructing the frame. Make sure to select lightweight but strong materials such as aluminum or carbon fiber.
Assembling the Pieces
The next step is to assemble the pieces of the anemo traveler. This includes attaching the wings, connecting the motors, and installing the battery. Make sure all the connections are secure before proceeding.
Testing and Troubleshooting
Once you’ve finished constructing the anemo traveler, it’s time to give it a test flight. Be sure to fly in an open area with minimal wind and no obstacles. If you encounter any issues, troubleshoot and adjust accordingly.

Building an Anemo Traveler: A Visual Guide
For those who prefer to learn visually, here’s a step-by-step guide to building an anemo traveler:
Overview of the Process
Building an anemo traveler involves gathering the necessary materials, constructing the frame, attaching the wings and motors, and installing the battery. Once the anemo traveler is complete, it’s ready to be tested.
Step-by-Step Instructions
The process of building an anemo traveler can be broken down into several steps. First, gather the materials you’ll need. Next, construct the frame and attach the wings and motors. Finally, install the battery and give the anemo traveler a test flight.
Tips and Tricks
Here are some tips and tricks to help you build a successful anemo traveler: choose lightweight but strong materials, don’t skimp on quality, and use the appropriate tools. Additionally, make sure to double check your connections and test the anemo traveler before taking it out for a flight.
Conclusion
Building an anemo traveler can be a fun and rewarding experience. With the right materials and a bit of patience, anyone can construct their own anemo traveler. This guide provides a comprehensive overview of the process, including detailed instructions on gathering the necessary materials and assembling each component. Tips and tricks are included to help ensure a successful test flight.
Summary of Article
This article provides a comprehensive guide to building an anemo traveler, including detailed instructions on gathering the necessary materials and assembling each component. Tips and tricks are included to help ensure a successful test flight.
Resources for Further Learning
For more information on building an anemo traveler, check out the following resources: How to Build an Anemo Traveler (YouTube video), Anemo Traveler Construction Guide (ebook), and Anemo Traveler Forums (online community).
(Note: Is this article not meeting your expectations? Do you have knowledge or insights to share? Unlock new opportunities and expand your reach by joining our authors team. Click Registration to join us and share your expertise with our readers.)