Introduction
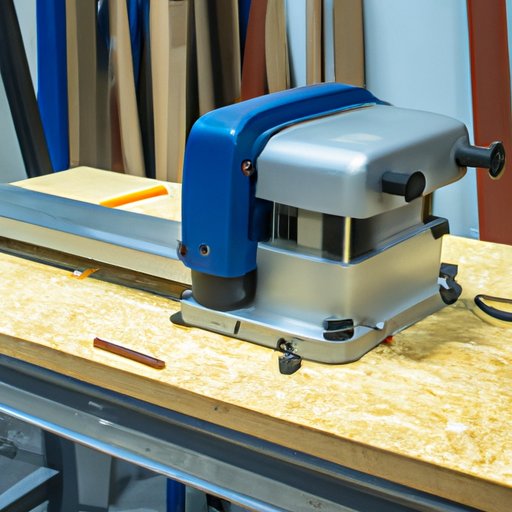
A jointer is an essential tool used by woodworkers and DIYers alike. It’s used to straighten and flatten boards, as well as create edges that are at a perfect 90-degree angle. Jointers are especially useful for projects in which precise cuts are required, such as furniture making or cabinetry. In short, jointers can help you achieve professional results with your woodworking projects.
Jointers come in several different sizes and styles, from stationary benchtop models to larger floor models. They all have the same basic components, though, and work in much the same way. In this article, we’ll explore how jointers work and provide you with a step-by-step guide to using one. We’ll also discuss the various parts of a jointer and provide some tips on how to maintain your jointer.
Step-by-Step Guide to Using a Jointer
Using a jointer may seem intimidating at first, but once you get the hang of it, it can be an easy and rewarding process. Here’s a step-by-step guide to using a jointer:
Setting up the jointer
The first step is to set up the jointer. This involves attaching the infeed and outfeed tables to the jointer, as well as adjusting the fence and setting the depth of cut. Once everything is in place, you’re ready to start using the jointer.
Adjusting the settings
Next, you need to adjust the settings on the jointer. This includes adjusting the speed of the cutterhead and setting the angle of the fence. Make sure you take your time and adjust the settings accurately; otherwise, you won’t get the results you want.
Operating the jointer
Now it’s time to actually operate the jointer. Place the board on the infeed table and slowly push it across the jointer. The cutterhead will do its job, and you should end up with a perfectly straight and flat board.
Finishing touches
Once you’ve finished running the board through the jointer, you can give it a final touch. You can use a hand plane to smooth out any rough spots or uneven surfaces. You can also use a router to round off the edges if you want to give the board a more finished look.
Exploring the Parts and Components of a Jointer
Jointers consist of several different parts and components. Let’s take a look at each one in more detail:
Cutterhead
The cutterhead is the most important part of the jointer. It consists of a series of blades arranged in a circle. As the board passes over the cutterhead, the blades cut away any high spots, leaving a perfectly flat surface.
Fence
The fence is used to keep the board at a consistent angle as it passes over the cutterhead. It’s adjustable, so you can set it to whatever angle you need for your project.
Table
The table is what the board rests on as it passes over the cutterhead. It’s usually made of cast iron and is very sturdy.
Motor
The motor powers the cutterhead and allows it to rotate at a consistent speed. It’s usually powered by electricity, although some jointers are powered by a gas engine.
Dust collection system
Jointers produce a lot of sawdust, so it’s important to have a good dust collection system. Most jointers come with a built-in dust collection system that collects the sawdust as it’s produced.

Jointer Maintenance Tips for DIYers
Maintaining your jointer is essential if you want it to last for years to come. Here are some tips for keeping your jointer in tip-top shape:
Cleaning the machine
Make sure you clean the jointer regularly. Use a brush or vacuum to remove any dust or debris from the machine. Make sure you don’t use any water or harsh chemicals, as this could damage the machine.
Checking the blades and cutterhead
Inspect the blades and cutterhead regularly to make sure they’re not dull or damaged. If they are, replace them as soon as possible.
Lubricating the parts
Lubricating the moving parts of your jointer will help ensure that it runs smoothly. Apply lubricant to the bearings, gears, and other moving parts of the machine.

How to Choose the Right Jointer for Your Project
When choosing a jointer, there are a few things you should consider. First, think about what type of projects you’ll be doing. For example, if you’re working on large projects, you’ll need a larger, more powerful jointer. On the other hand, if you’re only working on small projects, a smaller, less expensive model might suffice.
It’s also important to research different models to see which one best suits your needs. Compare features, prices, and customer reviews to find the best option for you. Finally, make sure you check the warranty to make sure you’re covered in case something goes wrong.
Conclusion
Jointers are an invaluable tool for woodworkers and DIYers alike. They can help you create perfect edges and surfaces, and they’re relatively easy to use once you get the hang of it. In this article, we explored how jointers work and provided you with a step-by-step guide to using one. We also discussed the various parts of a jointer and provided some tips on how to maintain it. Finally, we discussed how to choose the right jointer for your project.
With these tips and tricks in mind, you’ll be able to maximize the potential of your jointer and create stunning woodworking projects.
(Note: Is this article not meeting your expectations? Do you have knowledge or insights to share? Unlock new opportunities and expand your reach by joining our authors team. Click Registration to join us and share your expertise with our readers.)
