Introduction
Cultured butter is a type of butter made with cream that has been fermented with bacteria or yeast cultures. This fermentation process helps to create a unique flavor that is both slightly sour and sweet. Compared to regular butter, cultured butter has a higher fat content, making it richer and creamier. It also has a longer shelf life due to its increased acidity levels.
Making cultured butter from scratch can be a rewarding experience. Not only does it result in a delicious product, it also allows you to experiment with different cultures and flavors. In addition, it’s an economical way to enjoy butter since you’ll be using fewer ingredients than store-bought butter. Read on to learn about the benefits of making cultured butter from scratch, as well as the step-by-step process for crafting your own delicious dairy product.
Step-by-Step Guide to Making Cultured Butter
Making cultured butter from scratch is a relatively simple process. Here is a step-by-step guide to help you get started:
Gather Necessary Ingredients
The first step in making cultured butter is to gather the necessary ingredients. You’ll need cream (preferably organic), cultures (such as lactic acid bacteria or mesophilic cultures), and salt (optional). You may also want to add additional ingredients for flavoring, such as herbs, spices, or honey.
Prepare Cream and Cultures
Once you have all of the necessary ingredients, it’s time to prepare the cream and cultures. Start by bringing the cream to room temperature (about 68-72 degrees Fahrenheit). Then, add the cultures and mix thoroughly. For best results, use a whisk or spoon to ensure that the cultures are evenly distributed in the cream.
Start the Culturing Process
Once the cream and cultures are mixed, it’s time to start the culturing process. Place the mixture in a container and cover it with a lid or plastic wrap. Then, let it sit at room temperature for 8-12 hours. During this time, the cultures will start to ferment the cream, resulting in a slightly sour flavor.
Refrigerate and Finish the Culturing Process
After 8-12 hours, transfer the mixture to the refrigerator and let it sit for an additional 8-12 hours. This will help slow down the culturing process and allow the flavors to develop further.
Churn the Cream into Butter
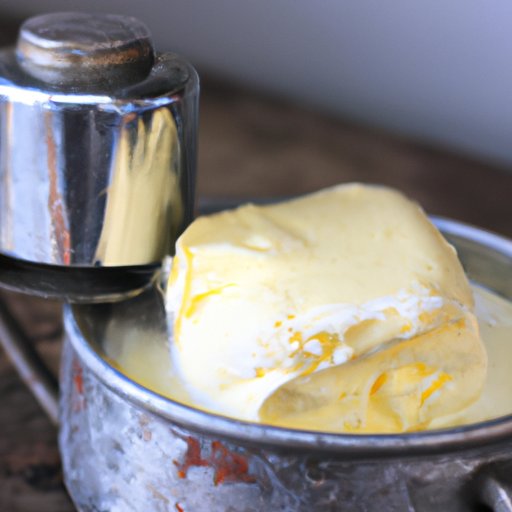
Once the culturing process is complete, it’s time to churn the cream into butter. To do this, place the cream in a food processor or stand mixer and blend until it becomes thick and lumpy. Once the butter starts to form, pour off the liquid (known as buttermilk) and discard. The remaining butter should have a light yellow color and a slightly sour flavor.
Add Salt and Flavoring (Optional)
At this point, you can add salt and other flavorings to the butter, if desired. For example, you could add herbs, spices, or honey to give the butter a unique flavor. If adding salt, use sea salt or kosher salt and add it gradually, tasting as you go. Once you’ve reached the desired flavor, stir the butter to incorporate the seasonings.
Store and Enjoy
Now that your cultured butter is complete, it’s time to store it. The best way to store butter is in an airtight container in the refrigerator. It will keep for up to two weeks. When ready to enjoy, simply spread it on toast, bake with it, or use it in your favorite recipes.
How to Cultivate the Perfect Homemade Butter
Making cultured butter from scratch is a fun and rewarding experience. But in order to achieve the perfect homemade butter, there are a few key things to keep in mind. Here are some tips for cultivating the perfect homemade butter:
Choose High-Quality, Fresh Cream
It’s important to use high-quality, fresh cream when making cultured butter. Look for cream that is free of additives, preservatives, and fillers. Fresh cream will also produce a better-tasting butter. According to Fine Cooking, “Fresh cream has more proteins and lower fat content than older cream, so it takes less churning to make butter.”
Consider Different Cultures and Their Flavor Profiles
When it comes to culturing butter, there are a variety of cultures to choose from. Each culture will impart a different flavor profile. For example, lactic acid bacteria produces a mild, slightly sweet flavor, while mesophilic cultures produce a bolder, tangier flavor. Consider the flavor profiles before selecting a culture for your butter.
Control the Temperature for Optimal Culturing
Temperature is an important factor in culturing butter. Generally, the ideal temperature range for culturing butter is between 68-72 degrees Fahrenheit. If the temperature is too low, the process will take longer; if the temperature is too high, the butter will not turn out correctly. It’s important to monitor the temperature throughout the process to ensure optimal results.
Monitor the pH Level for a Balanced Flavor
In addition to controlling the temperature, it’s also important to monitor the pH level of the cream. The optimal pH level for culturing butter is between 4.6 and 4.8. If the pH level is too low, the butter will have a bitter taste; if the pH level is too high, the butter will have an overly sour taste. Use a pH meter to test the cream periodically throughout the culturing process.

Exploring the Art of Culturing Butter at Home
Making cultured butter from scratch can be a fun and rewarding experience. Not only will you have the satisfaction of creating something delicious from scratch, you’ll also have the opportunity to explore the art of culturing butter. Here are some tips for exploring the art of culturing butter at home:
Experiment with Recipes
One of the best ways to explore the art of culturing butter is to experiment with different recipes. Try experimenting with different cultures, flavors, and techniques. With each recipe, you’ll learn something new and create a unique butter that is sure to impress.
Use Equipment and Tools Appropriately
When making cultured butter, it’s important to use the appropriate equipment and tools. For example, use a food processor or stand mixer to churn the cream into butter, and use a pH meter to measure the pH level of the cream. These tools will help you achieve optimal results.
Learn About the Aging Process
Aging butter is another way to explore the art of culturing butter. Aging butter helps to develop its flavor and texture, resulting in a richer and creamier product. To age butter, simply store it in an airtight container in the refrigerator for up to two weeks. As the butter ages, its flavor will become more pronounced.
Explore Different Cultures and Flavors
Finally, don’t be afraid to experiment with different cultures and flavors. There are a variety of cultures to choose from, each with its own unique flavor profile. And don’t forget about adding additional ingredients for flavoring, such as herbs, spices, or honey. The possibilities are endless!
A Beginner’s Guide to Crafting Cultured Butter
Making cultured butter from scratch can seem intimidating at first. But with the right knowledge and tools, anyone can craft this delicious dairy product. Here are some tips for beginners who are just starting out:
Start Simple and Build Up Complexity
When starting out, it’s best to begin with a simple recipe. Once you’ve mastered the basics, you can start to experiment with different cultures and flavors. This will help you gain a better understanding of the culturing process, as well as the different flavors and textures that can be achieved.
Understand the Basics of Culturing Butter
Before you start experimenting with recipes, it’s important to understand the basics of culturing butter. Learn about the different cultures and their flavor profiles, as well as the optimal temperature and pH level for culturing. This will help you achieve the best results.
Utilize Basic Tools and Techniques
In order to make cultured butter, you’ll need to use the appropriate tools and techniques. Use a food processor or stand mixer to churn the cream into butter, and use a pH meter to measure the pH level of the cream. Also, make sure to control the temperature throughout the process and monitor the pH level for a balanced flavor.
Practice and Experiment Often
Making cultured butter from scratch is a skill that must be practiced and perfected. Don’t be afraid to experiment with different recipes and techniques. The more you practice, the better your results will be. So get creative and have fun!
Conclusion
Making cultured butter from scratch is a fun and rewarding experience. Not only does it result in a delicious product, it also allows you to experiment with different cultures and flavors. In addition, it’s an economical way to enjoy butter since you’ll be using fewer ingredients than store-bought butter. By following the steps outlined above and utilizing basic tools and techniques, you’ll be well on your way to crafting the perfect homemade butter.
(Note: Is this article not meeting your expectations? Do you have knowledge or insights to share? Unlock new opportunities and expand your reach by joining our authors team. Click Registration to join us and share your expertise with our readers.)