Introduction
Building a remote control car at home can be a fun and rewarding experience. It allows you to customize your car to your liking and provides a sense of accomplishment when you see it drive around. Not only can it be an enjoyable hobby, but it can also be a beneficial learning experience by teaching you about electronics and mechanics. This article will provide a comprehensive guide to building a remote control car from scratch, as well as offer some budget-friendly tips and advice for those who want to get started.
DIY Guide to Building a Remote Control Car from Scratch
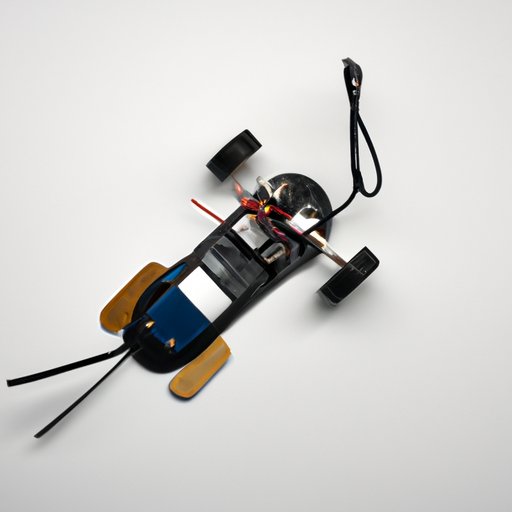
When we say building a remote control car from scratch, it means that we will be building all the components of the car ourselves. It includes building the chassis, wheels, motor, gears, controller, and receiver. Here’s a brief overview of the main components required to build a remote control car:
Chassis: This is the body of the car that provides support for all the other components.
Wheels: The wheels are responsible for transmitting the power generated by the motor to the ground.
Motor: The motor is responsible for generating the power that drives the car forward or backward.
Gears: The gears are responsible for transmitting power from the motor to the wheels and controlling the speed of the car.
Controller and Receiver: The controller sends signals to the receiver on the car, which then translates those signals into actions of the car.
Now that we understand the various components let’s dive into the step-by-step instructions for building a remote control car from scratch:
Step 1: Building the Chassis
The chassis is the foundation of the car, and all the other components will be attached to it. Start by gathering the materials such as aluminum sheets, hard plastic sheets, or carbon fiber sheets. Cut out the pieces according to the design of the car, and drill holes where necessary. Once all the pieces are cut, connect them using screws or rivets.
Step 2: Building the Wheels
The wheels consist of a hub, rim, and tire. Start by making the rim using any lightweight material such as plastic, and drill the hole in the center. Then, connect it with the hub using screws or a strong adhesive. Afterward, fit the tire over the rim, and your wheel is completed.
Step 3: Building the Motor and Gears
The motor is the heart of the car, and it can be gotten from an old toy or scrap appliance. Once you have the motor, connect it to the gearbox using an elastic band. The gearbox controls the speed by changing the gear ratios. If you want your car to go faster, then use smaller gears, but for more torque, use bigger gears.
Step 4: Building the Controller and Receiver
The controller is what you use to control the car, while the receiver is what receives the signals from the controller. You can easily get a cheap remote control circuit board from an online store or electronic shop. Once you have it, connect it to the receiver on the car. The receiver translates the signals from the controller, which then cause the car to move.
Step 5: Assemble
Finally, assemble all the components like the motor, wheels, controller, and receiver on the chassis. Make sure everything is properly connected and secured. Once everything is in place, you’re ready to drive your remote control car.
5 Simple Steps to Build Your Own Remote Control Car
If building a remote control car from scratch seems daunting, here are five simple steps to get the job done:
Step 1: Choose Your Chassis
Choose a pre-made chassis from an online store or use any lightweight material like cardboard, foam board, or plastic to build your own.
Step 2: Add the Wheels and Motor
Attach the wheels to the chassis and add a motor to power them. Use a simple electric motor or a modified servo motor controlled by a microcontroller.
Step 3: Install the Gears
Use small plastic gears to regulate the speed and direction of the car. You can select gears according to the car’s torque, speed, and power requirements.
Step 4: Add the Controller
Buy a ready-made Remote control transmitter and receiver kit online. Install the receiver in the car and pair it with the transmitter. The transmitter sends signals to the receiver to control the car.
Step 5: Customize
To make your remote control car unique, add decorations such as lights, paint, stickers, or customized wheels.
How to Make a Remote Control Car with Everyday Materials
If you’re looking for an even more budget-friendly way to build your remote control car, there are several methods using everyday materials. Here are three options:
Cardboard Car:
You can use cardboard to make a lightweight car. Use a box cutter to cut out the shape of the car and the wheels. Secure the wheels to the car with straws and glue, then add a motor and a remote control circuit board.
Paper Clip Car:
Use around 20 paper clips and a piece of cardboard to make a basic remote control car. Create the gears with paper clips and attach them to a battery-powered motor. Then, create the wheels and attach them to the gears.
Rubber Band Car:
This option requires a rubber band, straws, and a few pieces of cardboard. Cut out the car’s shape and attach wheels to it. Then, attach a propeller to the back of the car, connect it to the rubber band and get ready to race.
Expert Tips for Building a Remote Control Car on a Budget
Building a remote control car can be pricey, but it doesn’t have to be. Here are a few tips to help make building a remote control car more affordable:
Research:
Before buying parts, do your research. Compare prices, read reviews, and don’t hesitate to ask for advice.
Repurpose:
Some parts of the car can be made from materials lying around your house, such as plastic bottles, cardboard, old toys, or remote control cars, which can be used for parts.
Bargain Shop Online:
You can buy the majority of the car components from online stores at a lower price. Amazon, eBay, and Banggood are popular online markets to look for car parts.
Buy in Bulk:
Purchasing car parts in bulk can significantly save you money; however, ensure you research before buying to get the best deal.
The Ultimate Guide to Building a Remote Control Car at Home Easily
Building a remote control car at home can be a fulfilling experience. You can create your design, add decorations, and customize the car in any way to meet your needs. This article guides you through building a remote control car with various options for different budgets. To get started, select an option that best suits you and enjoy creating the remote control car of your dreams.
Additional Resources
Conclusion
Building your remote control car can be challenging but ultimately enjoyable through the DIY process. This article has provided a comprehensive guide on how to build a remote control car on any budget, from building a car from scratch to using everyday materials. Using the tips and methods described in this article, you can create a personalized remote control car that’s perfect for you and have a fun time in the process.
(Note: Is this article not meeting your expectations? Do you have knowledge or insights to share? Unlock new opportunities and expand your reach by joining our authors team. Click Registration to join us and share your expertise with our readers.)